To stay up to date, remember to subscribe to our YouTube channel!
SUBSCRIBE ON YOUTUBE
Windows 11 offers an advantage to administrators and you see that when an error occurs, especially blue screen errors (BSOD), the name of the error and an associated code are generated, this will help to work directly on the cause of the error, One of the errors that affect users is the Kernel Data Inpage error (Kernel data page error) is an error associated with failures in the computer hardware..
Error reasons
Some of the most common causes of this error are:
- Faults in the cable connection.
- Outdated or corrupt device drivers.
- Presence of virus or malware.
- Issues with the archive page setup.
previous solutions
TechnoWikis has a series of solutions that will help you correct this error in Windows 11 but before any method try the following:
- Disconnect all the devices from the computer, especially if they are new, and leave them like that for a few minutes, then connect them again and turn on the PC to check if the error is gone.
- Restart the BIOS of the equipment, for this we access the BIOS and locate the section called Reset to default values.
Let's see the solutions TechnoWikis has for you for the Kernel Data Inpage Error Windows 11 error.
1 Repair Error Kernel Data Inpage Windows 11 from Services
In Windows 11 everything is managed through services that interact with each other for proper operation, so if any of these failures we will see the error in question as a result.
Step 1
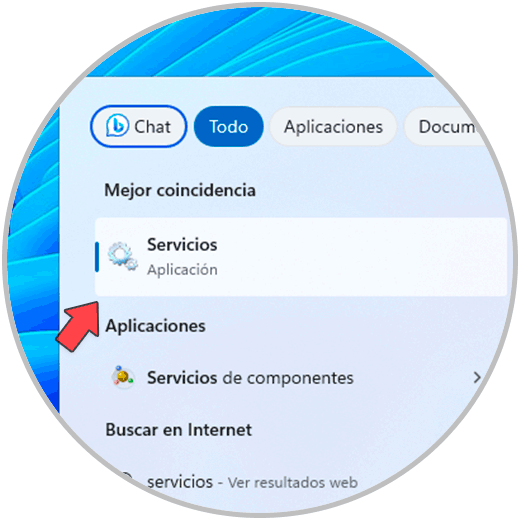
In our case we are going to open services from the Start search engine:
Step 2
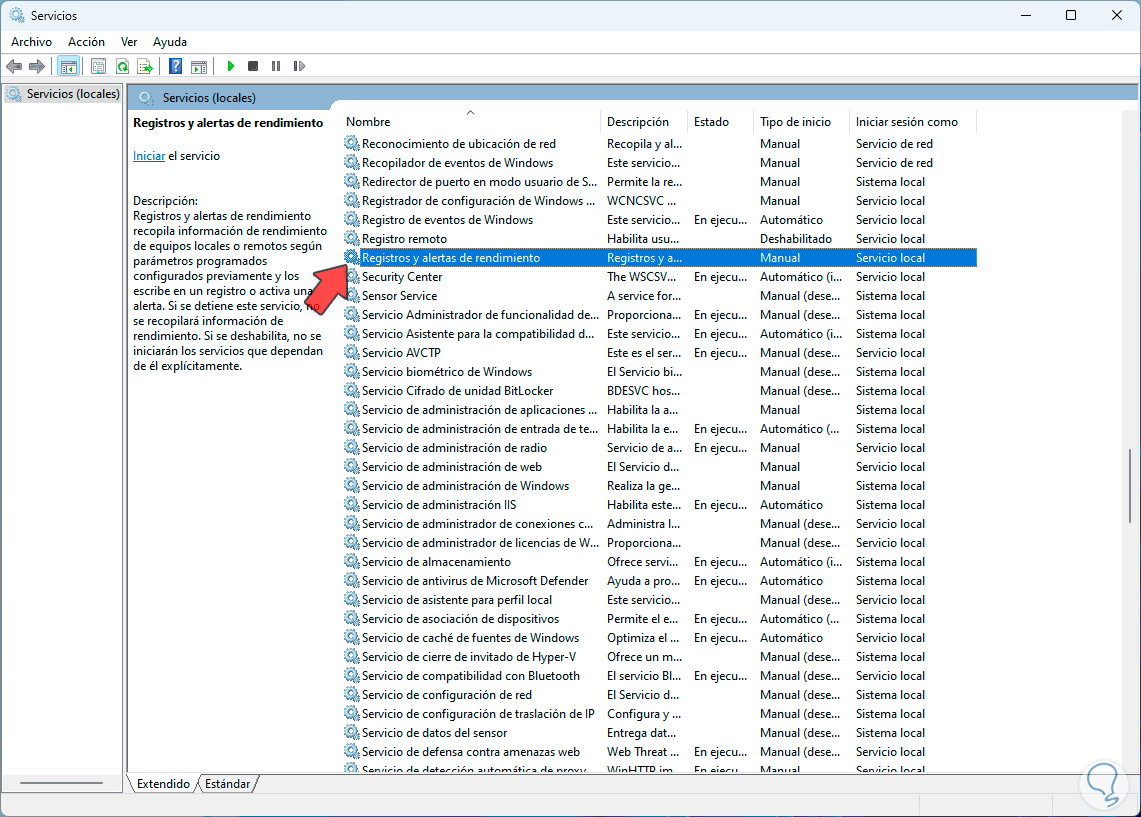
There we locate the service called "Performance logs and alerts":
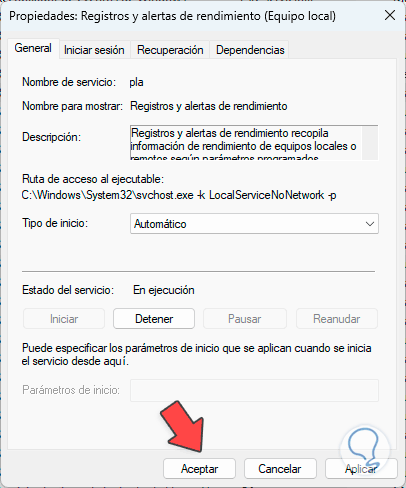
This Performance Logs and Alerts service is responsible for capturing performance information from local or remote computers based on the parameters that have been programmed and configured, then writes those values to a log or triggers an alert..
We double click on the service to see its properties:
Step 3
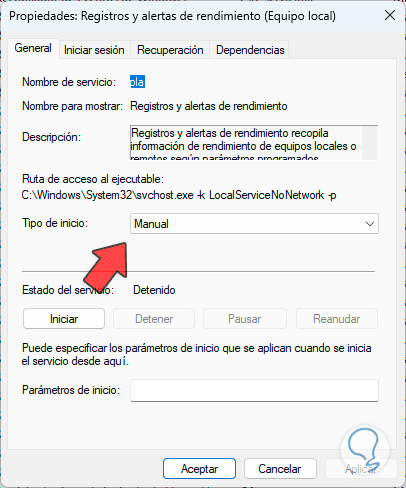
Now in the "Startup type" field we set the "Automatic" option:
Step 4
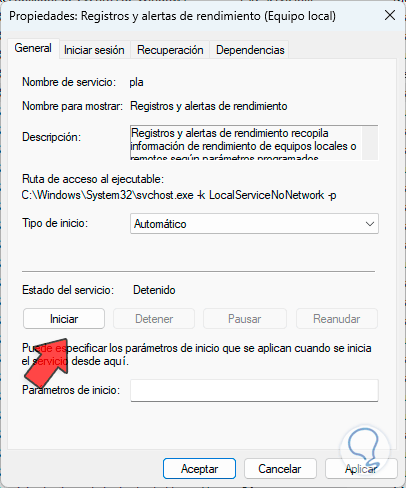
We click on "Start" to activate the service:
step 5
We apply the changes.
2 Repair Error Kernel Data Inpage Windows 11 from Advanced Options
Through this option we seek to make adjustments in the advanced configuration of the system since some parameters may be incorrectly configured.
Step 1
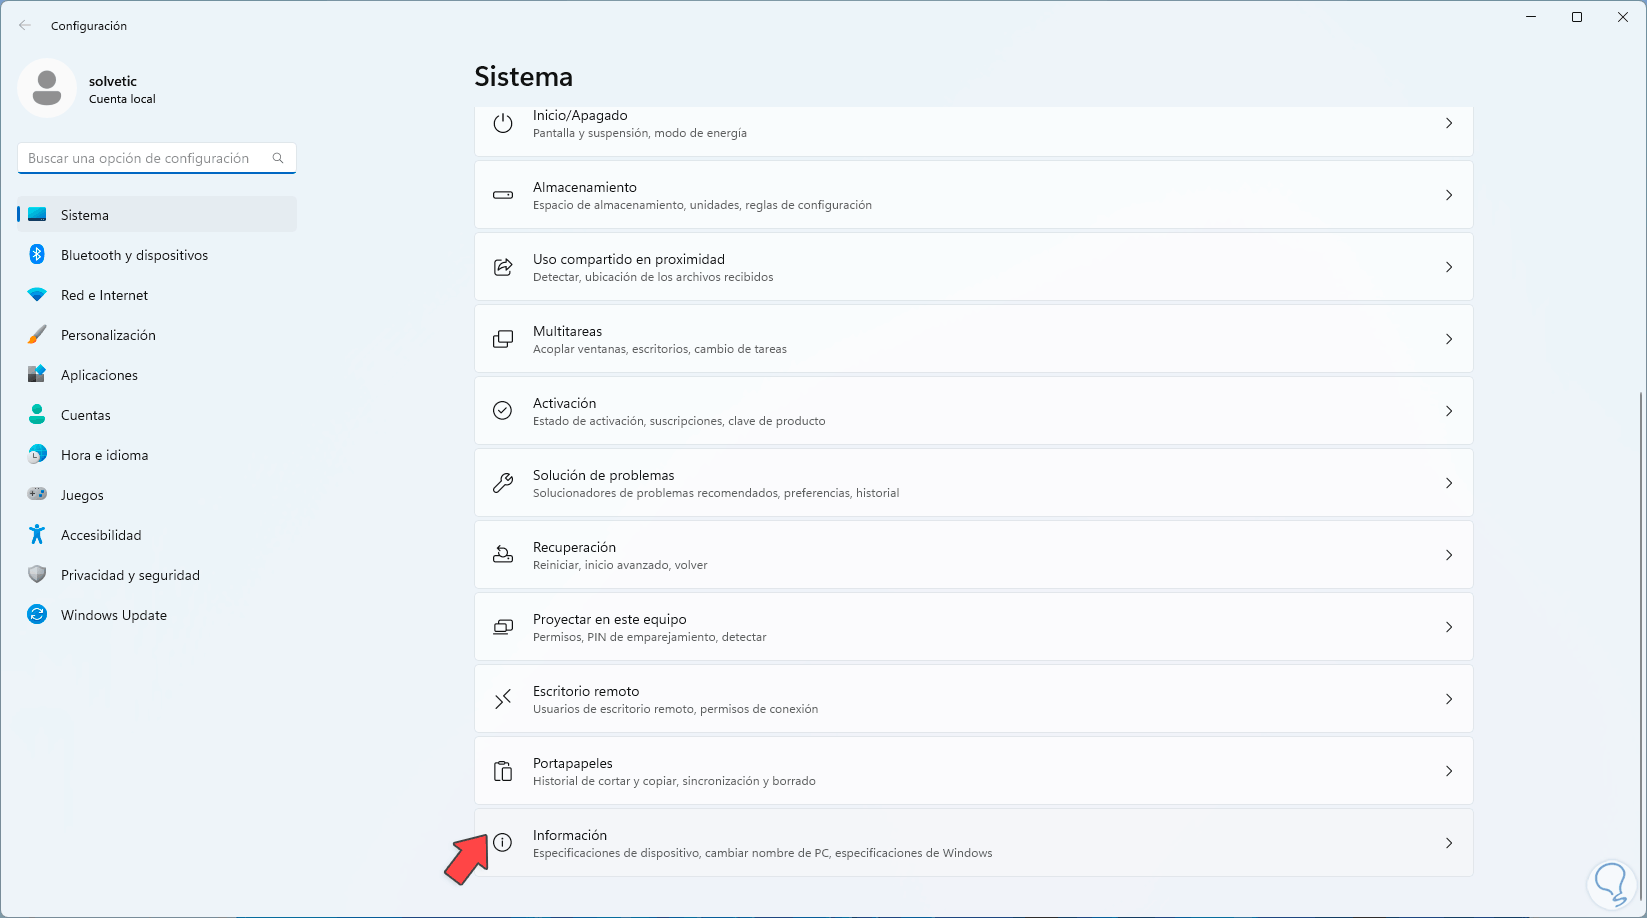
To do this we go to the route:
Step 2
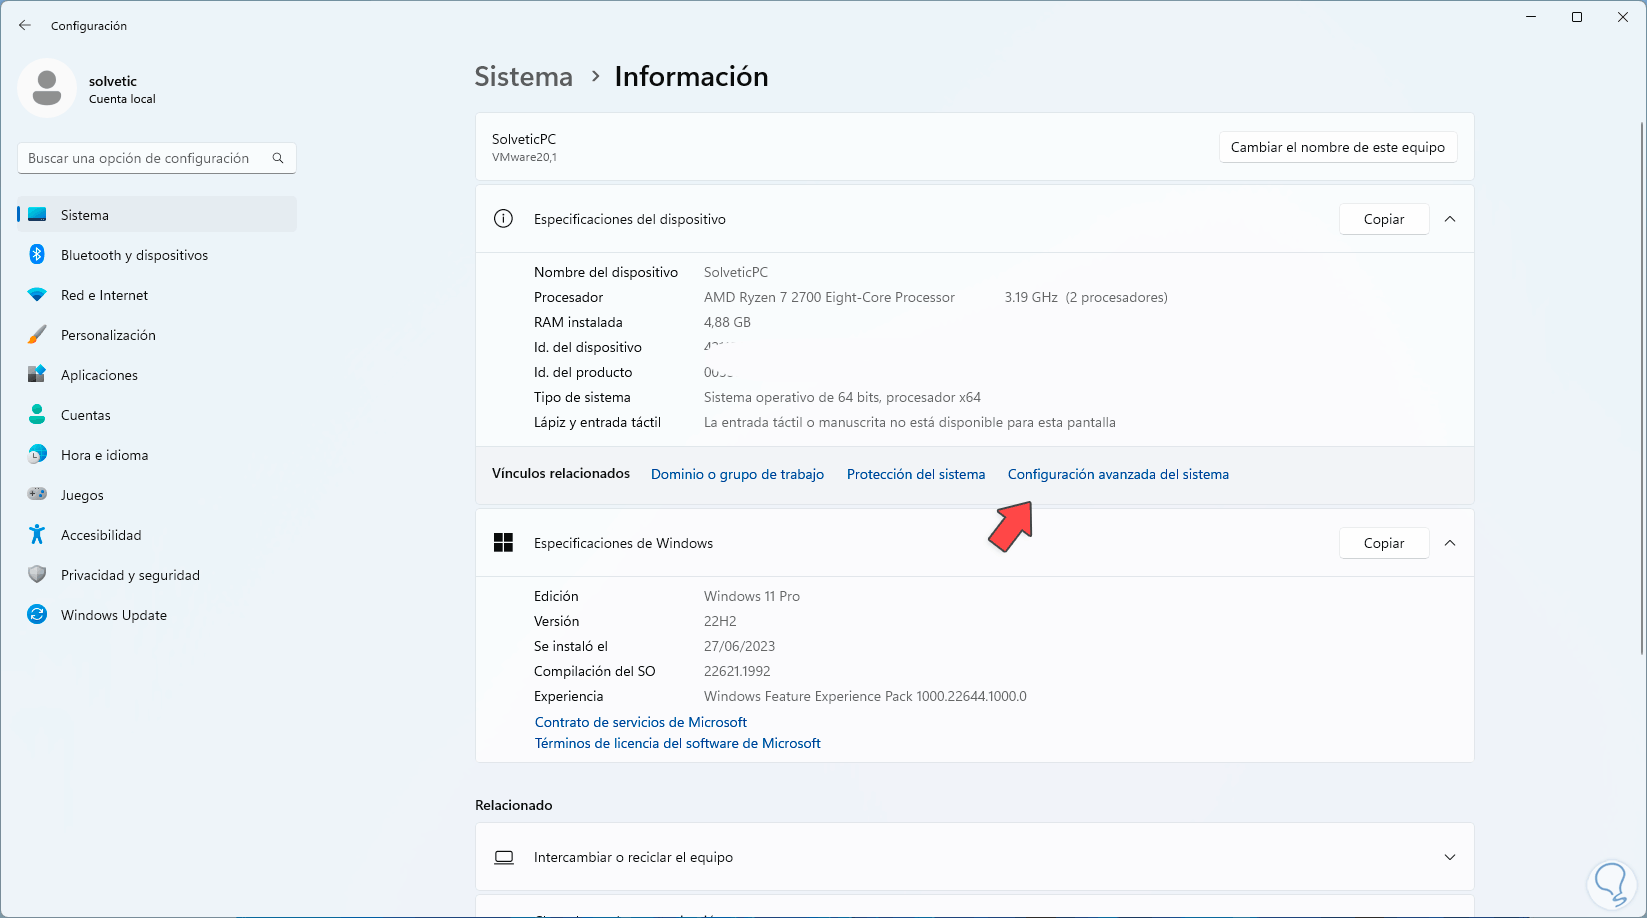
When accessing there we are going to click on the "Advanced system configuration" line:
Step 3
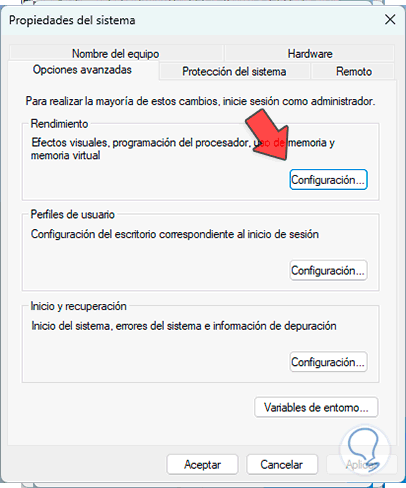
In the pop-up window we are going to click on the "Settings" button in the "Performance" section:
Step 4
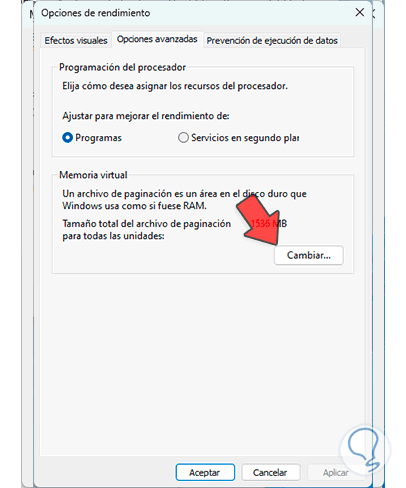
Then we go to the "Advanced options" tab and click on "Change" in the "Virtual memory" section:
step 5
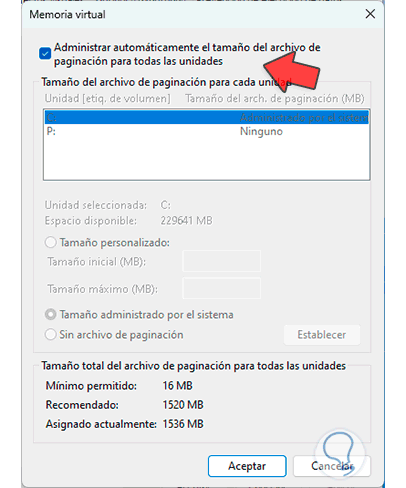
Let's confirm that this enables the “Automatically manage paging file size for all drives” checkbox:
step 6
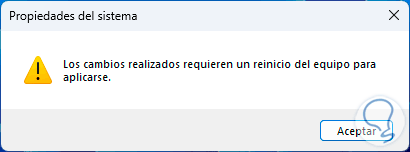
When exiting the window it will be possible to reboot the system if something was modified:
step 7
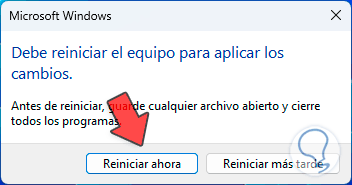
When we close all the windows we will see the following. There we can restart the system or do it later.
3 Fix Kernel Data Inpage Error Windows 11 by restarting Windows
A solution that helps to correct many errors is to restart the system, this will undoubtedly cause all system processes to update and may be the solution to the aforementioned error.
Step 1
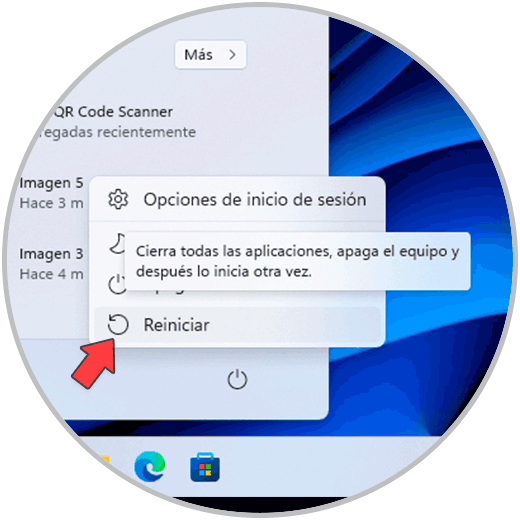
For this case we click on the Windows shutdown button and then click on "Restart":
Step 2
The system will reboot:

Step 3
we wait for it to load again:

4 Repair Error Kernel Data Inpage Windows 11 analyzing RAM
Windows 11 integrates various tools to correct and review components, and RAM is one of them.
Step 1
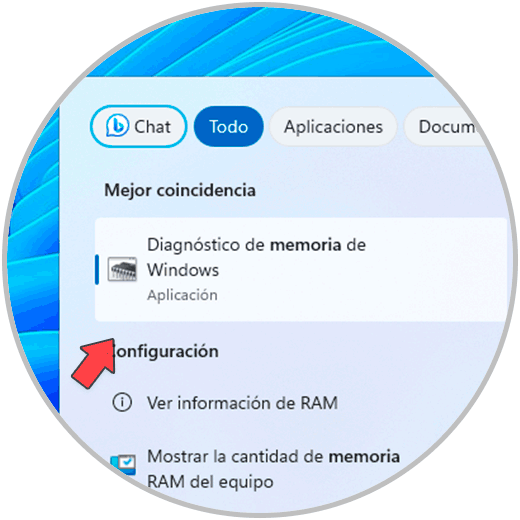
For this method from the search engine we enter the word "memory" and there we click on "Windows memory diagnosis":
Step 2
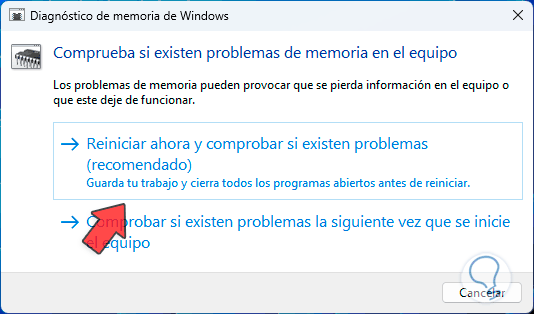
The following message will be displayed. Now we click on "Restart now and check for problems",
Step 3
the system will reboot:

Step 4
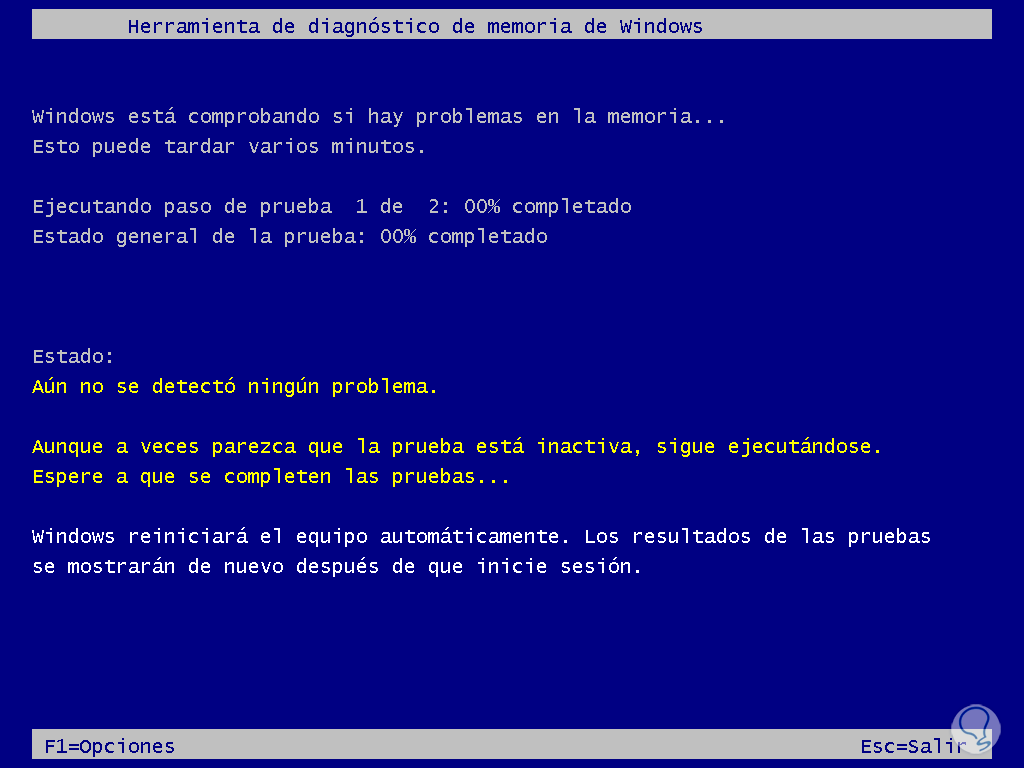
After a moment we will see the following:
step 5
There it is possible to press the F1 key to access the type of analysis to use:
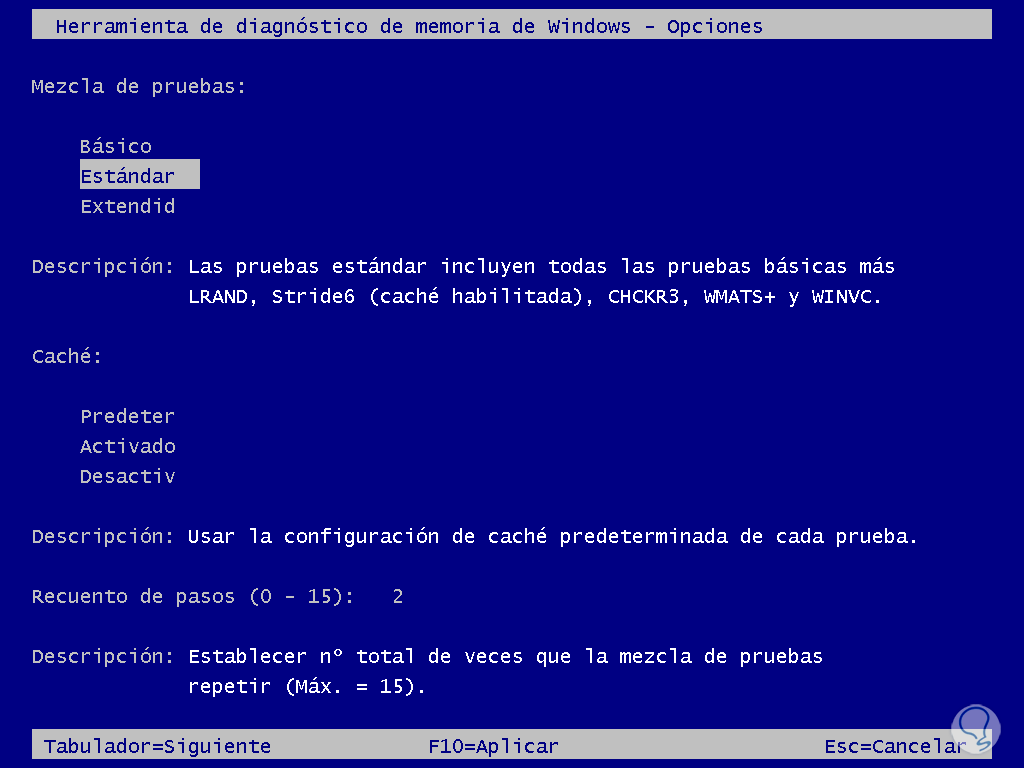
step 6
We look forward to testing:
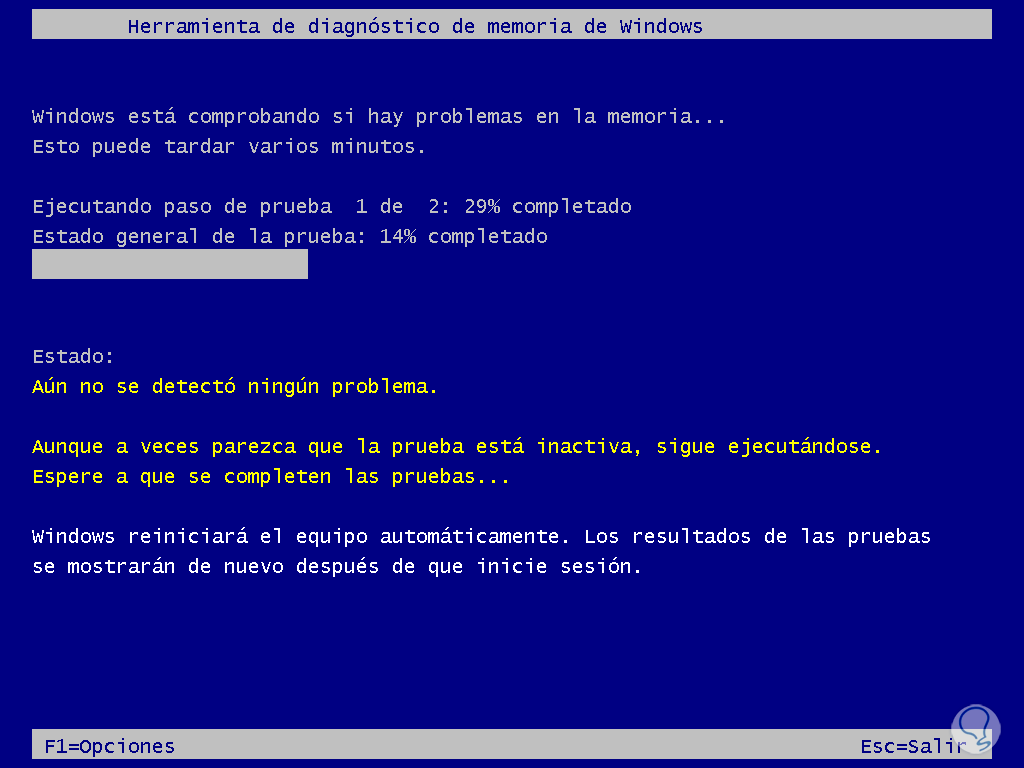
step 7
The second test will be done based on the selected configuration:
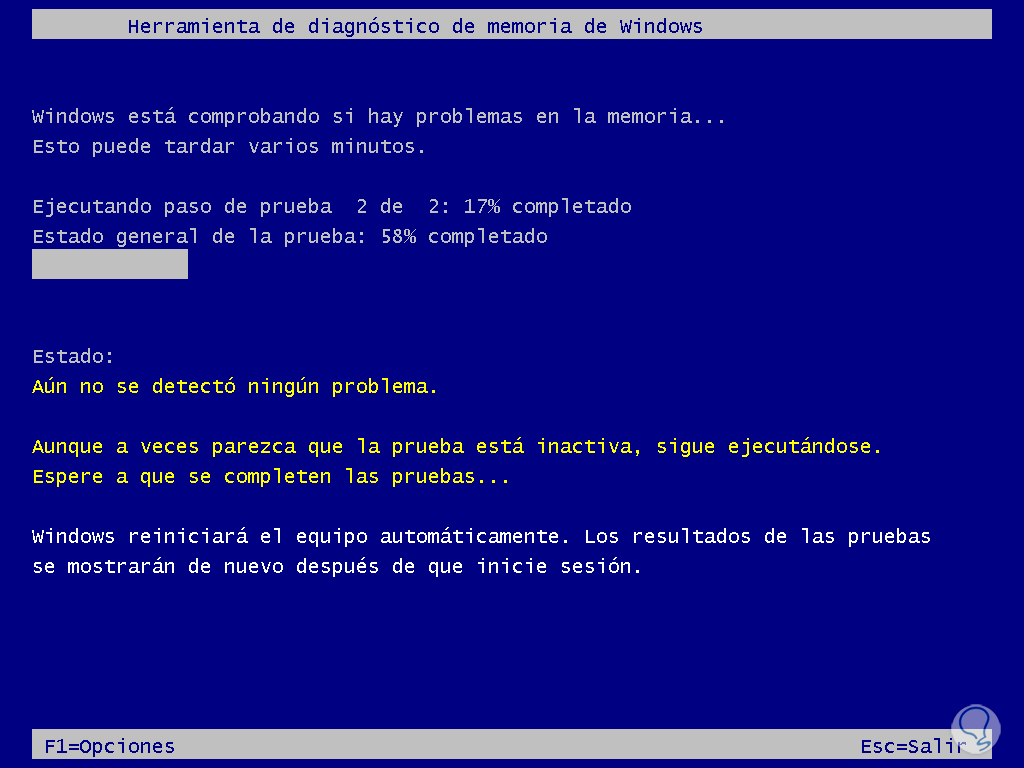
step 8
When this process ends, Windows will automatically restart:

step 9
When the session starts we will see the results of the analysis:
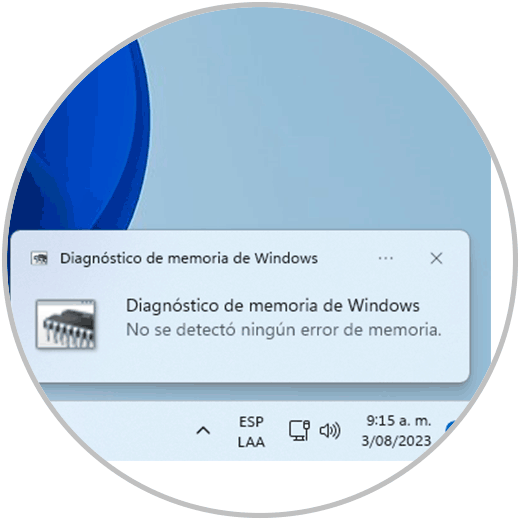
step 10
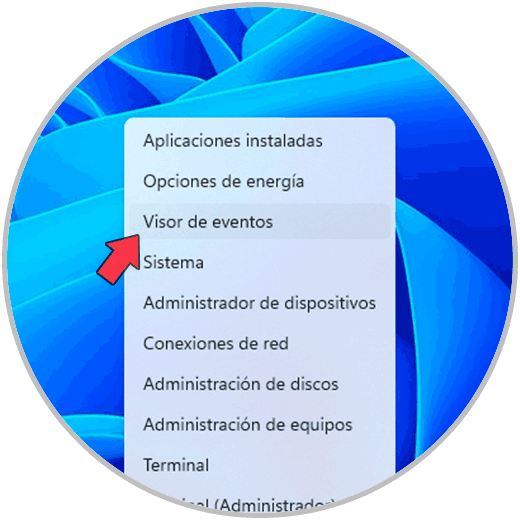
In case of seeing any error, we can open the Event Viewer from Start:
step 11
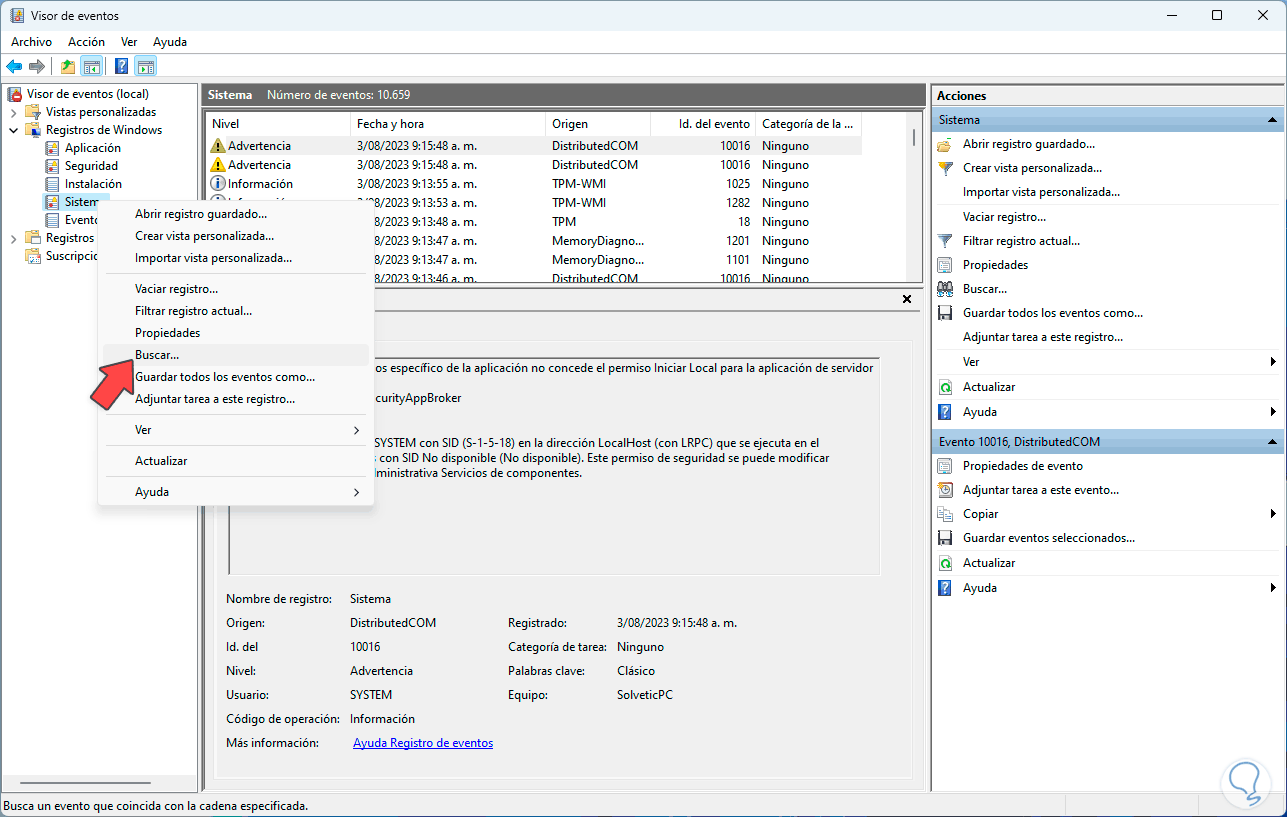
Then we go to the path "Windows Logs - System", there we right click on "System" and select the "Search" option:
step 12
In the small window we enter "memorydiagnostics":

step 13
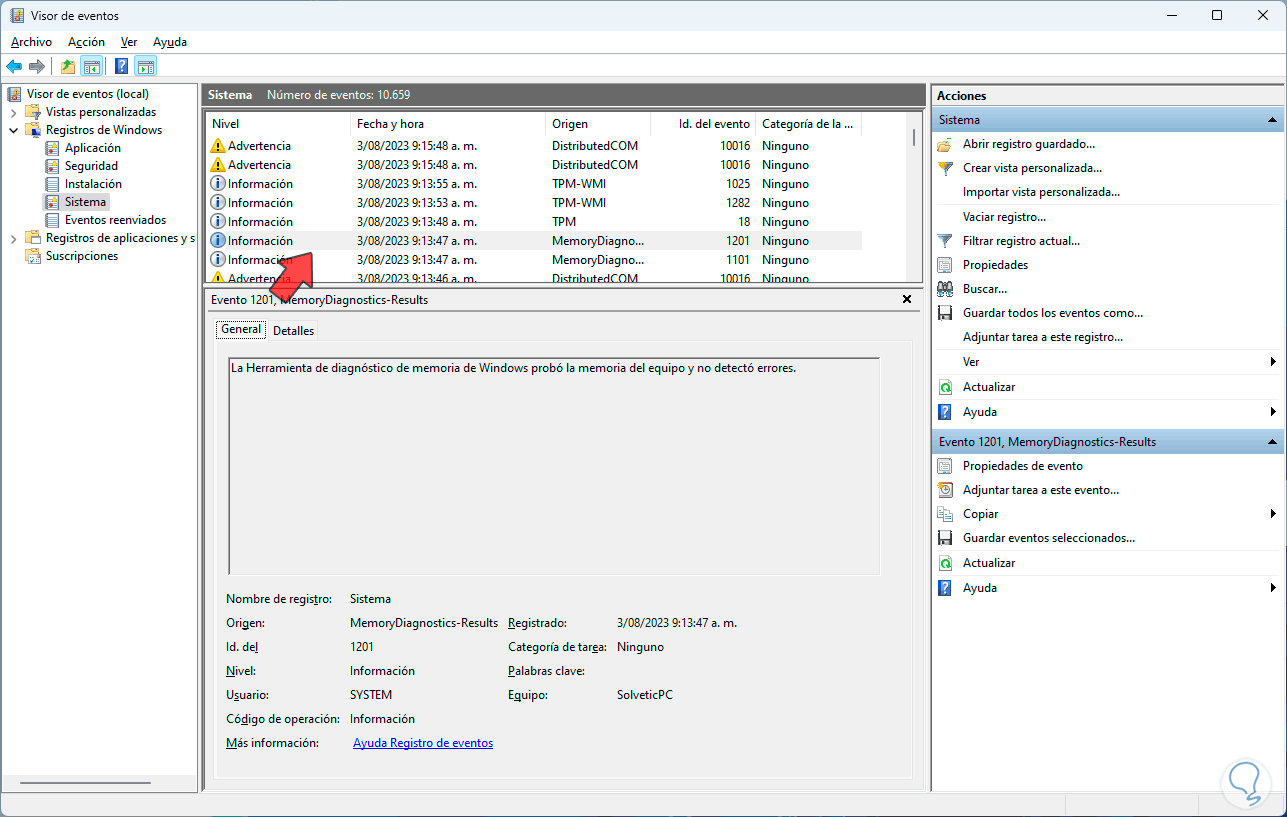
We click on "Search" to validate if any registered error is detected:
5 Repair Error Kernel Data Inpage Windows 11 by analyzing the computer
As we mentioned at the beginning, one of the causes of this error is the presence of a virus or malware, we can perform an analysis to verify if there is any threat and thereby correct the error.
Step 1
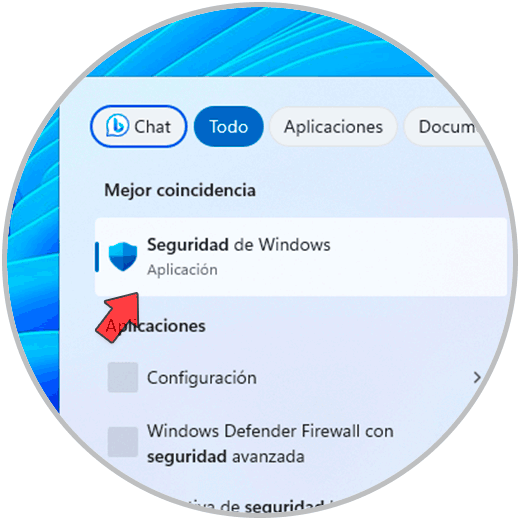
We enter the word "security" in the search engine and then click on "Windows Security":
Step 2
Now we go to the “Antivirus and threat protection” section:
Step 3
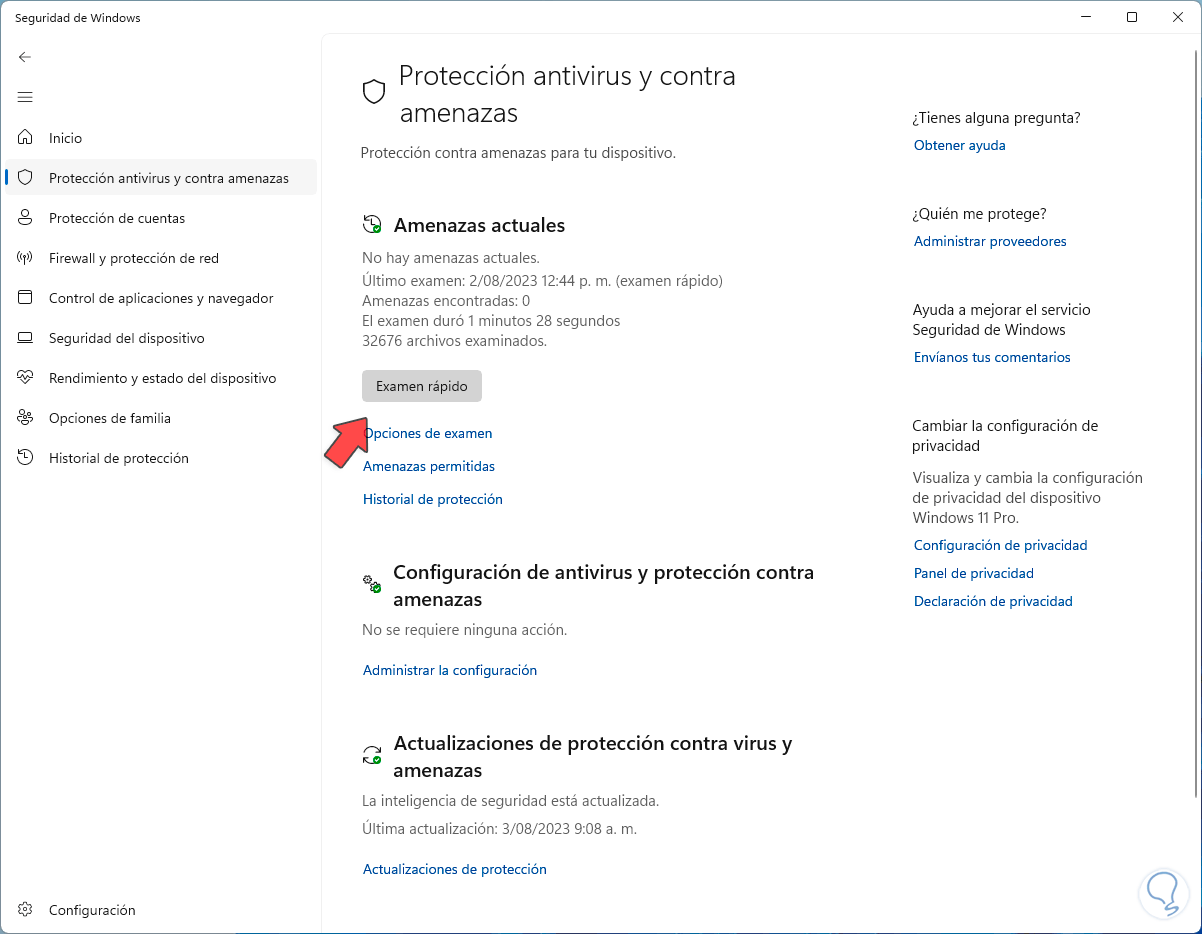
We click on "Quick exam" to start the analysis process:
Step 4
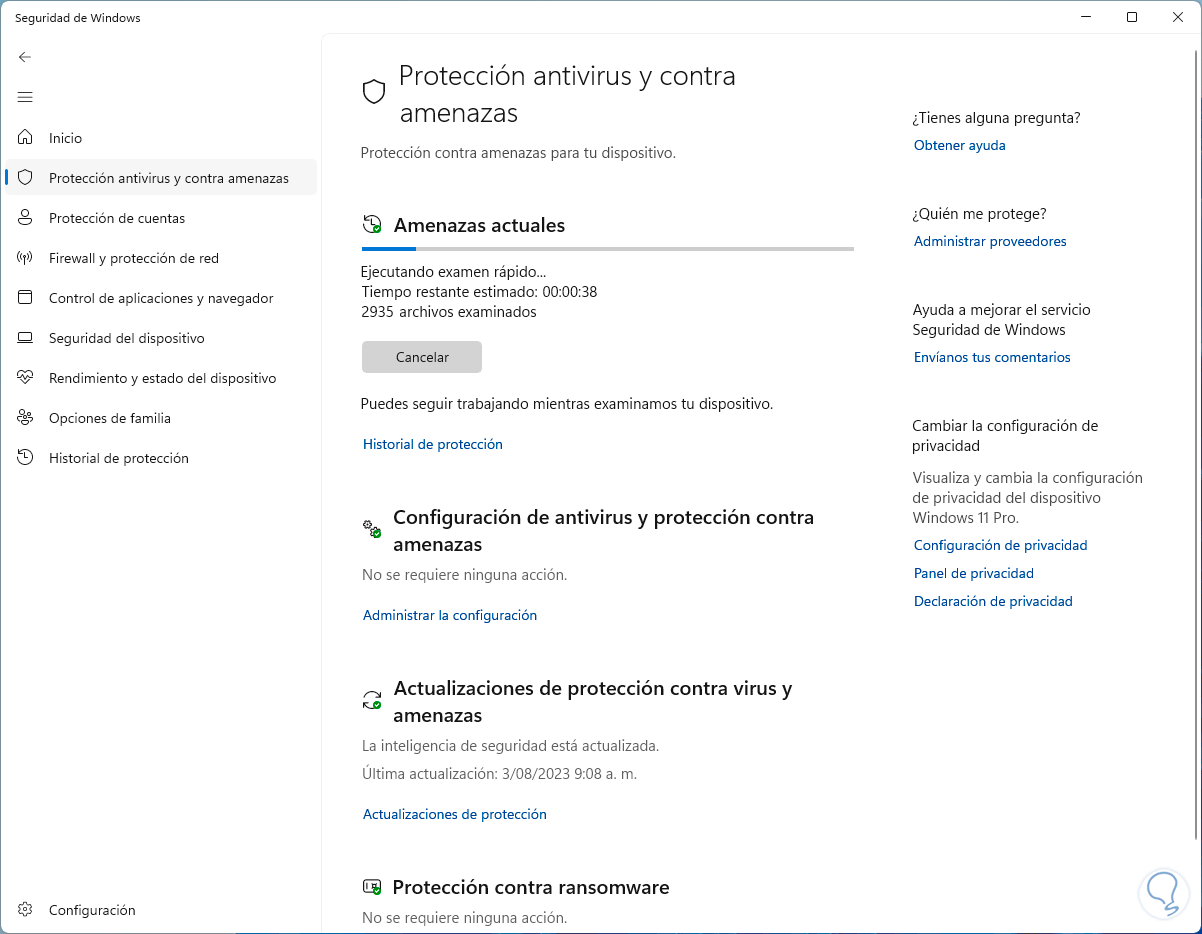
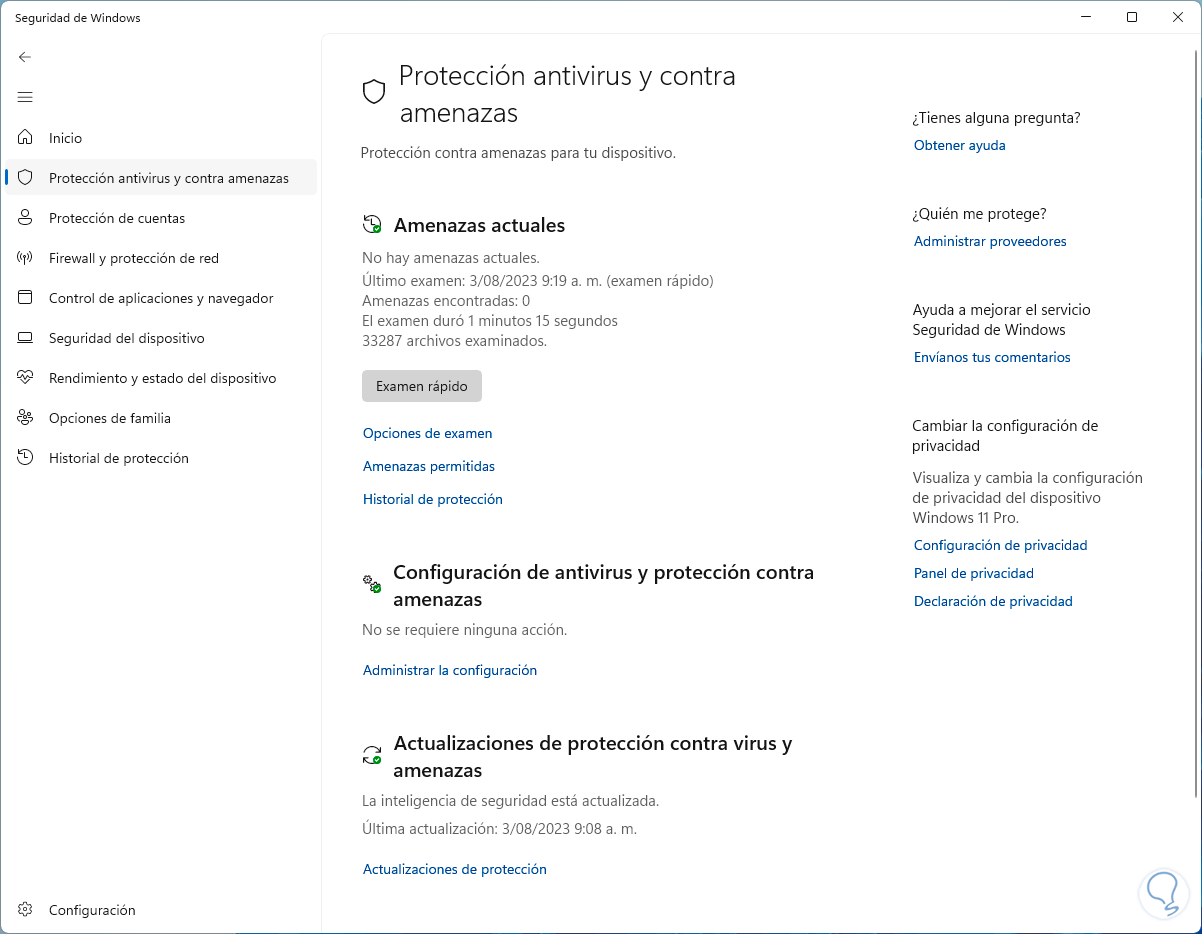
Wait for the process to finish:
6 Repair Error Kernel Data Inpage Windows 11 uninstalling applications
Another cause of this error is associated with new applications that have been installed, they can cause conflicts that generate this error.
Step 1
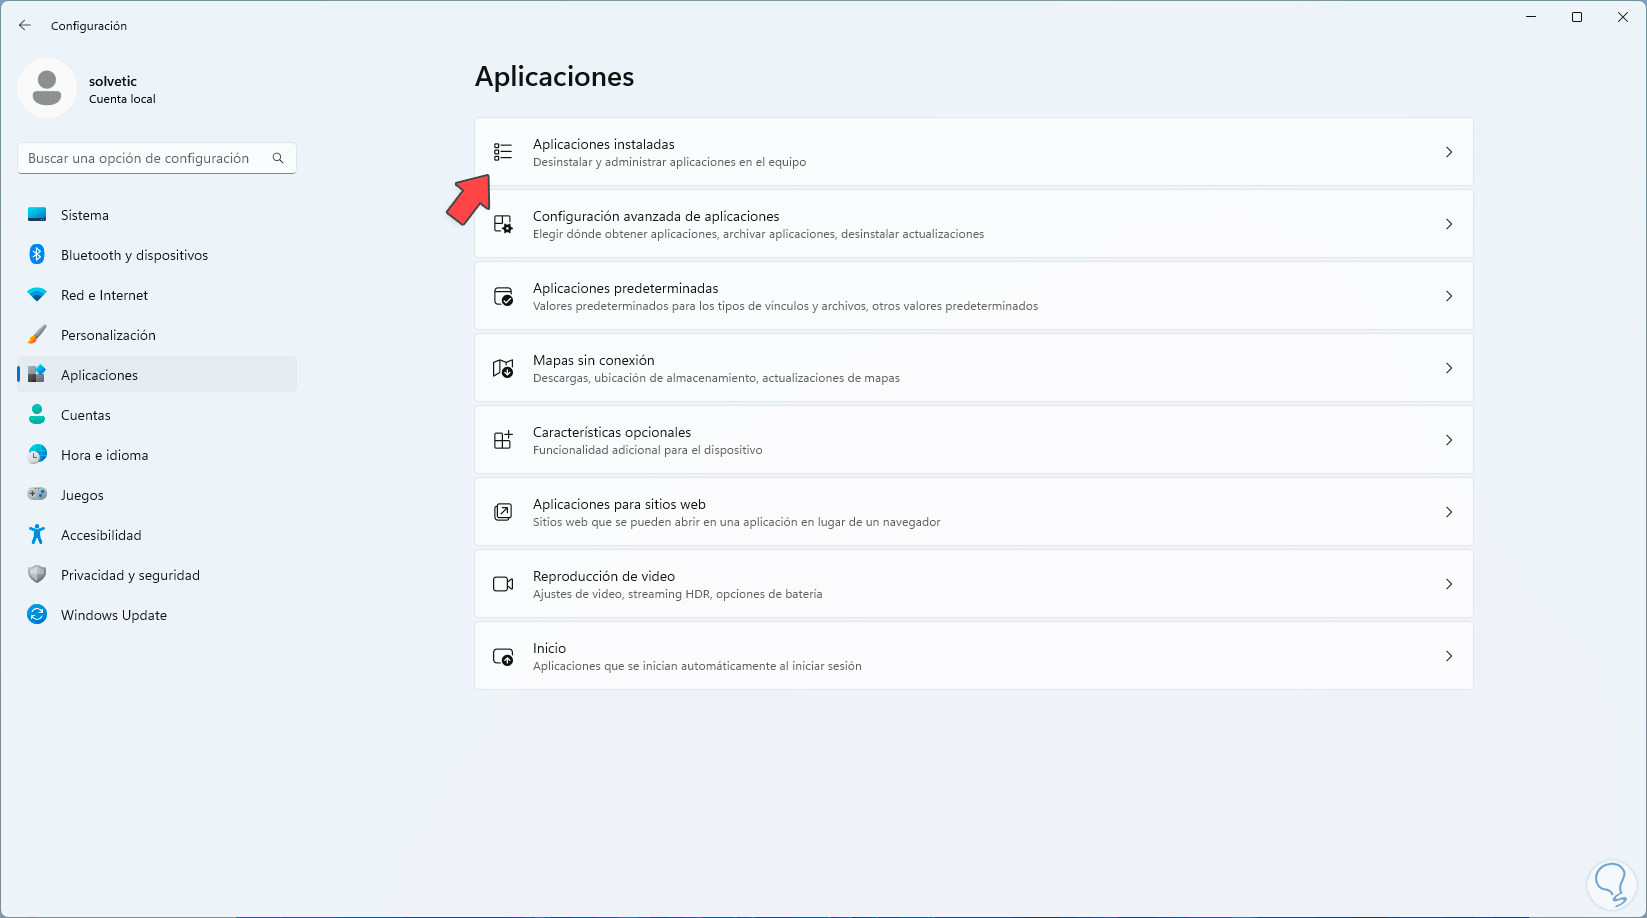
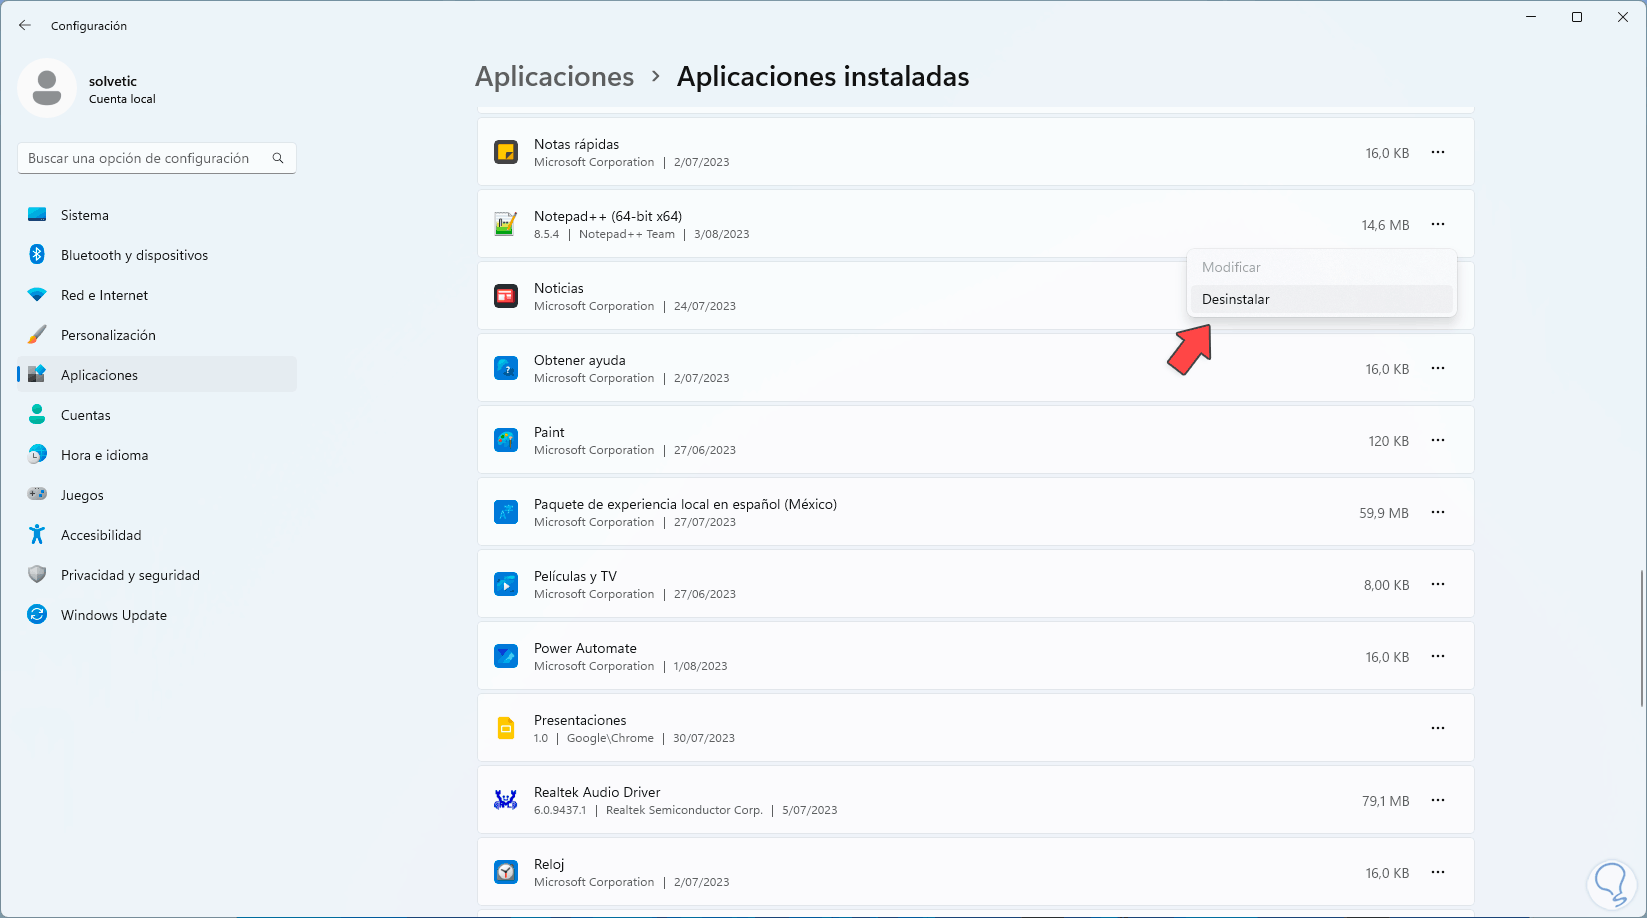
To uninstall an application we go to the route:
Step 2
There we click on the application menu and select the "Uninstall" option:
Step 3
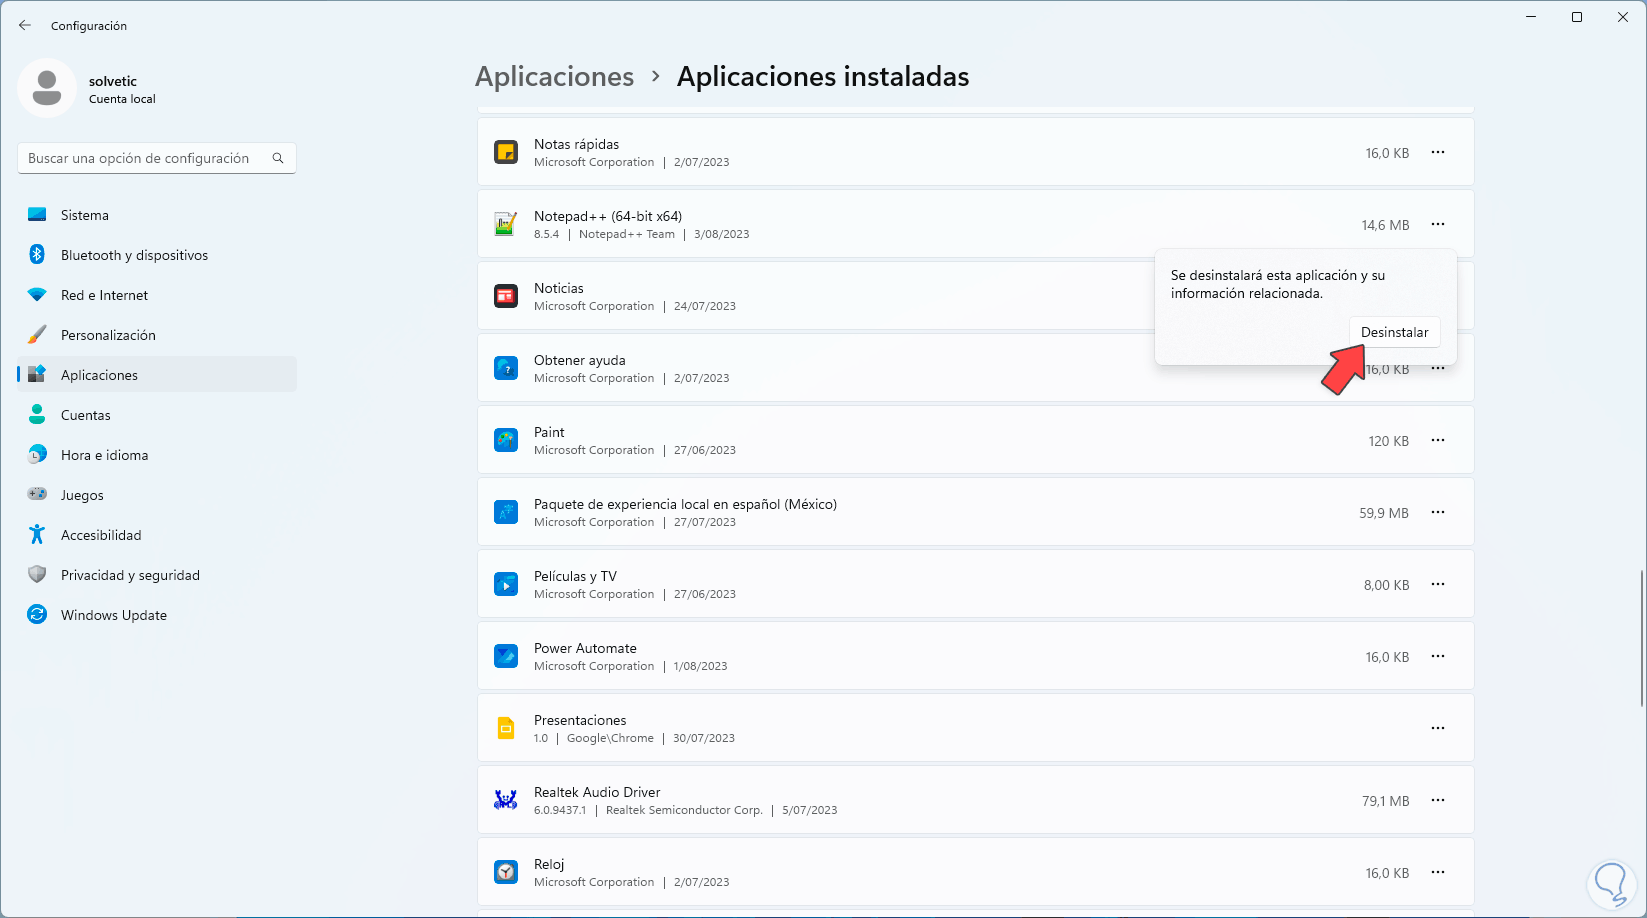
We confirm this action again:
Step 4
The application wizard will open:

step 5
There we click on "Uninstall" and wait for this operation to complete:

step 6
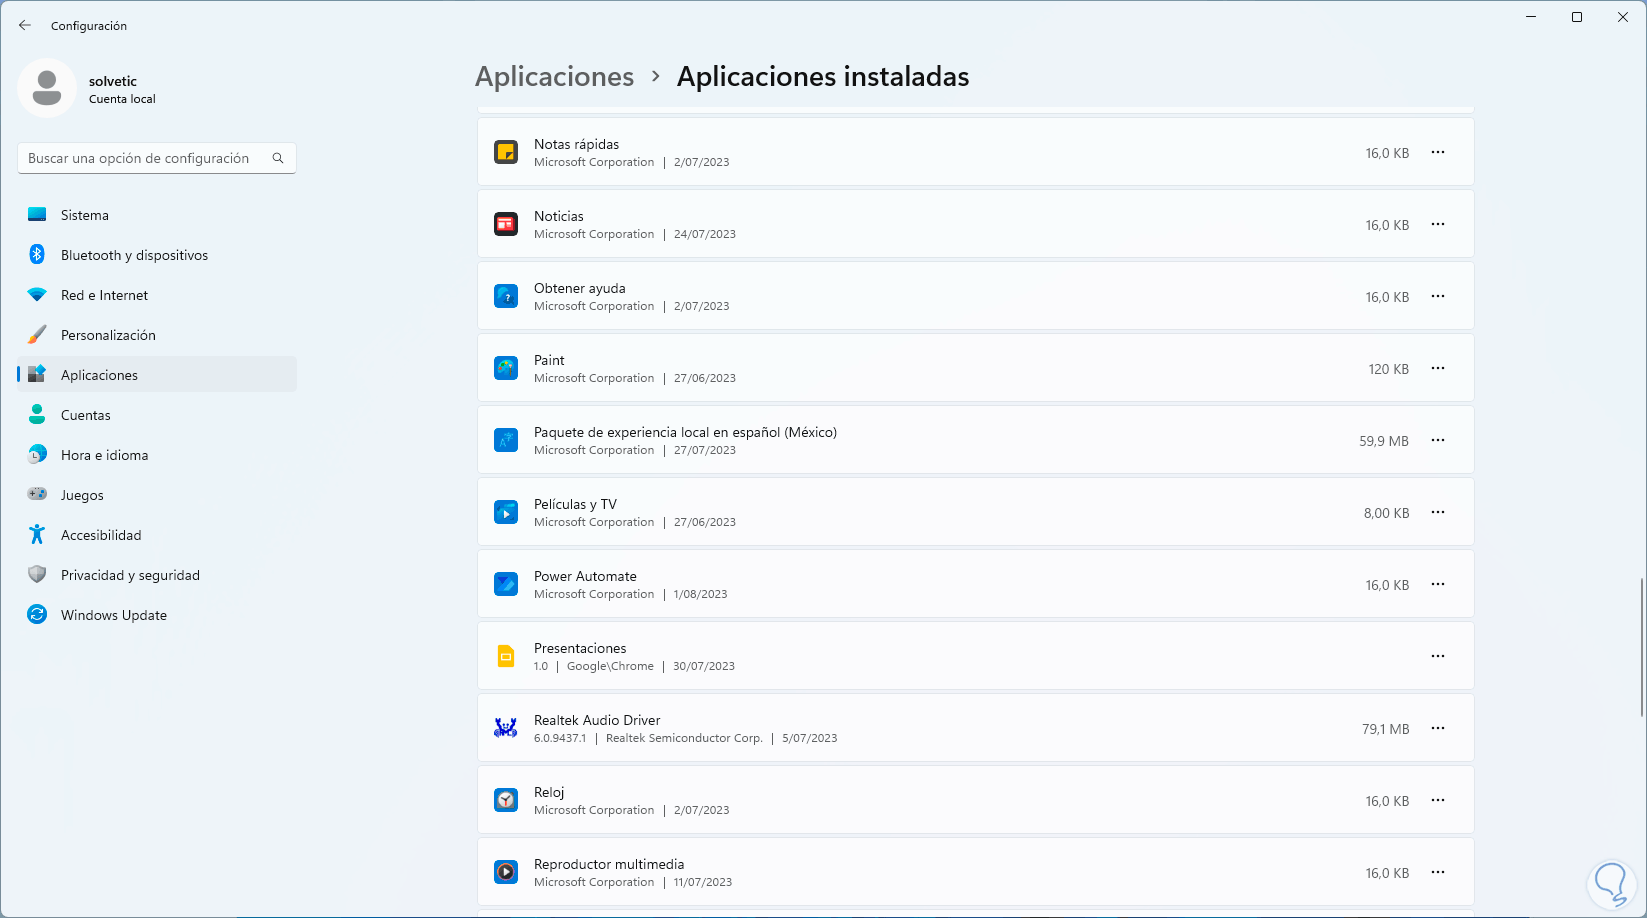
We validate that the application has already been uninstalled from Windows 11:
7 Fix Kernel Data Inpage Error Windows 11 updating drivers
Another cause of this error is having outdated drivers as they affect their operation.
Step 1
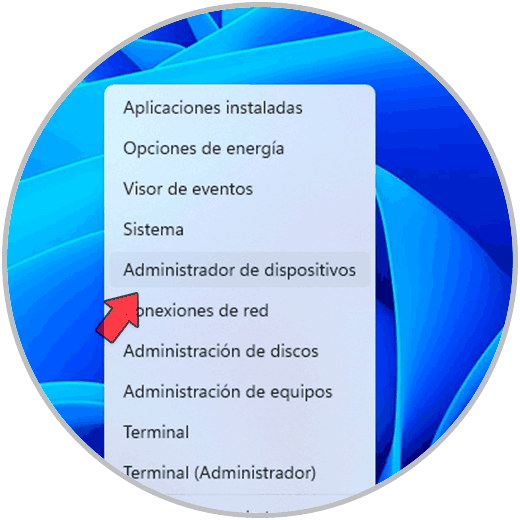
To update them we right click on the Start menu and in the list we click on "Device Manager":
Step 2
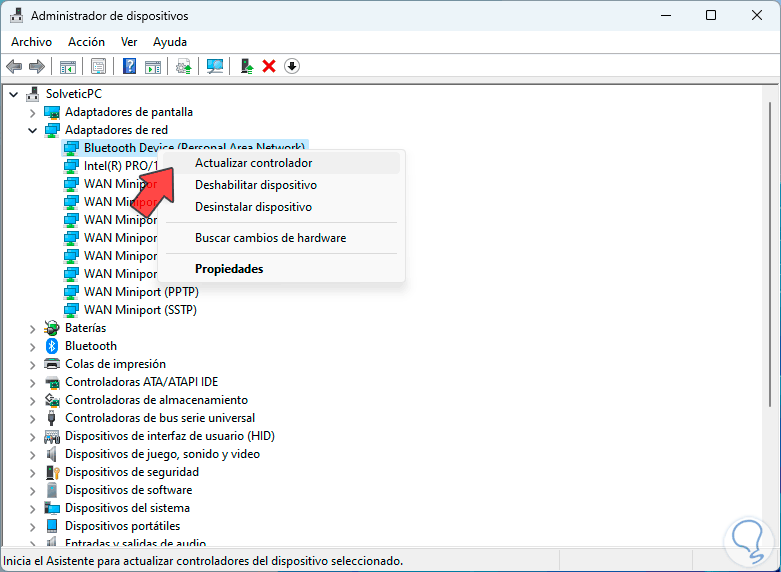
Now we access the section where the error is presented and right-click on the driver to select the "Update driver" option:
Step 3
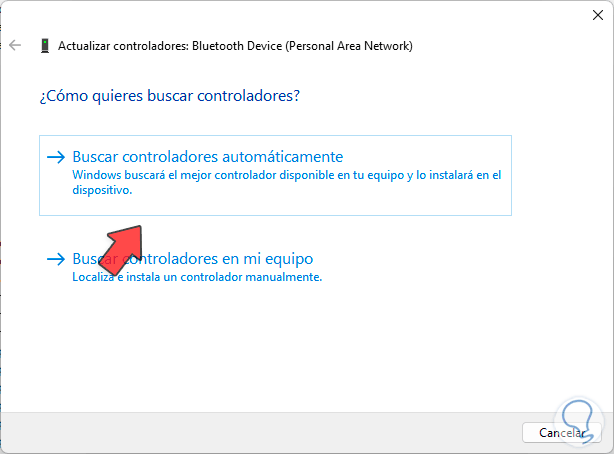
We will see the following: We click on "Search drivers automatically"
Step 4
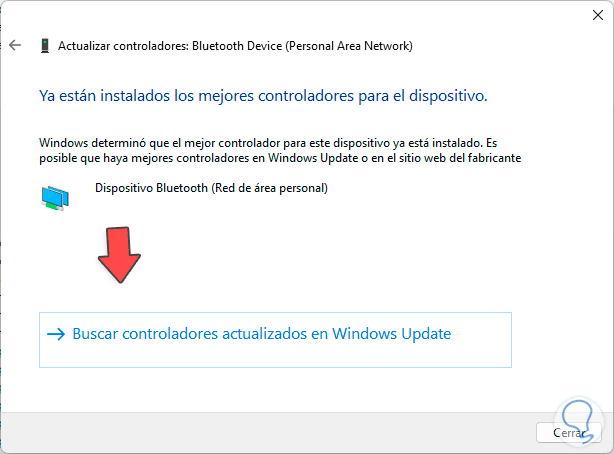
and wait for the search to finish:
8 Repair Error Kernel Data Inpage Windows 11 by analyzing the hard drive
Step 1
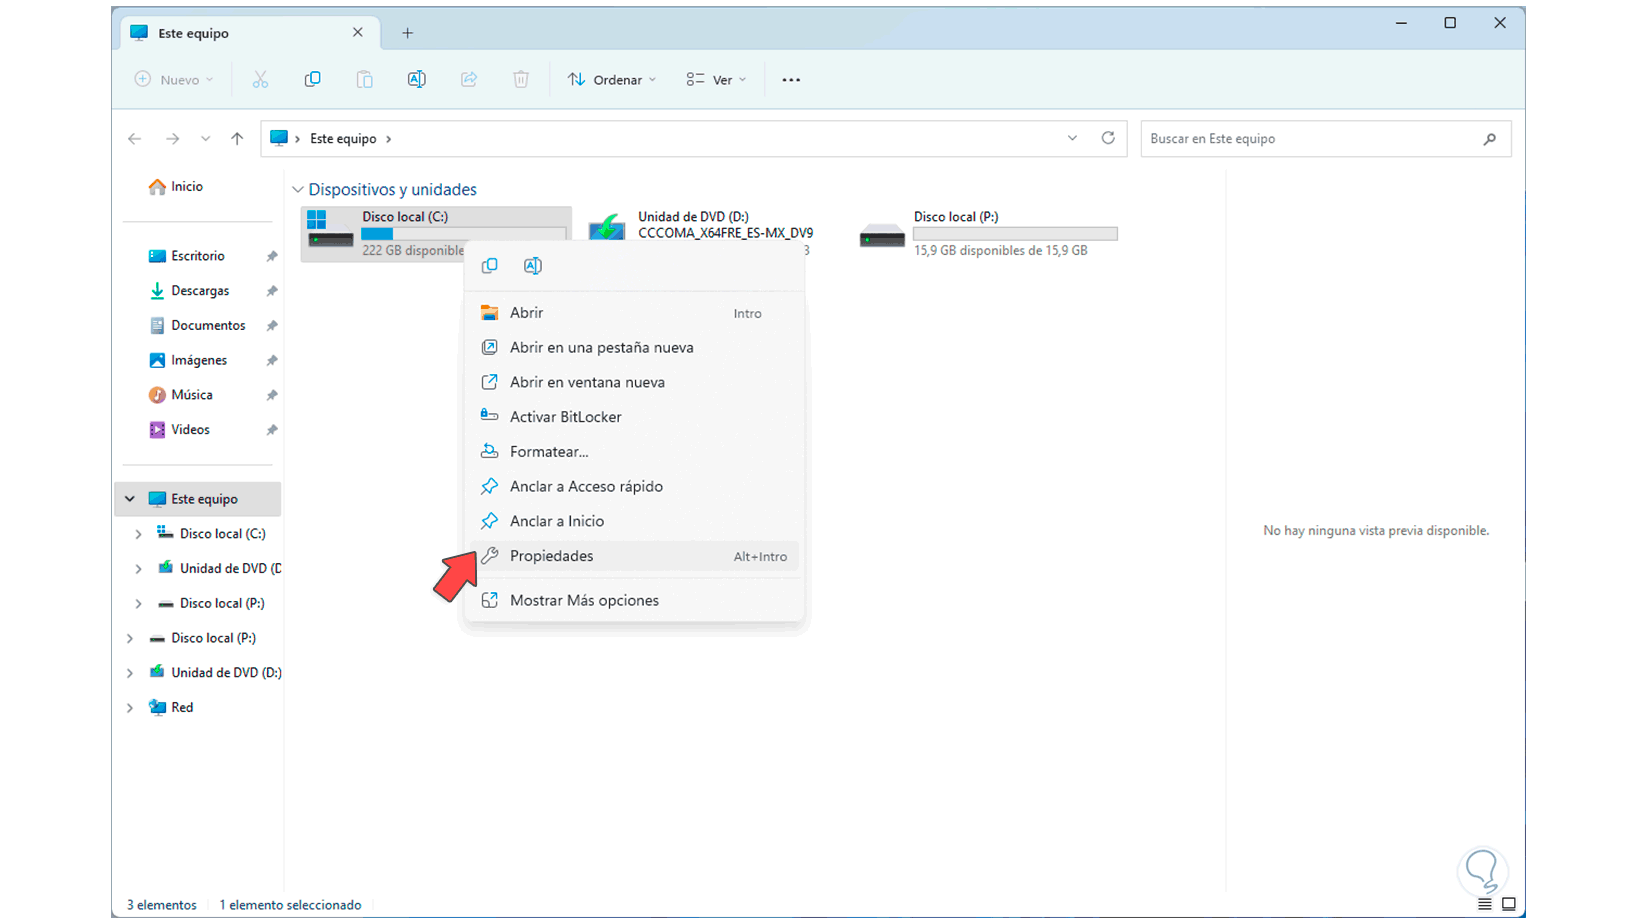
Finally it will be possible to analyze our disk in search of failures, for this we open the File Explorer and right click on the C drive to select "Properties":
Step 2
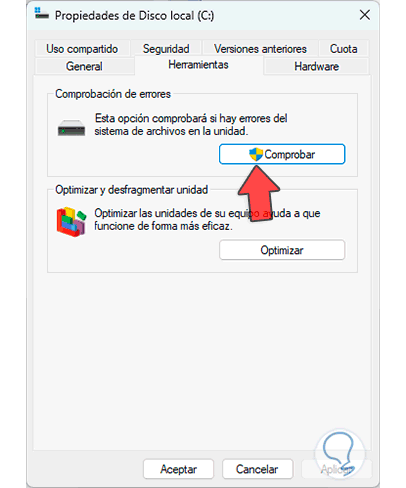
In the pop-up window we go to the "Tools" tab and there we click on "Check":
Step 3
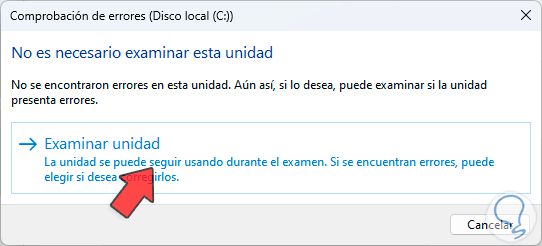
The following window will open:
Step 4
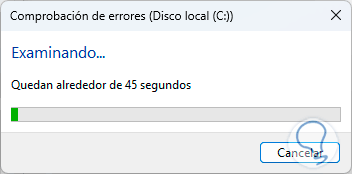
Now we are going to click on "Browse unit" and wait for the analysis to finish:
step 5
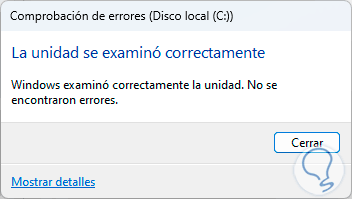
At the end of this analysis we see if there are errors or not:
With these options we will solve the Kernel Data Inpage error in Windows 11.