To stay up to date, remember to subscribe to our YouTube channel!
SUBSCRIBE ON YOUTUBE
One of the most practical functions of Windows 11 for administrative issues is to use Safe Mode, this mode allows the system to load with the minimum of drivers and thus be able to perform support actions in a centralized way because it only loads the minimum of drivers and services, with this mode all device drivers and third-party software are temporarily disabled since the cause of the errors may be in them..
Windows 11 safe mode can be used in basic form or with the network drivers in case tasks and management are needed in this part of Windows. TechnoWikis will explain some ways to access Safe Mode in Windows 11.
1 Start Safe Mode Windows 11 from Settings
Step 1
It is one of the traditional methods to perform this operation.
Step 2
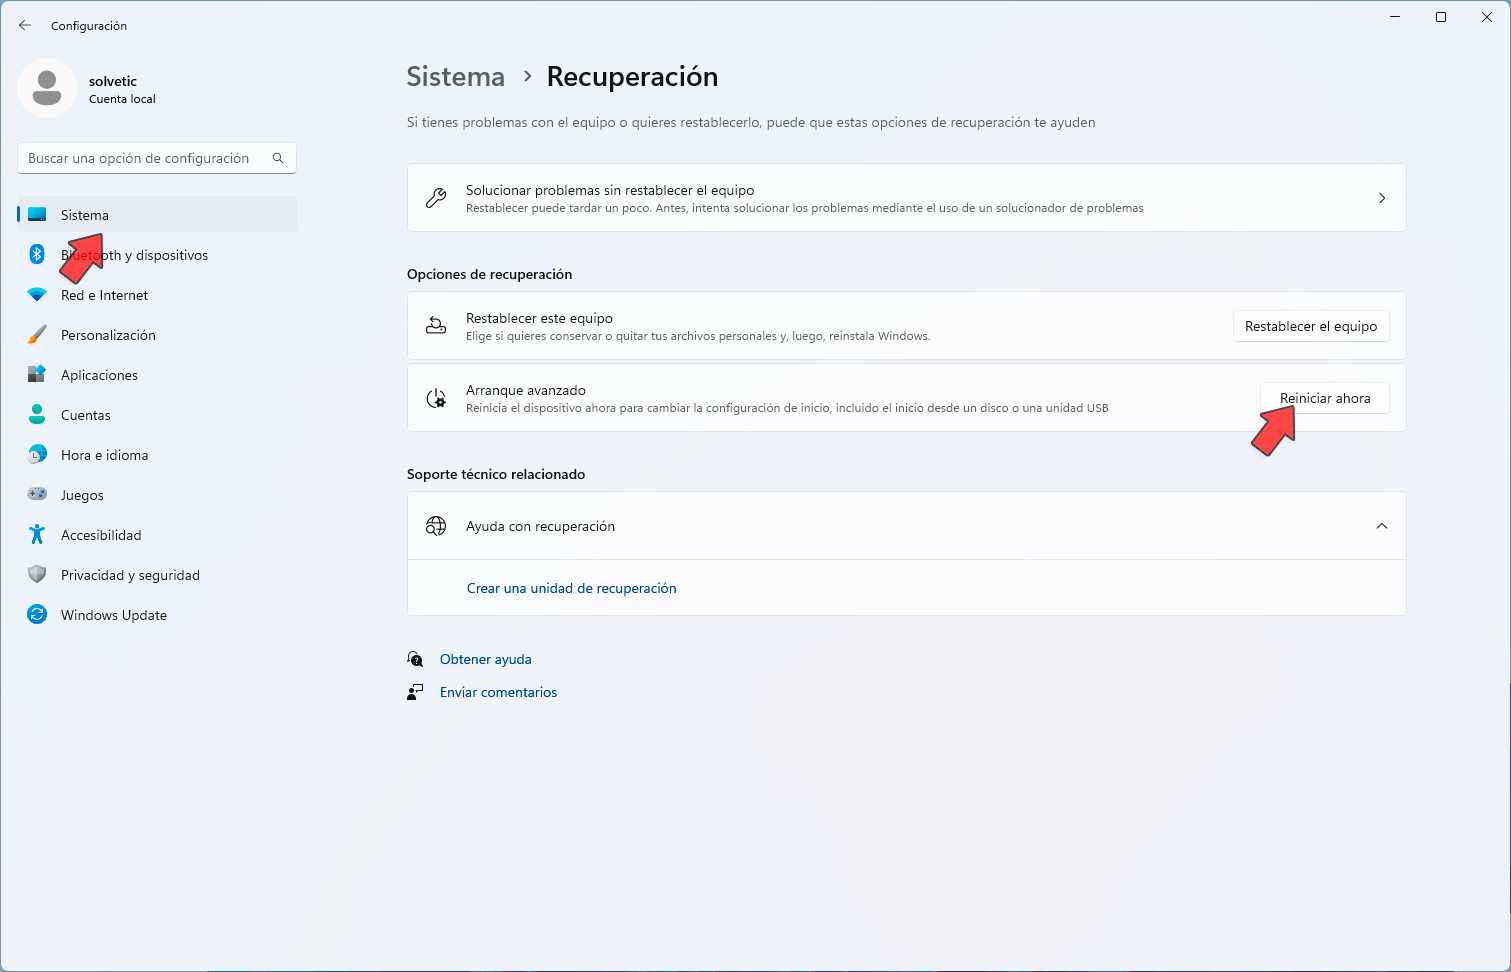
To use this way we click on the Start menu, then we click on "Settings" and we will go to "Recovery" located in the "System" section:

Step 3
By clicking there we will see the following: We are going to click on the "Restart now" button
Step 4
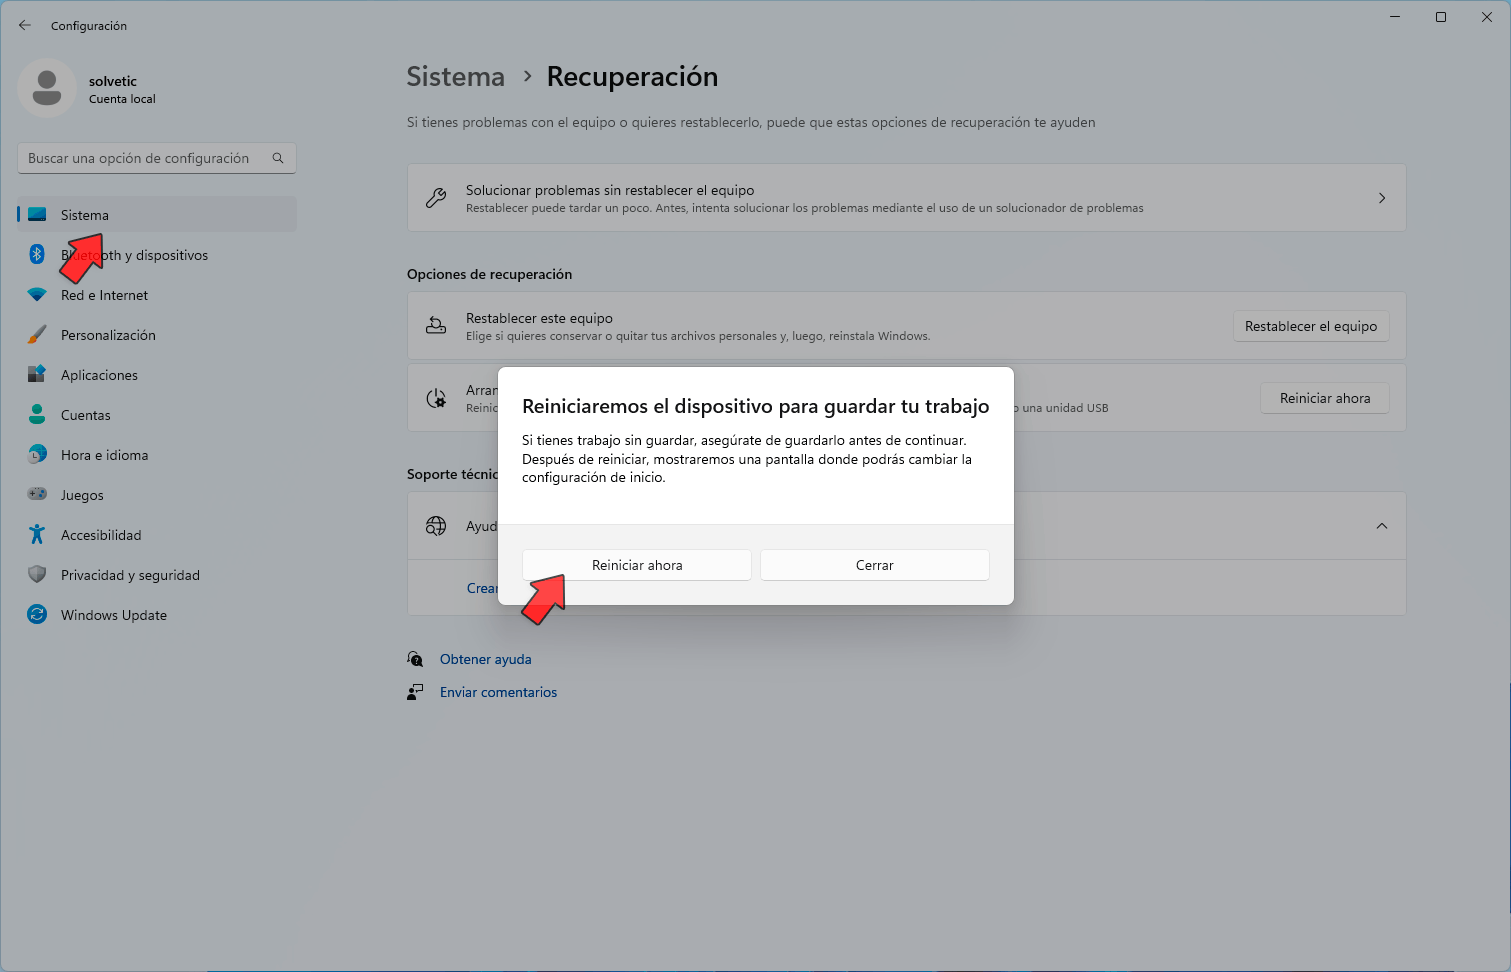
and we must confirm this process:
step 5
We click on "Restart now" and Windows will restart in an advanced way:

step 6
We expect services to load like this:

step 7
Then we will see the following. Now we click on "Troubleshoot"

step 8
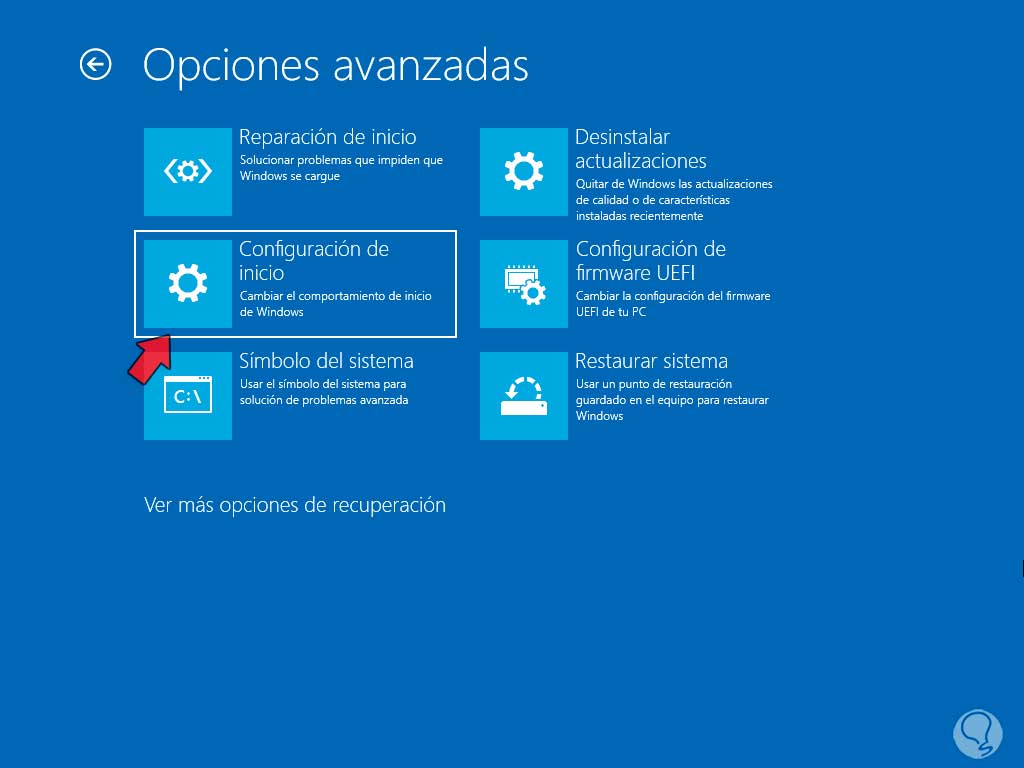
and then we click on "Advanced options":

step 9
We will have access to the various usage options:
step 10
In this window we will click on "Startup configuration" to see the following:

step 11
After this we click on "Restart", when the system restarts we press the F4 or F5 key to access one of these safe modes:

step 12
The system will reboot:

step 13
The session will start:

step 14
You will see that the system has started in this safe mode:

step 15
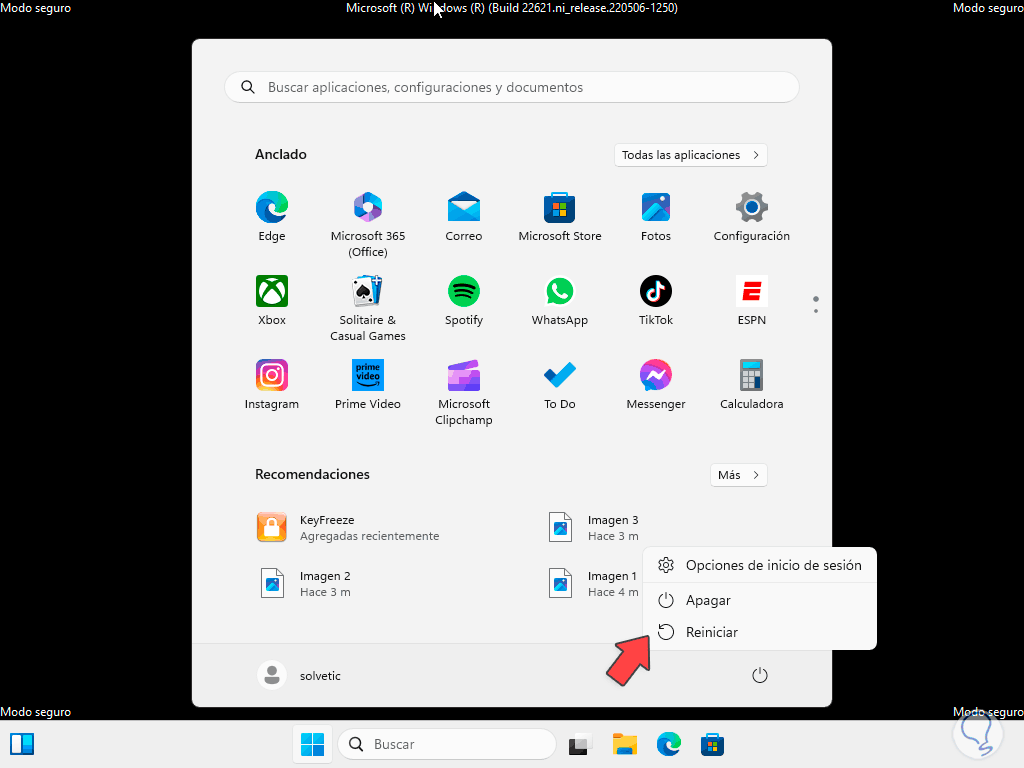
Now you can reboot the system to access as normal:
step 16
We see Windows 11 in its normal state after being rebooted:

2 Start Safe Mode Windows 11 from Lock Screen
Step 1
This is another of the functional options that Windows 11 offers us to access this Safe Mode of the system, for this, on the lock screen we will click on the shutdown button, then press the Shift key on our keyboard and click on Restart:

Step 2
The system will be started in advanced mode:

Step 2
Again we expect it to load this mode:

Step 3
Now we click on "Solve problems" in the displayed window:

Step 4
Then we click on "Advanced options":

step 5
Finally we click on "Startup Settings":

step 6
We will see the following window:

step 7
We click on "Restart", after the system restarts, press the F4 or F5 key to access one of these safe modes with or without network functions:

step 8
The system will reboot:

step 9
We will see that the system starts in safe mode:

step 10
It is possible to reboot the system to access normal mode:

3 Boot Windows 11 Safe Mode from System Repair
This is another of the options we have and it applies when Windows 11 fails during startup and with the function active it will be possible to access the advanced options or it is possible to access it even with the system running normally.
Step 1
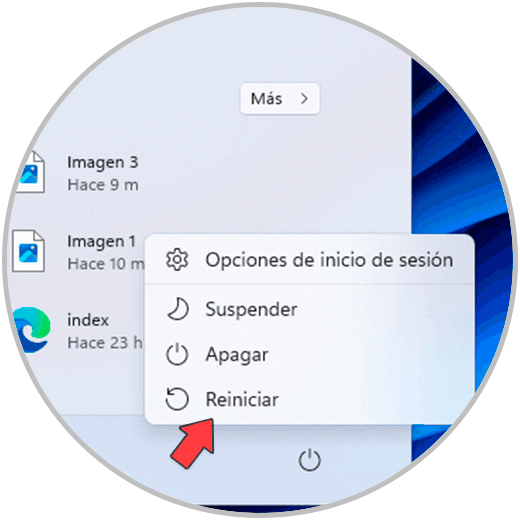
To begin we restart the system in a normal way:
Step 2
It will give way to normal reboot:

Step 3
We will do this restart process three times to access automatic repair, we can press the restart button on the computer or turn it off and on 3 times, we will see this:

Step 4
We are going to wait for the repair to finish and the equipment to be diagnosed:

step 5
After this it will usually open the following:

step 6
There we will click on the "Advanced Options" button and the main menu will open:

step 7
We click on "Troubleshoot" and then click on "Advanced options":

step 8
In the main options we click on "Startup Settings":

step 9
We will see the following. We click on "Restart".

step 10
After the system restarts, press the F5 or F4 key to use one of the available safe modes:

step 11
The system will reboot and log into safe mode:

step 12
Reboot the system to have normal access to Windows 11:

step 13
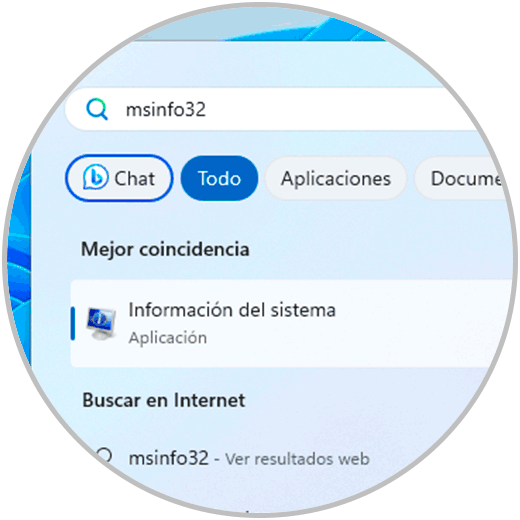
In the event that this function is not active on your computer, you will validate the status by entering "msinfo32" in the search engine and clicking on "System Information":
step 14
We go to the "Secure boot status" line to see the current status:

step 15
If it is disabled, we enter the BIOS or UEFI of the computer and enable the Secure Boot option:

4 Start Safe Mode Windows 11 using ISO
Step 1
In this case, it is required to use the Windows 11 ISO image, if we do not have it, we can go to the following link. There we download the utility to create the installation media, this gives us the possibility to create the bootable media with Windows 11.
Windows 11 media tool

Step 2
Once this is done, we will restart the system and the media with the Windows 11 ISO must be connected to the computer:

Step 3
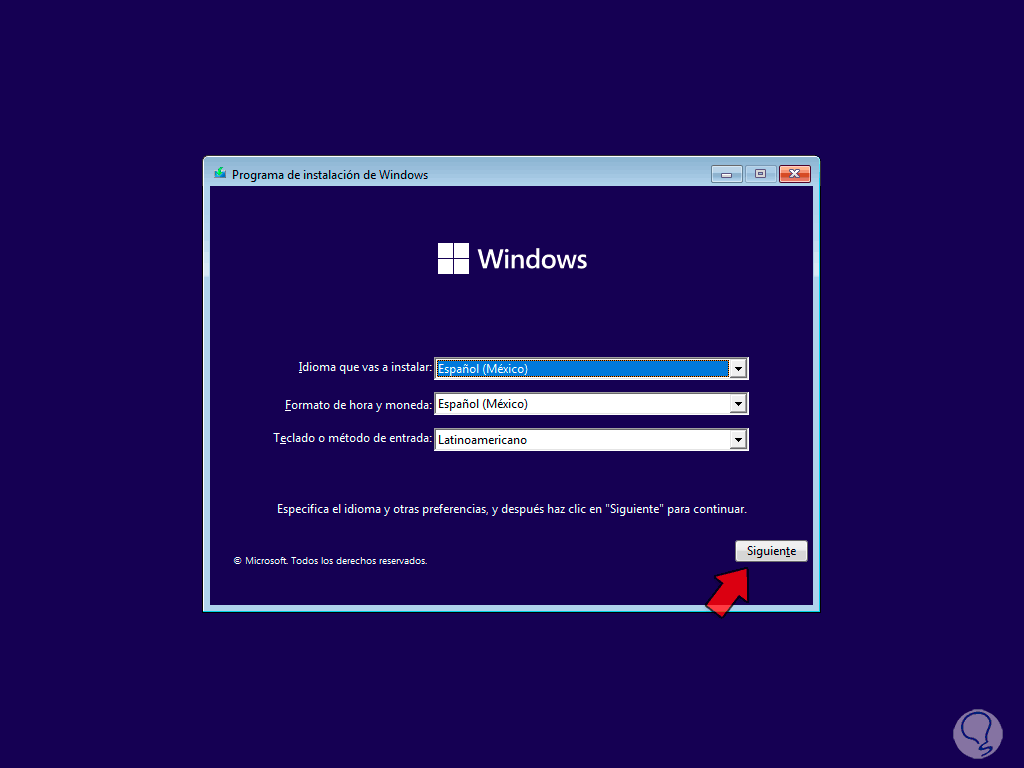
This will give us access to the Windows installation window:
Step 4
There we click "Next" to see this:

step 5
Then we click on "Repair the computer" to access the advanced options of the operating system again:

step 6
We are going to click on "Troubleshoot" and then click on "Advanced Options", then click on "Startup Settings":

step 7
The following will open:

step 8
After this we click on "Restart" to have the available use options:

step 9
There we can use the F4, F5 or even F6 keys depending on the type of safe mode we want to use, the system will reboot:

step 10
The session will be in secure mode:

step 11
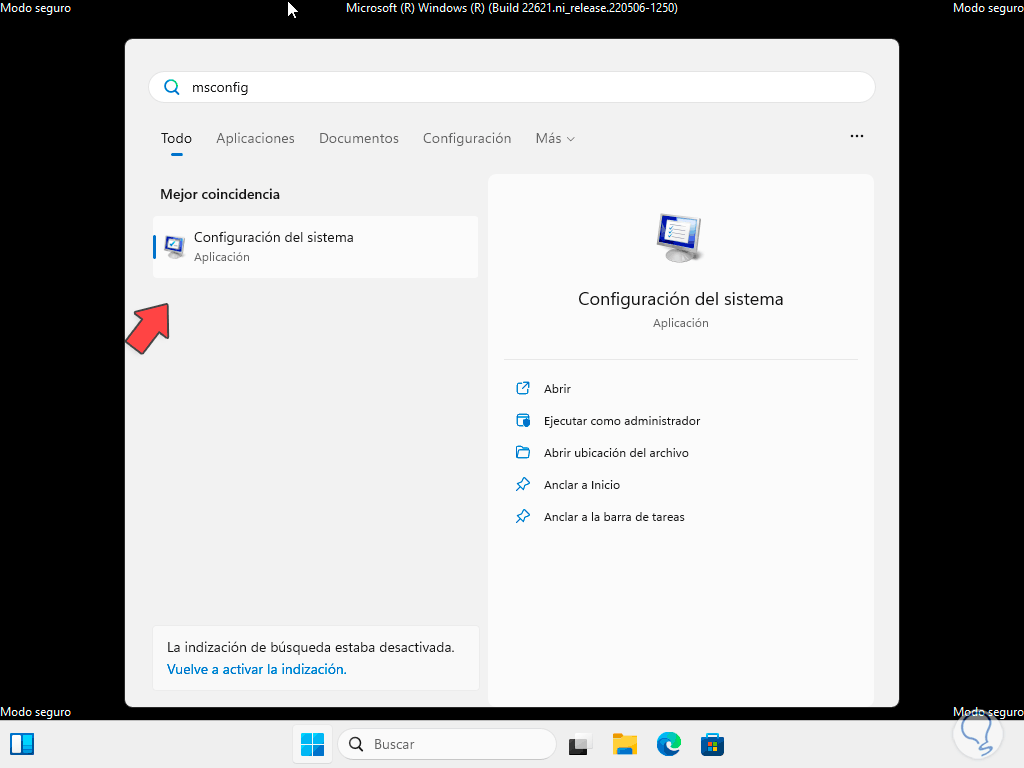
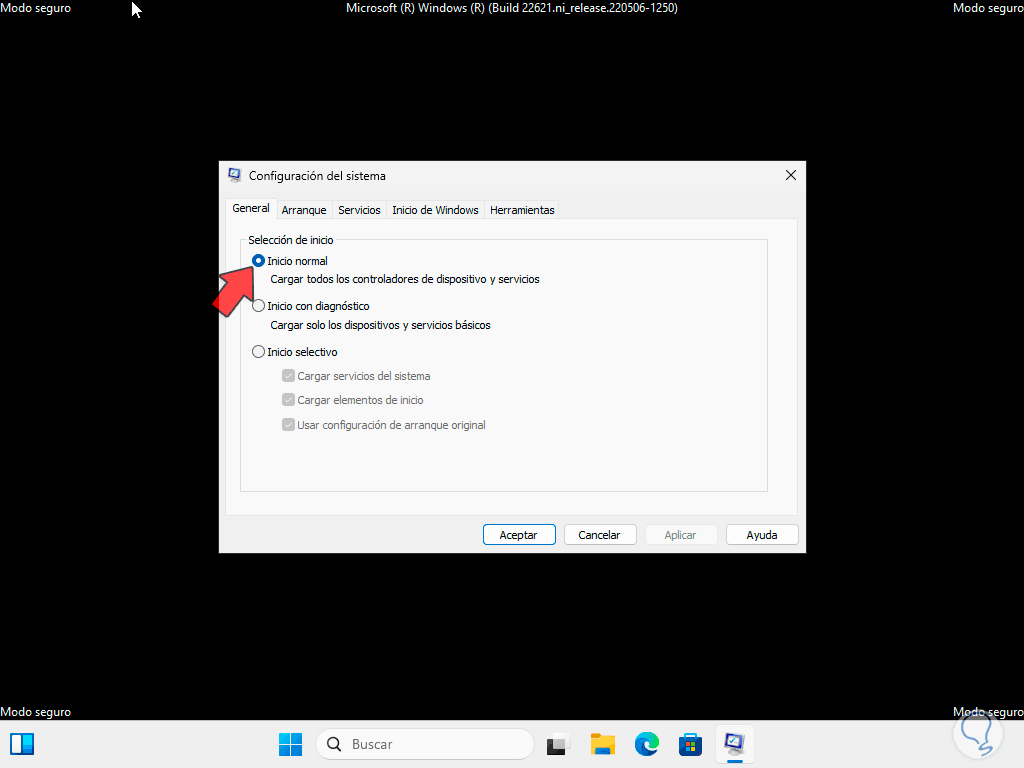
To return to normal mode we have two options, one is to restart the computer normally and the other is to enter the word "msconfig" in the search engine and open the utility:
step 12
The following will open. In the "General" tab we activate the "Normal startup" box, we apply the changes.
step 13
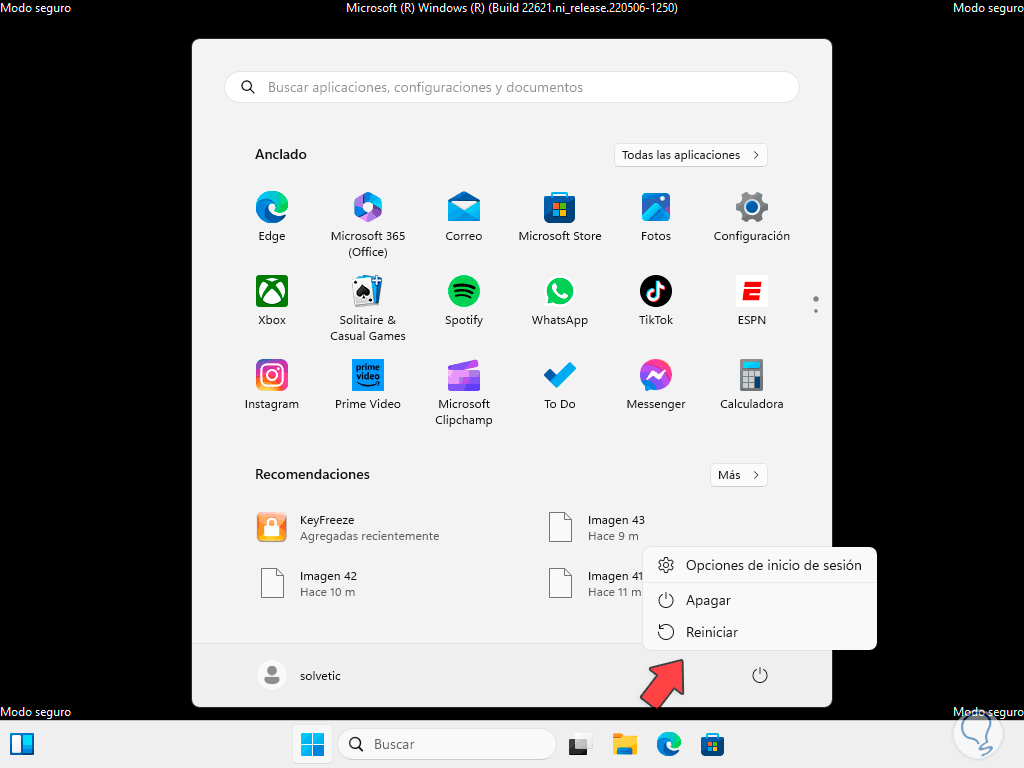
From the Start menu we restart Windows to have normal access:
step 14
Windows 11 will restart:

step 15
We see the normal session:

These are the options that TechnoWikis teaches you to access safe mode..