One of the traditional ways that are managed by administrators and support staff in any type of organization when certain problems arise with Windows, is to access the operating system through the secure mode. We have heard this term many times, but we do not know very well at that time what it is and what impact this mode has on Windows 10..
Safe mode starts the Windows 10 system in a basic state, in which a limited set of files and drivers is loaded. This is done in order that, within the support tasks, through this mode, equipment problems can be solved . For example, if the problem generated is not present or does not occur in safe mode, it is intuited that the default configuration and basic device drivers are not causing the problem and so we can use other methods of analysis .
When Safe Mode is activated in Windows 10, all commands that are available to affect the host computer are disabled, and there are some restrictions for symbol servers and debugger extensions of the operating system itself. There are two versions of the safe mode that are:
- Safe mode with networking.
Although they are identical, Safe Mode with network functions includes the network drivers and services that will be required to access the Internet and other computers on the network while Safe Mode does not allow you to perform this action. Through this tutorial we will learn to add the Safe Mode options on Windows 10 startup in a simple way.
To keep up, remember to subscribe to our YouTube channel! SUBSCRIBE
1. Add Safe Mode to boot graphically in Windows 10
To carry out this method graphically, we will use the msconfig utility which has been developed to carry out administration tasks not only on Windows 10 startup but also on its services, Startup and general parameters.
Step 1
To access this utility, we will use the following key combination and execute the “msconfig†command:
+ R
msconfig
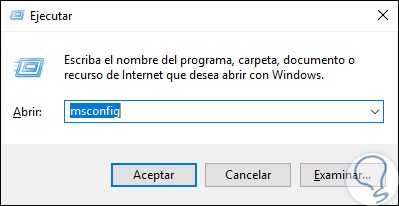
Step 2
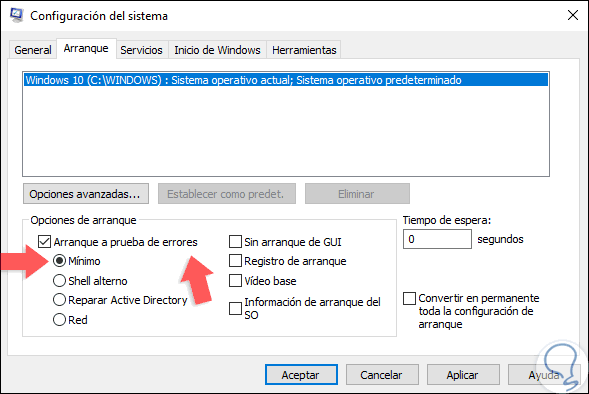
Click on OK or Enter and the following window will be displayed and there we go to the "Start" tab. Activate the "Error-proof start" box located in the "Boot options" section and activate the "Minimum" box:
Step 3
Click on the Apply and Accept button to save the changes and the following message will be displayed. Click on the "Restart" button to complete the process.

2. Add Safe Mode to boot with commands in Windows 10
To make use of the options from the console, we will execute the bcdedit command, technically called BCDEdit, is a command line tool designed to manage boot configuration data (BCD). BCD files manage a warehouse which is used to describe boot applications and boot application settings in Windows environments, so that BCDEdit can be used for various purposes, including the creation of new stores, the modification of existing ones, the Add boot menu options and others.
Step 1
Adding the Safe Mode options is possible from the CMD console, for this we access as administrators and in the deployed console we will first execute the following line:
bcdedit / copy {current} / d “Windows 10 Safe Mode†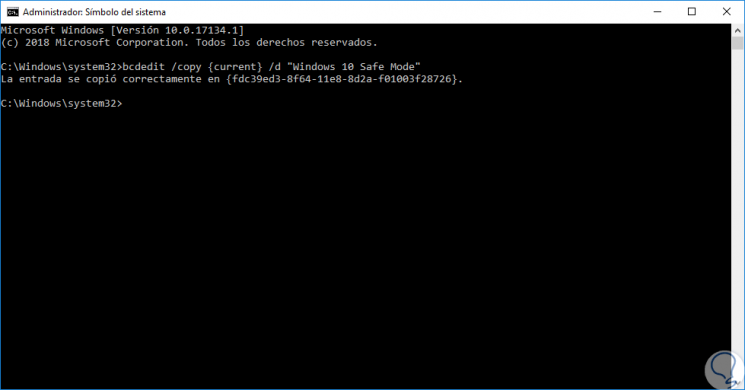
Step 2
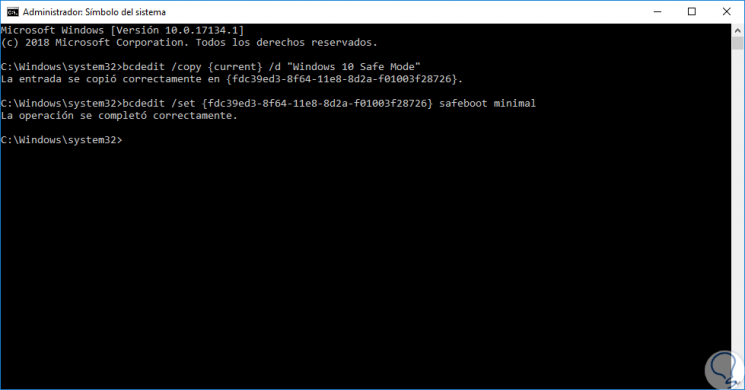
Pressing Enter will generate the GUID of the operating system, this can be copied by selecting with the mouse, right-clicking on the CMD title bar and then selecting the "Edit / Copy" option. Now, we execute the following syntax. As we see the operation is completed correctly, we can leave the terminal and restart the system to apply the changes.
bcdedit / set {guid} safeboot minimal Note
We replace the guid field with the ID generated in the previous command.
3. Add Safe Mode to boot with network functions using commands in Windows 10
Step 1
We have mentioned that this access mode allows us to have the network drivers enabled, to make use of this option, we go to the command prompt console as administrators and first execute the following line:
bcdedit / copy {current} / d “Windows 10 Safe Mode with Networking Support†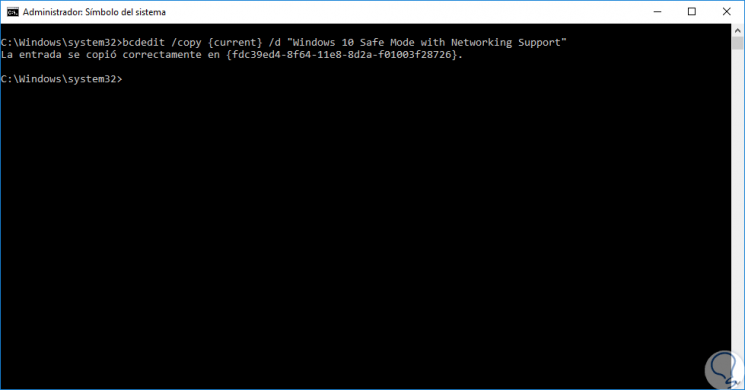
Step 2
As we can see, the guid is displayed where said order was copied, we proceed to copy this guid again and now we execute the following syntax. By validating this command, we can restart the system and access it in safe mode with network functions.
bcdedit / set {guid} safeboot network 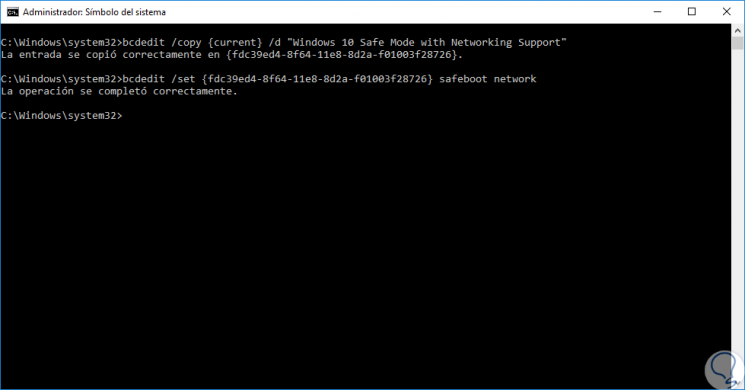
4. Add Safe Mode (Command Prompt) using commands in Windows 10
Step 1
This is another alternative that allows us to access in safe mode, but with the terminal environment, to enable this mode we access as administrators in the command prompt and execute the following:
bcdedit / copy {current} / d “Windows 10 Safe Mode (Command Prompt)†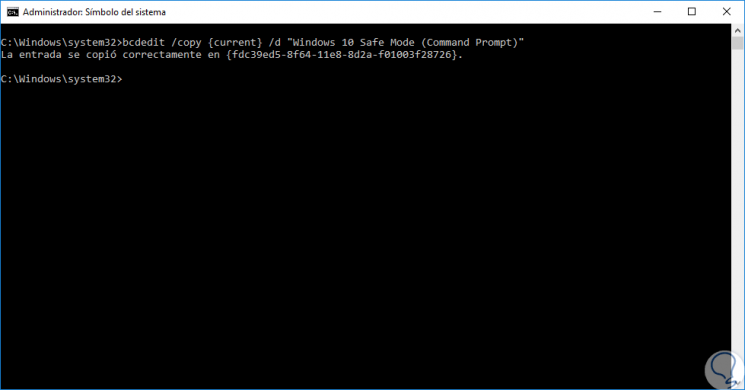
Step 2
We proceed to copy the guid and now we execute the following syntax:
bcdedit / set {guid} safeboot minimal 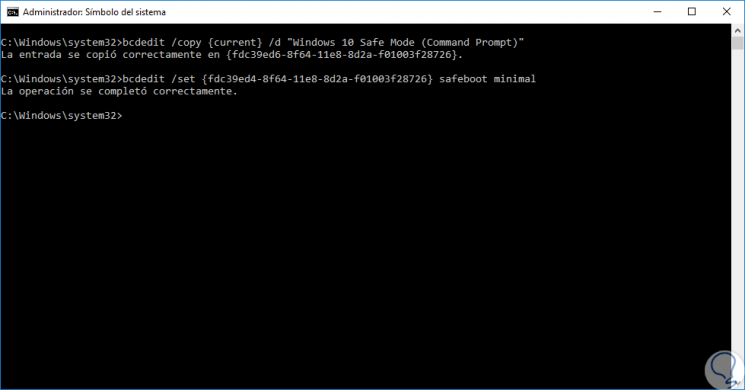
Step 3
Now, so that all options are available at boot, we run the following line:
bcdedit / set {guid} safebootalternateshell yes 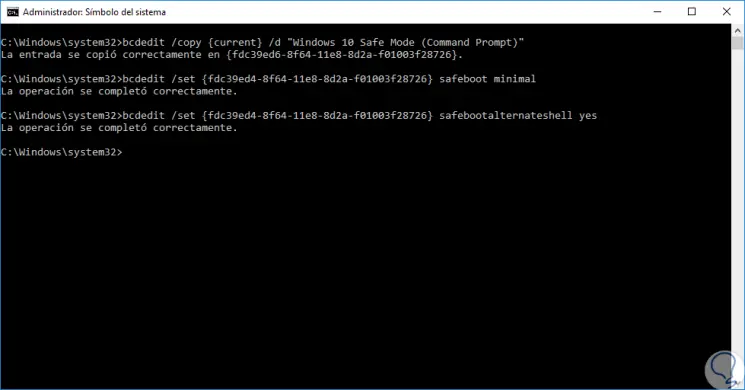
Step 4
We left the CMD console. With any of these methods at the time of restarting the system we will access directly in the configured safe mode:

Step 5
To access the options we have created, we must restart the system in advanced mode using one of the following options:
Step 6
With any of these options we will see the following:

Step 7
There we select the “Use another operating system†section and we can see each of the options in a safe way that we have configured. There, just click on the desired option to access it.

5. Remove Safe Boot Mode in Windows 10
Step 1
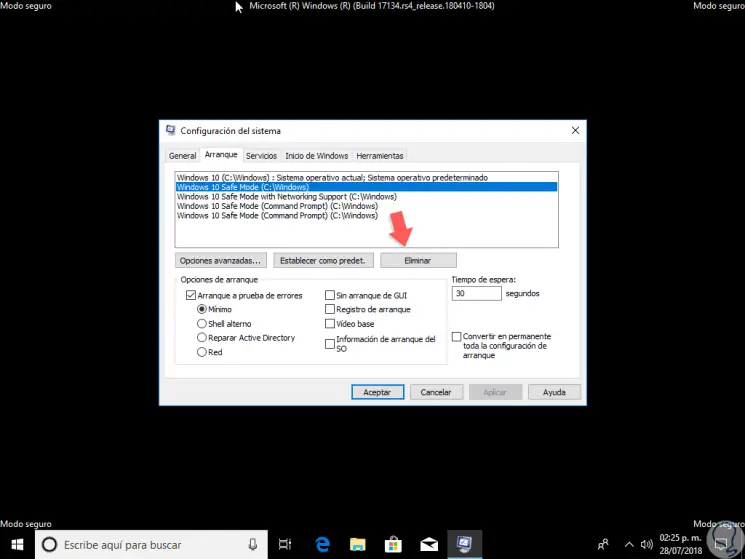
It is likely that at some point we want to remove these options from the system, for this, we go back to “msconfig†and there, in the “Startup†tab, we will see the different options created:
Step 2
Simply select each of them, except the first one that is where the operating system is hosted, and click on the "Delete" button. Finally, we deactivate the “Safe start-up†box and click on Apply and Accept to save the changes and it will be necessary to restart the operating system.
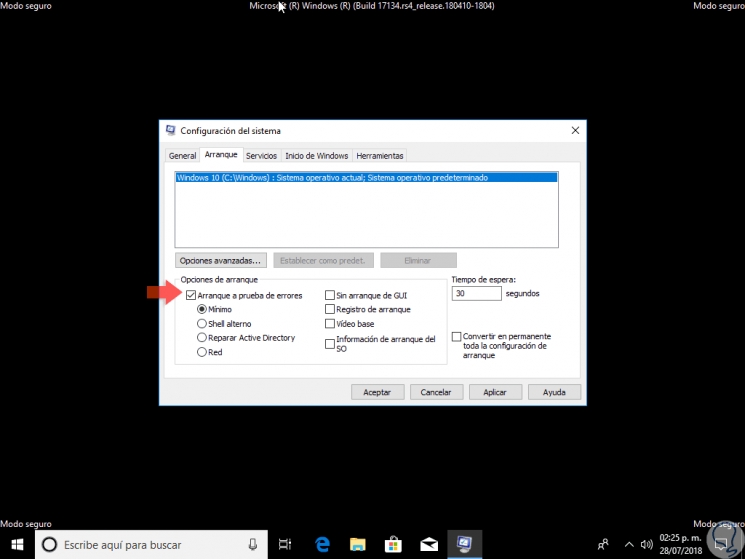
Thus, we have learned to set the different options of Safe Mode from the start in Windows 10..