To stay up to date, remember to subscribe to our YouTube channel!
SUBSCRIBE ON YOUTUBE
The printer in Windows 11, and in general in all operating systems, is essential to be able to capture what we do in the system and its applications, this includes everything from text to maps or various functions depending on the activity we carry out, we can see how in the Currently, printers have advanced functions (unseen before) and today they are multifunctional since they not only print but can scan, make copies and more..
If you have a new printer, this tutorial will be of great help to you because you have different ways to install Windows 11 Printer completely. TechnoWikis will teach you how to install a printer in Windows 11 and enjoy all its versatility.
1 How to install Windows 11 printer automatically
Step 1
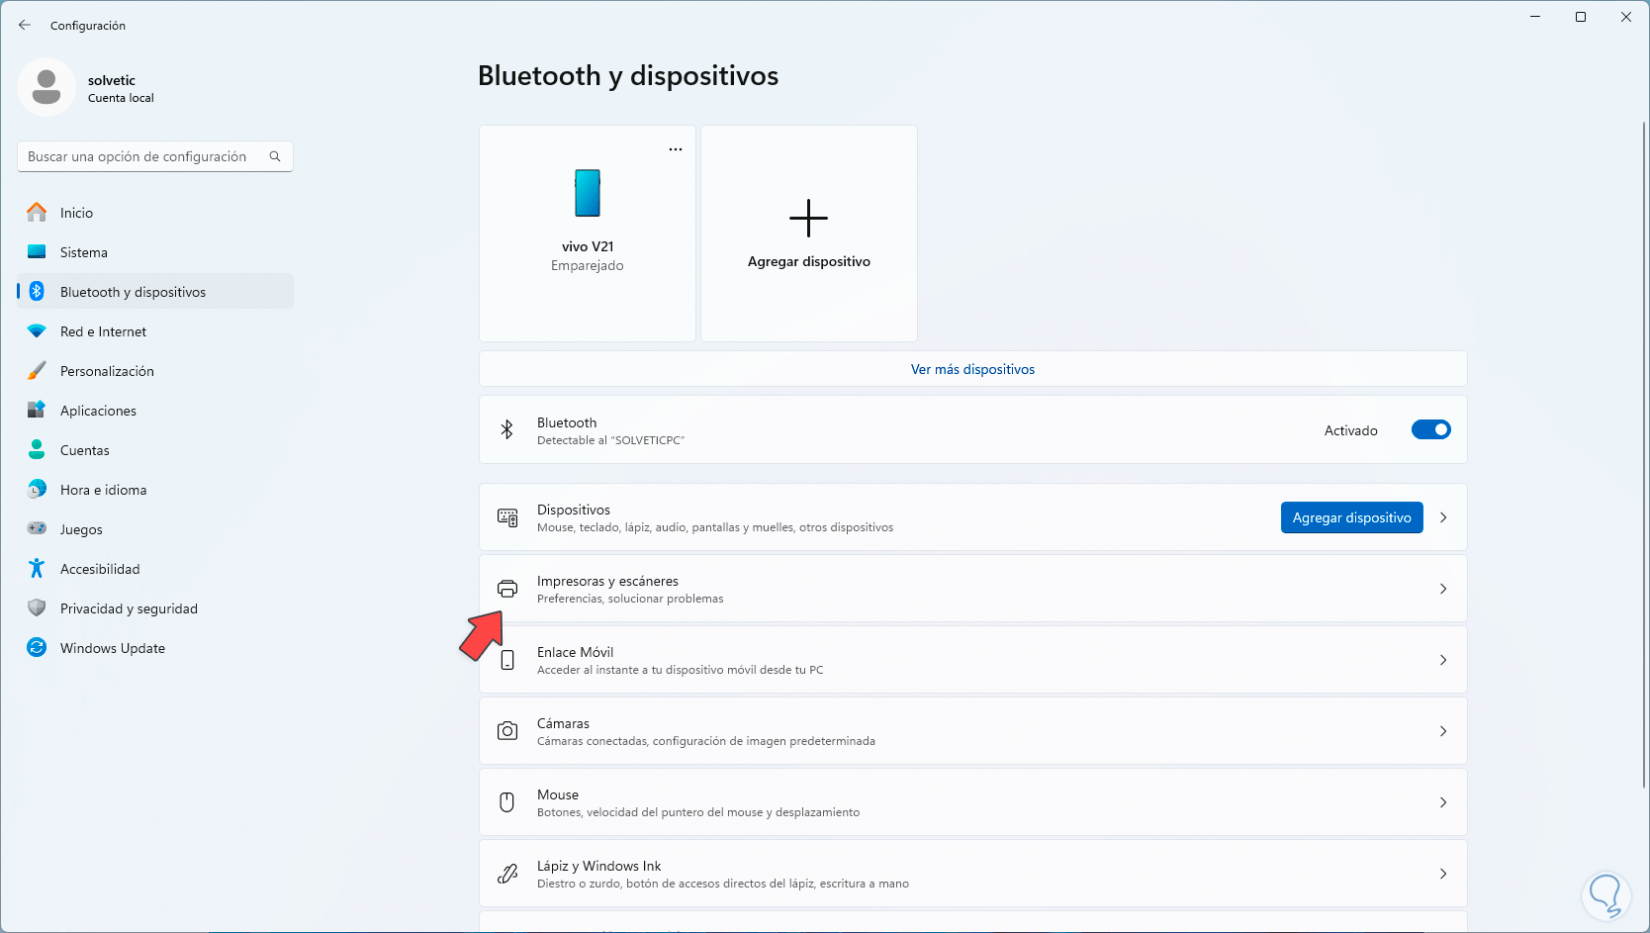
The first method will be to install the printer automatically, to achieve this method, we go to the path:
Step 2
There we click on the “Printers and scanners” section, we will see the following:
Step 3
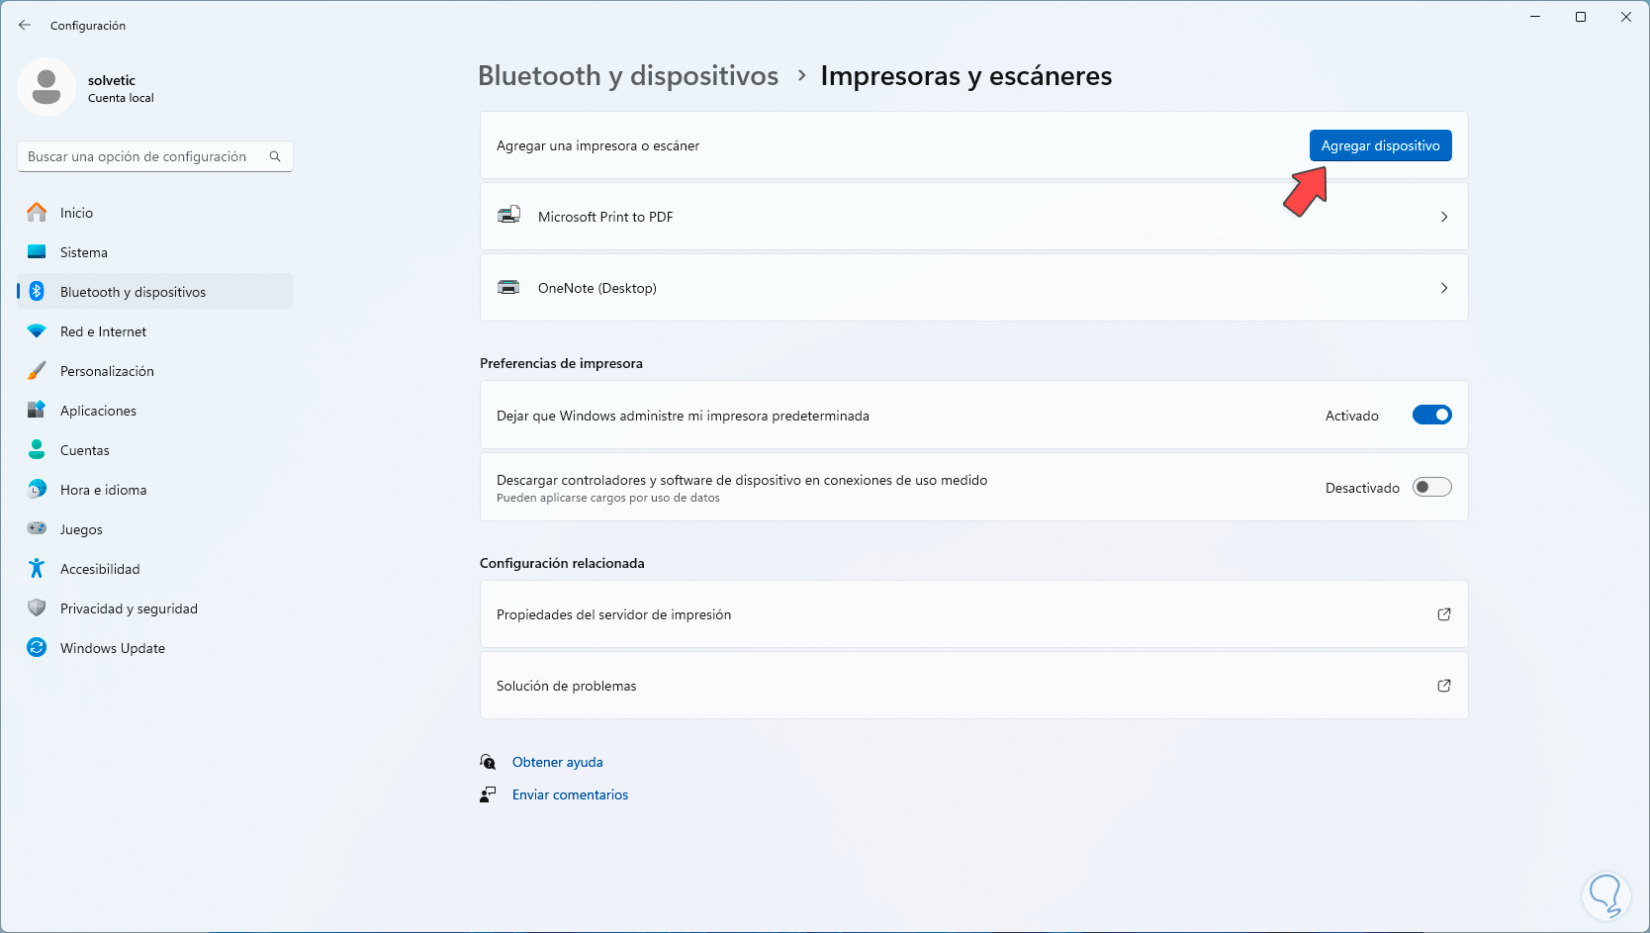
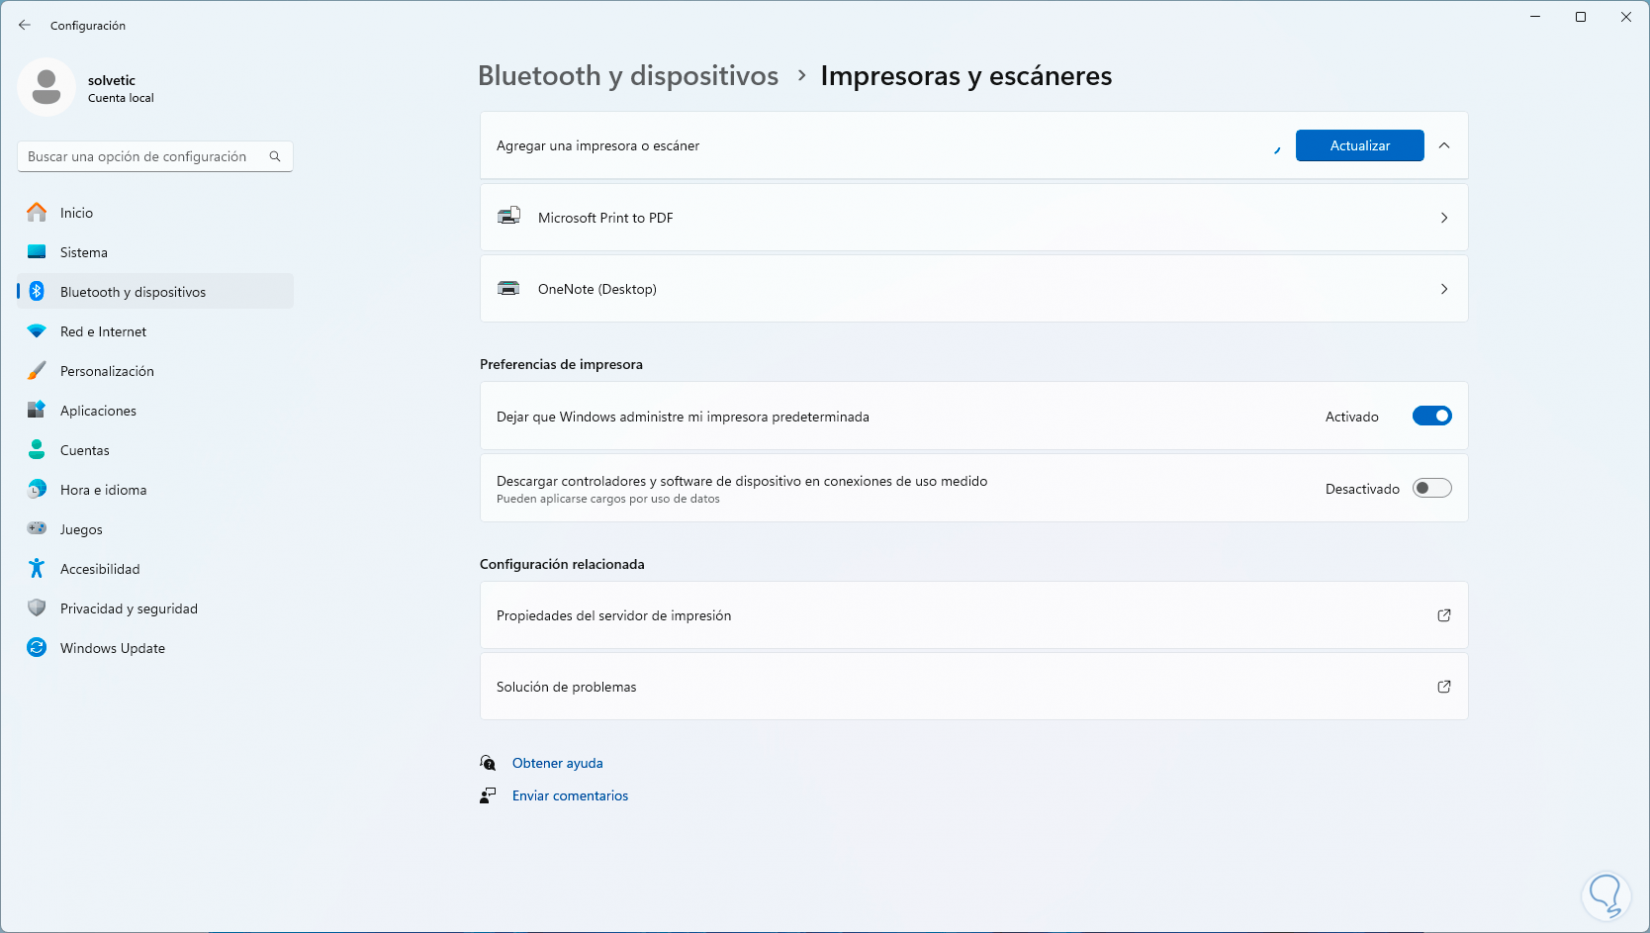
There we click on the “Add device” button and we will see that the printer search process begins:
Step 4
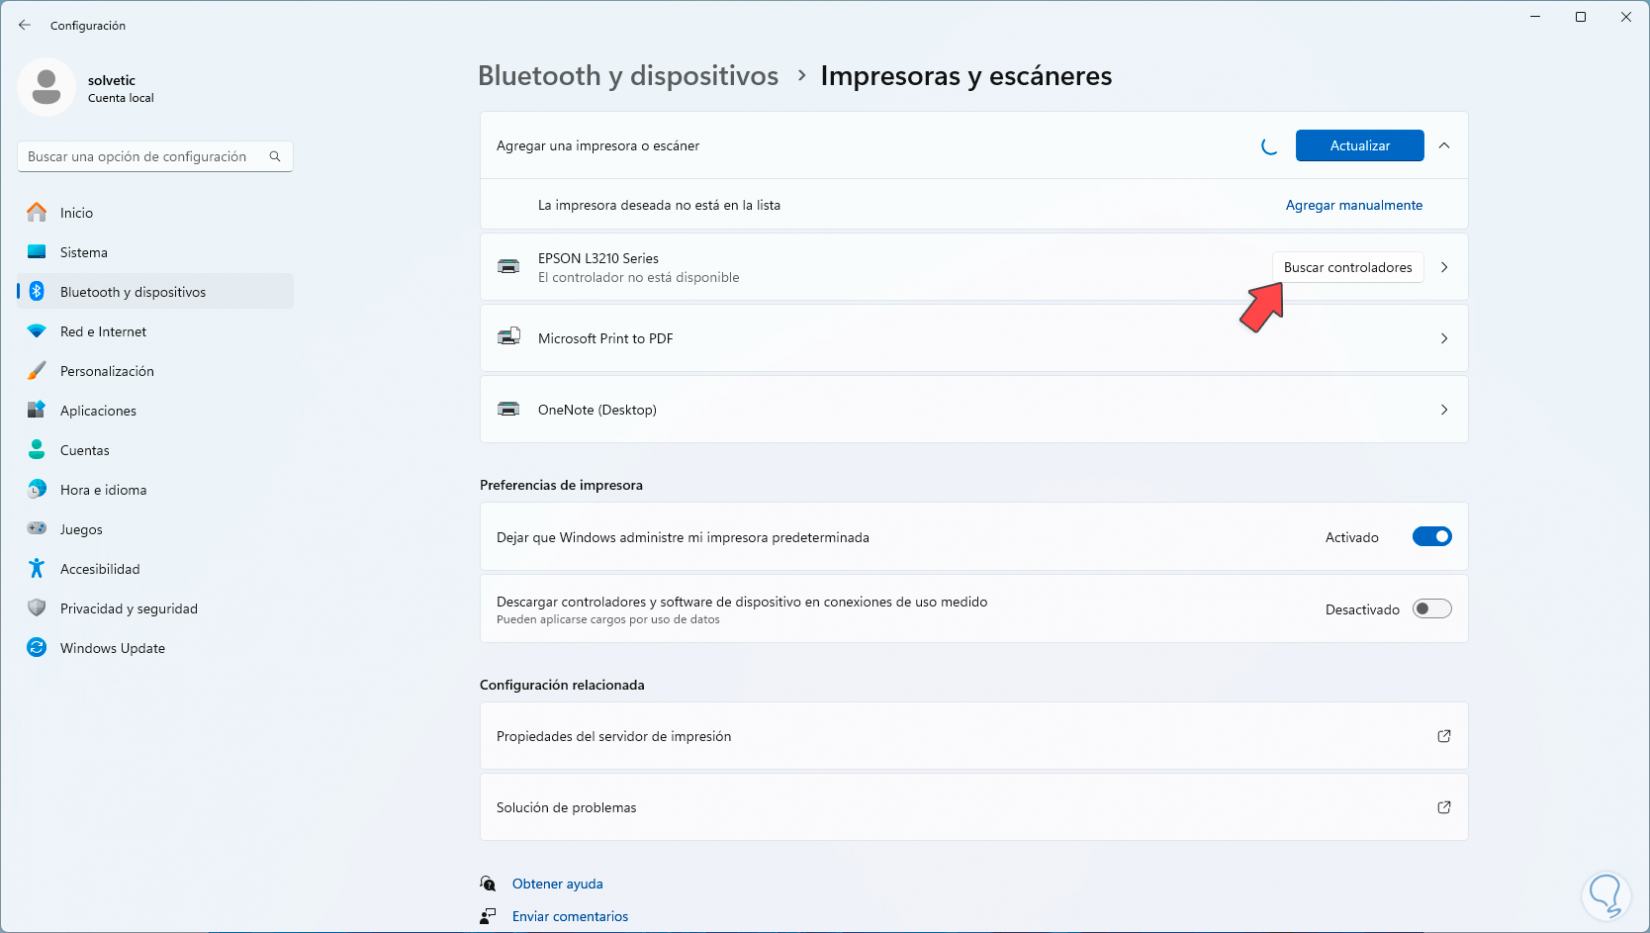
When we connect the printer, it will be detected automatically:
It is possible that the “Search for drivers” button is active; if so, we click there and from the web browser we will be redirected to the developer's site to download the most recent drivers..
2 How to install a Windows 11 printer manually
Step 1
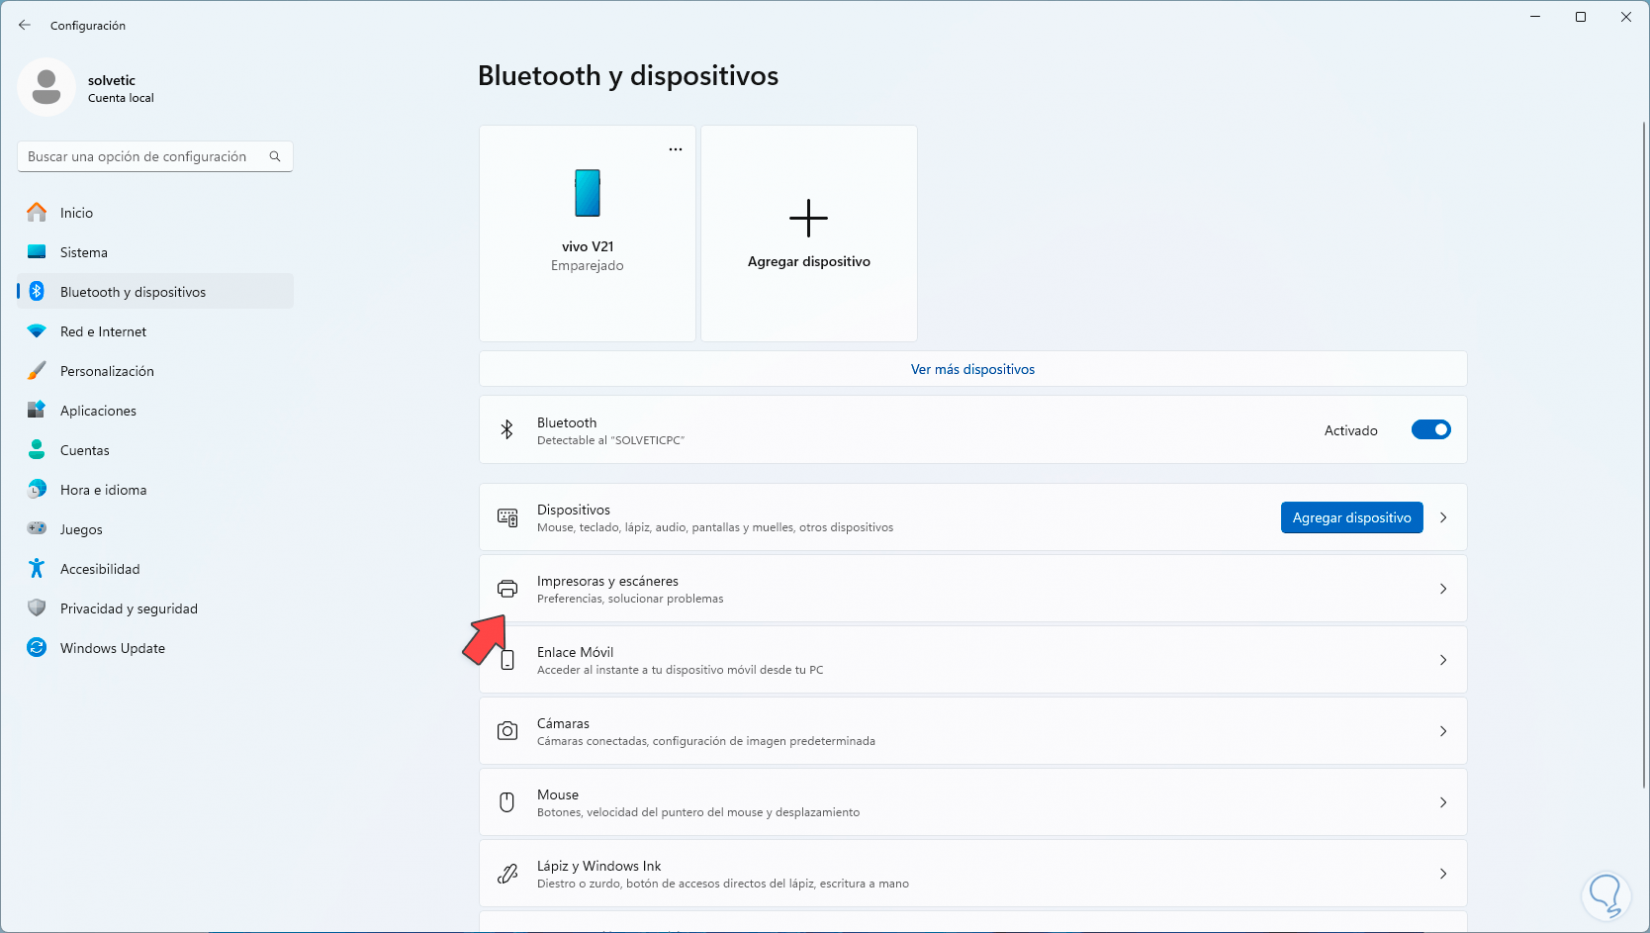
Now, if the automatic method does not work, we can carry out the process manually, for this we will go to the route:
Step 2
There we click on “Printers and scanners” to access the usage options:
Step 3
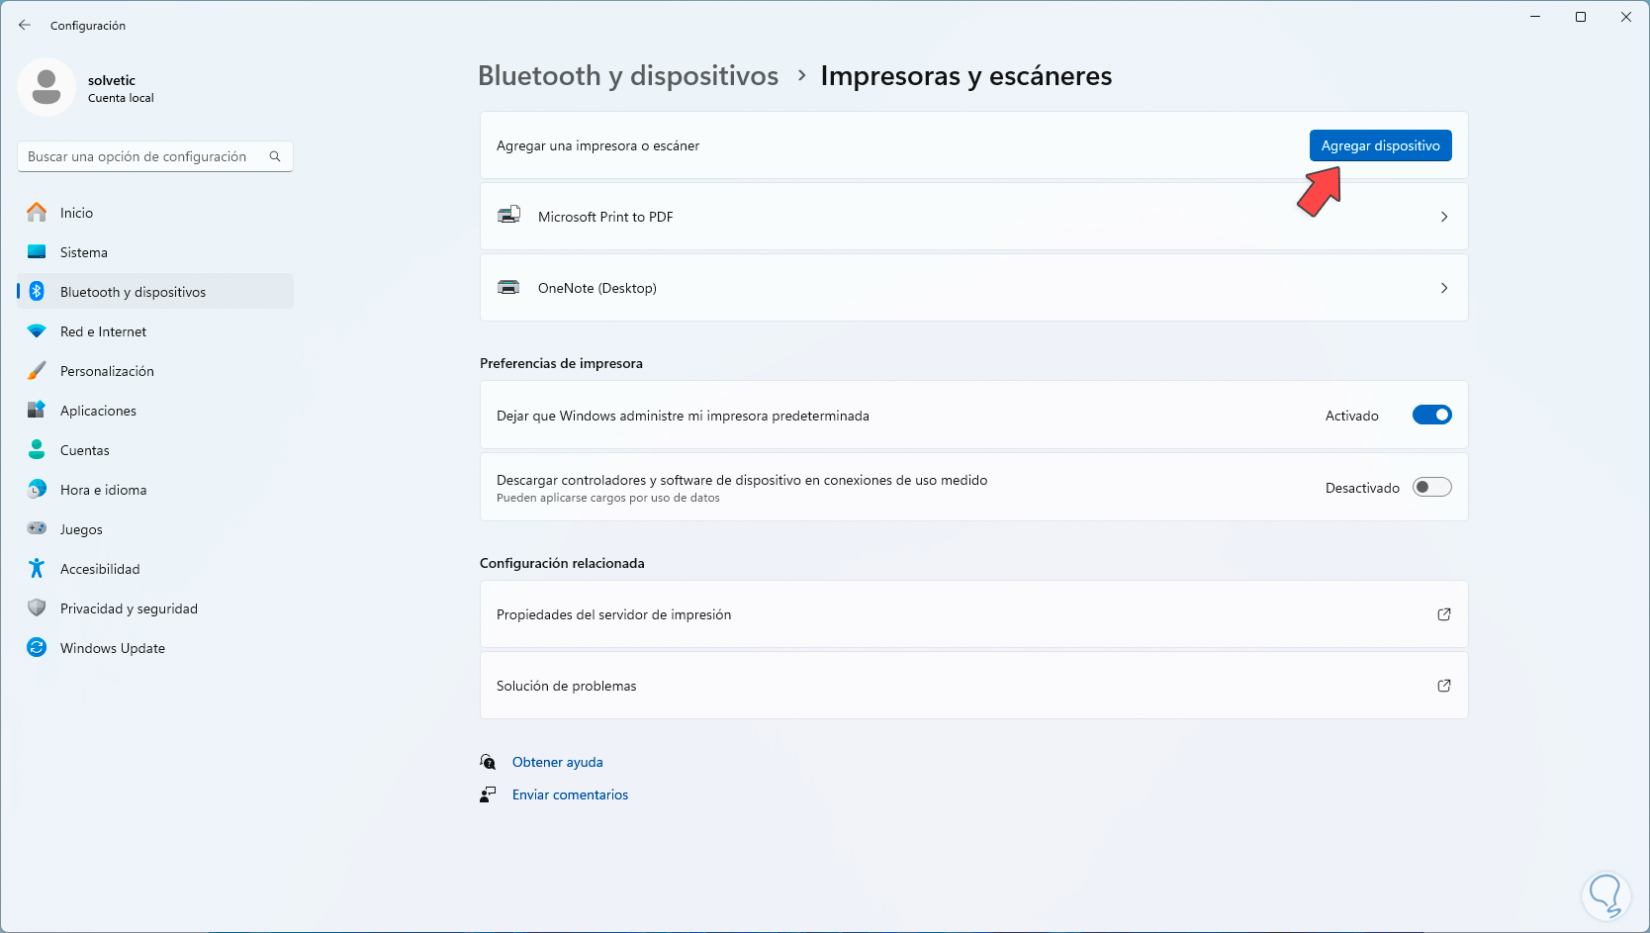
When we click on “Add device”, we can see that the search for printers begins:
Step 4
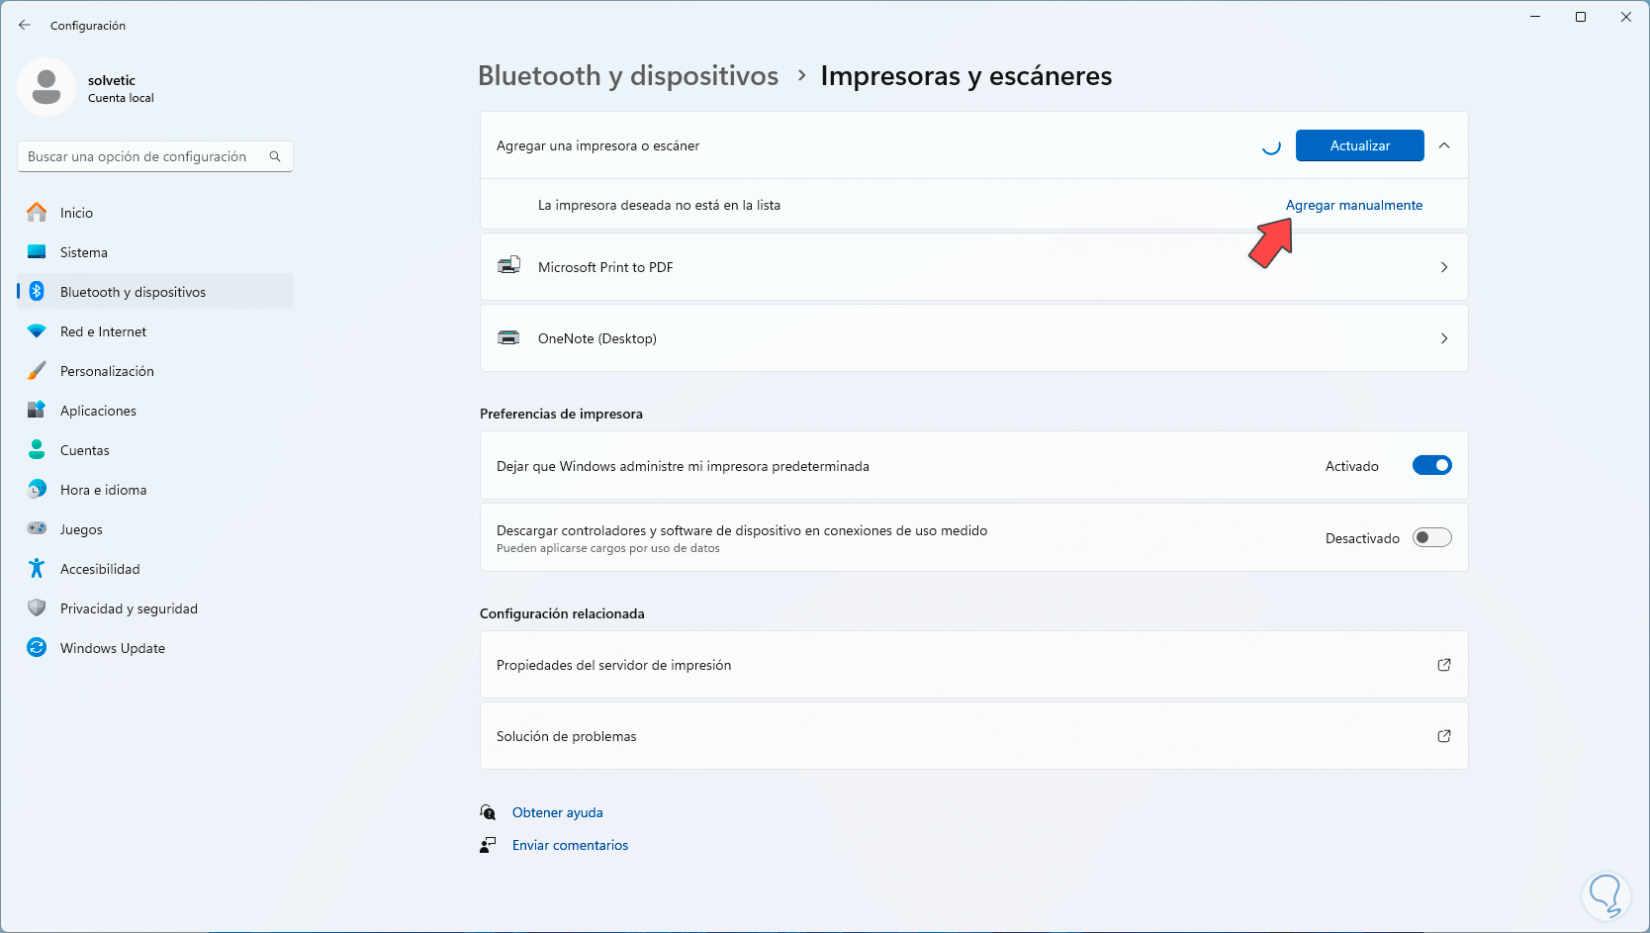
There, in a moment, the “Add manually” line is activated; we click there to access the various usage options:
Step 5
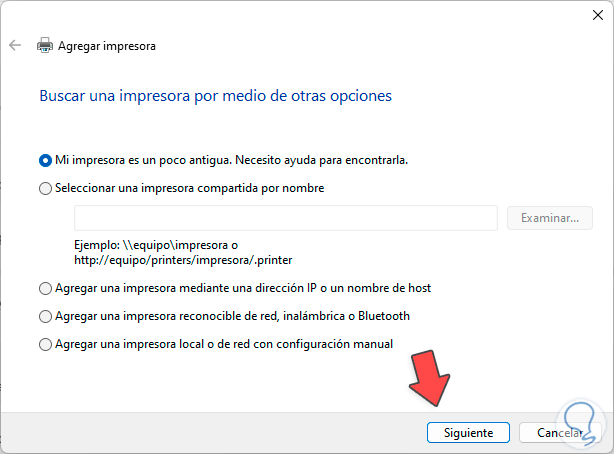
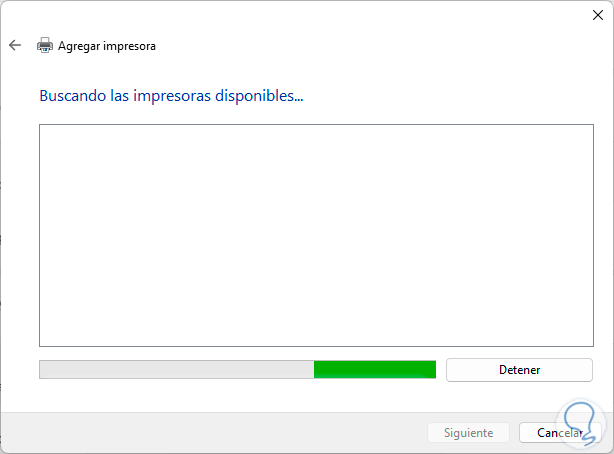
First of all, we activate the “My printer is a little old” option, click “Next” and we hope that the search will proceed based on the drivers hosted in Windows 11:
Step 6
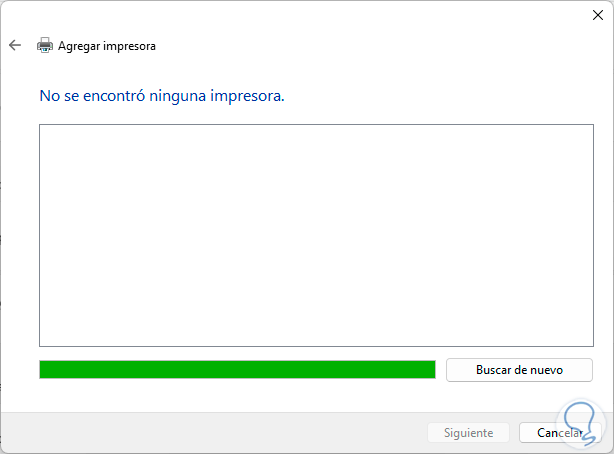
We wait for the process to finish:
Step 7
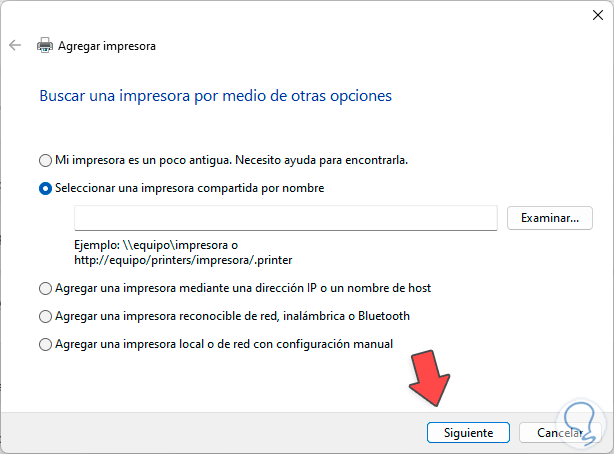
Now, we activate the “Select a shared printer by name” option:
Step 8
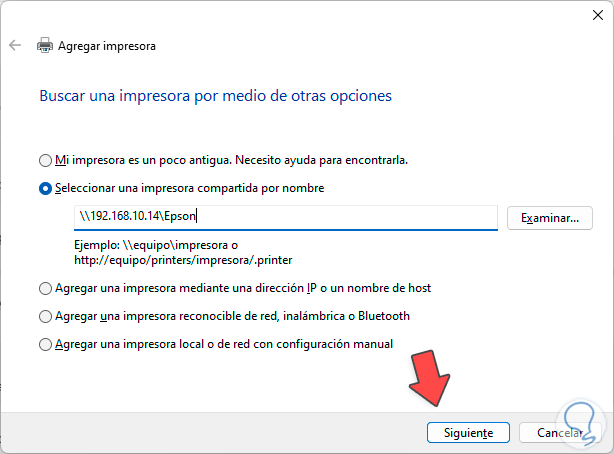
There we can enter the IP address or the path of the printer share on the local network:
Step 9
We click Next and wait for the search to be carried out. After this, we activate the “Add a printer using an IP address or host name” box:
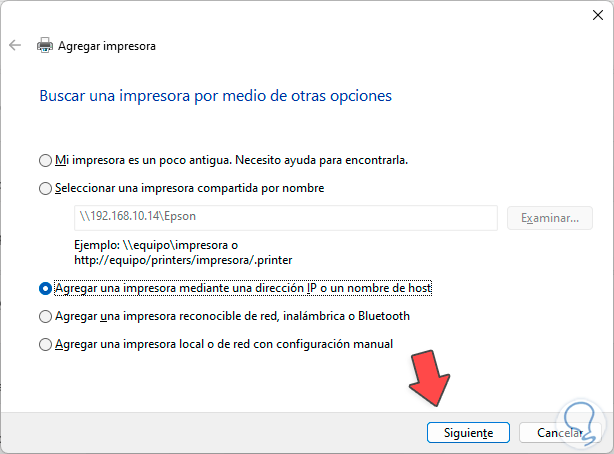
Step 10
We click on “Next”
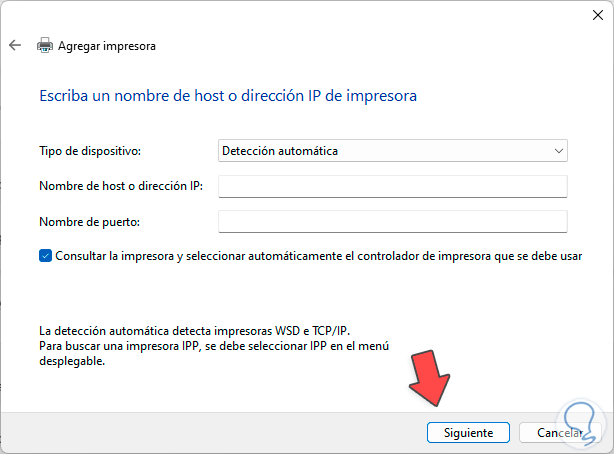
Step 11
In “Device type” we select the type of media to use, some of the options are:
Then we complete the fields with the respective values and wait for it to finish.
Step 12
After this, we will activate the “Add a recognizable network, wireless or Bluetooth printer” box:
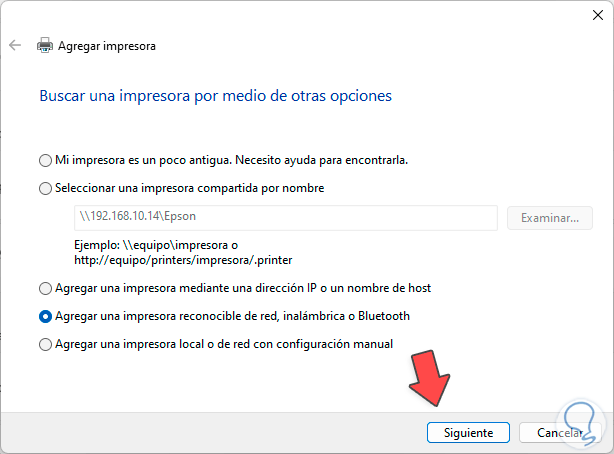
Step 13
By clicking “Next”, this search process will begin in nearby networks (in the case of Wi-Fi) or in the local network:
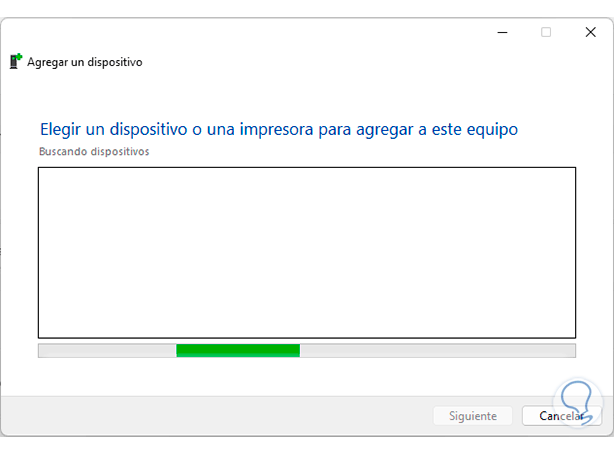
Step 14
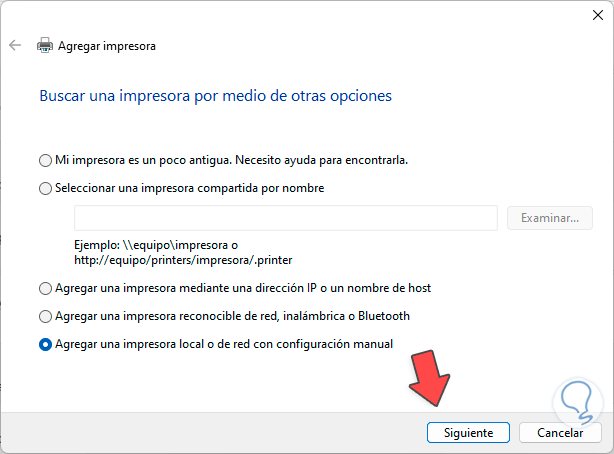
Finally, it is possible to use the “Add a local or network printer with manual configuration” option:
Step 15
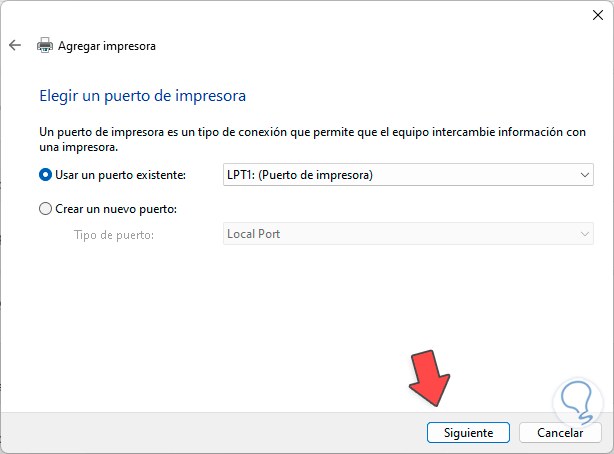
By clicking “Next” it is possible to select the port to use or create a new one:
Step 16
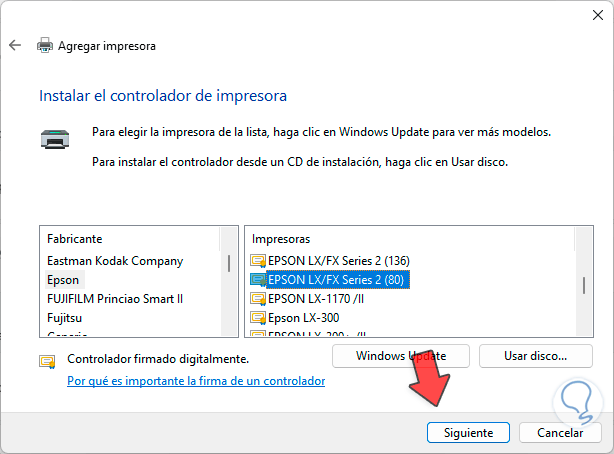
Then we select the manufacturer and model of the printer:
Step 17
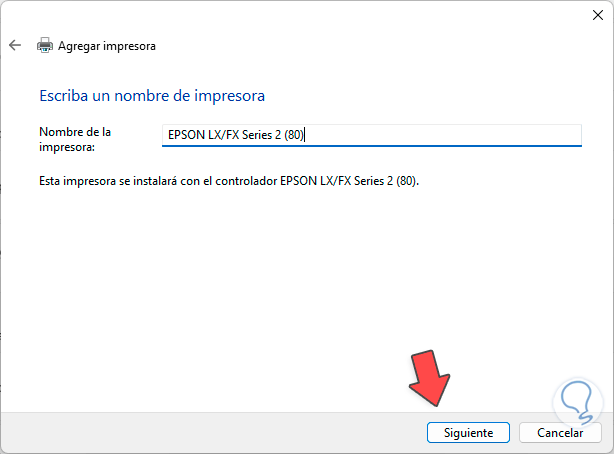
We click “Next” to assign a name to the printer:
Step 18
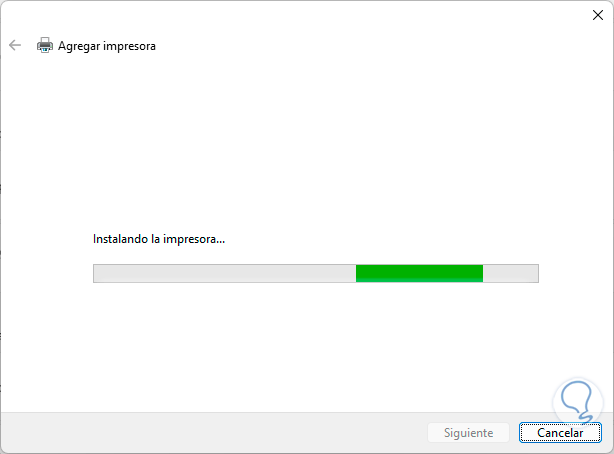
Then the installation process will begin in Windows 11:
Step 19
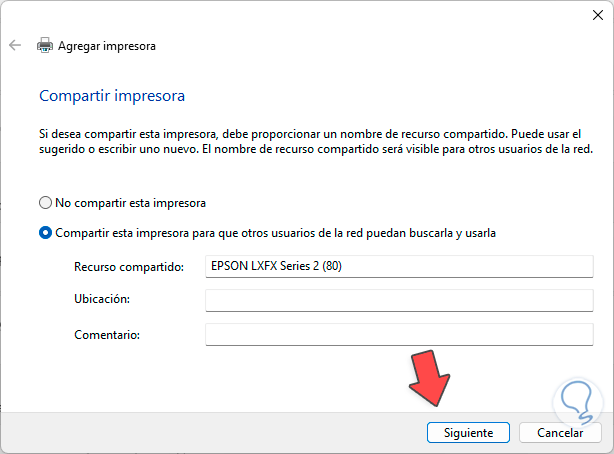
When this is completed, we can share it or not:
Step 20
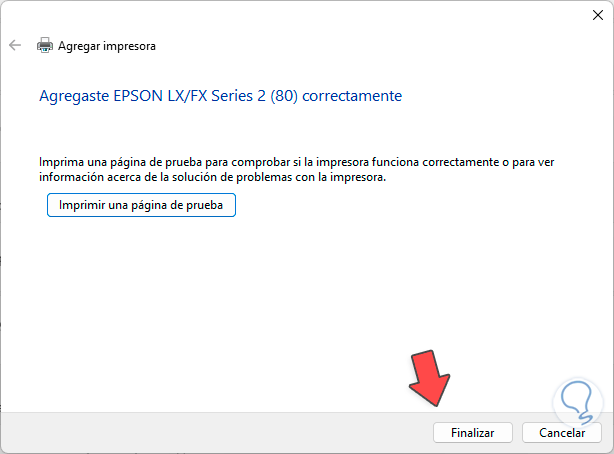
By clicking “Next” we see that the process has completed correctly:
Step 21
We click on “Finish” and our printer will be available:
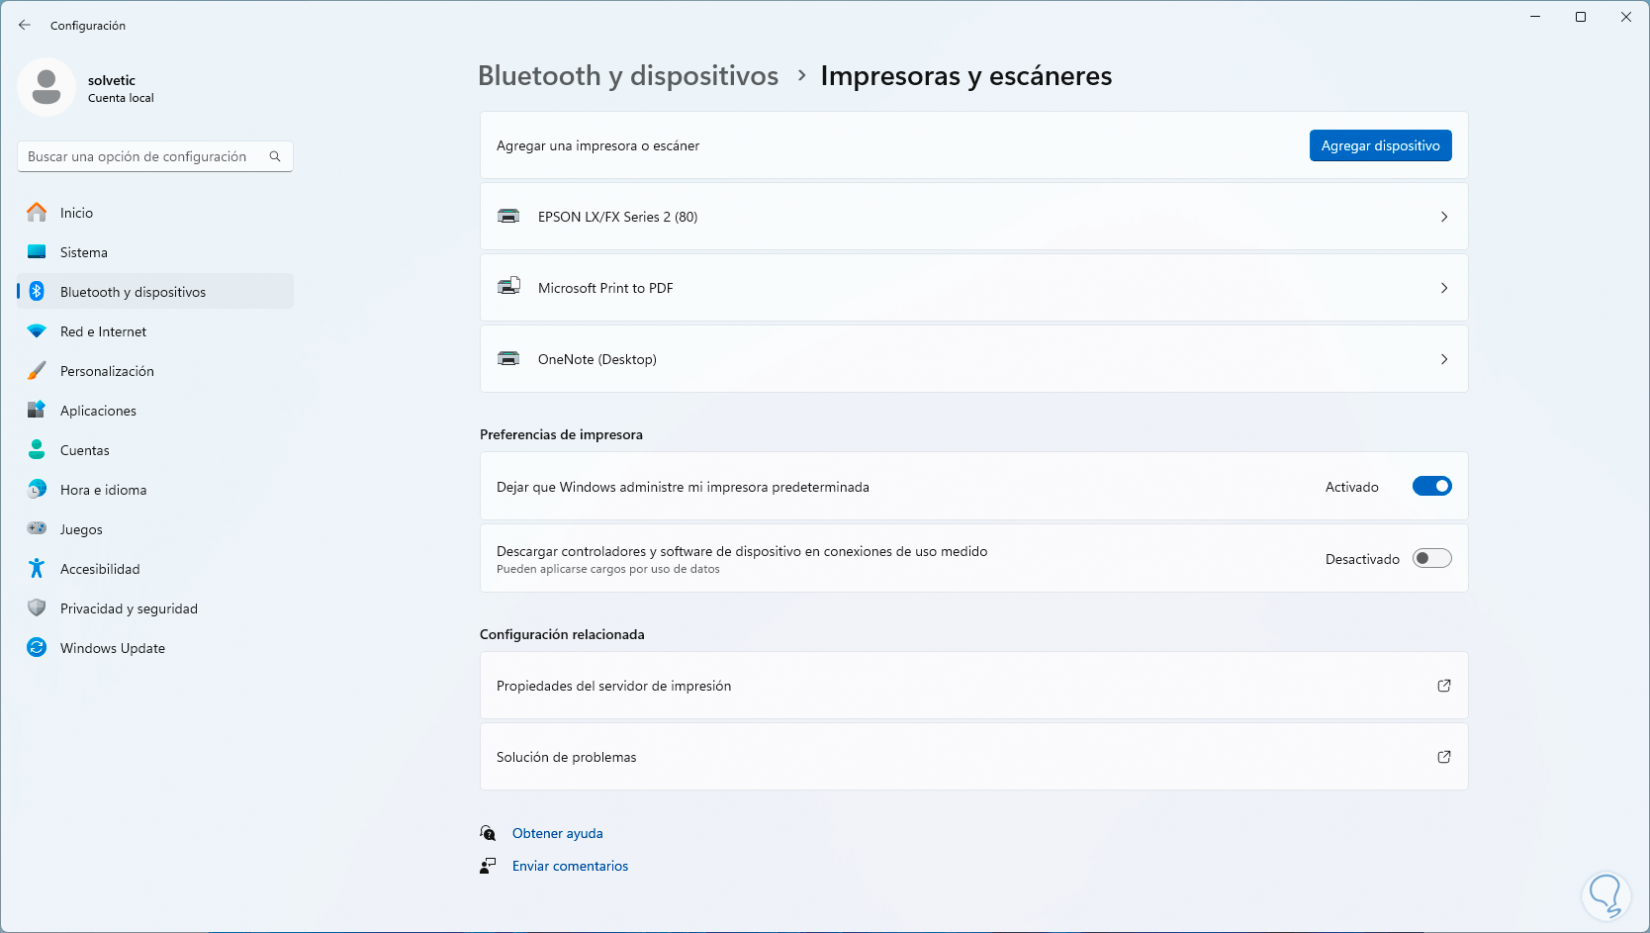
This is the way we can install a printer in Windows 11 and have access to all its advantages..