Windows operating systems have been developed in order to allow and facilitate interaction between different computers in order to share multiple elements, thus facilitating teamwork. By default, when our computer is connected to a local network , Windows 10 automatically creates a new workgroup called WORKGROUP..
From this point, it will be possible to join any existing work group in the local network or join a new domain if we are in a corporate environment, it should be noted that, if required, we will have the opportunity to create a new work group in Windows 10
These workgroups allow different teams to be joined using logical groups and from there have the option to share files and printers.
The work groups do not serve to centralize or manage permissions of the equipment added in the group, therefore, the administration of both users and privileges must be done individually in each of the teams that make up this work group. Each of the teams assigned to a work group have a peer-to-peer relationship with each other and must be managed locally..
The characteristics of a work group are:
- The relationship between all teams in a work group is equal to equal, that is, no team in the group has control over another
- The number of teams must not exceed 20 teams, for reasons of control and resources, if you exceed this limit a domain is recommended
- In order for users of a work group to be able to see each other, everyone must be on the same local network
- Each team belonging to the work group must have its own local user account
- All users of a local network can belong to a work group without requiring permission or entering a password, when creating a shared resource we can define how users will have access.
To join a workgroup, simply change the default name of WORKGROUP to a name that is available on the local network, but it is necessary that all computers in the workgroup have a unique team name.
Windows 10 gives us the opportunity to edit the name of the workgroup using various forms, but it is recommended that, for the new workgroup name, not use spaces or any of the following special characters: `~ @ # $% ^ & () = + [] {} | ; :, '' <> /?
TechnoWikis will explain how to edit the name of the workgroup in Windows 10..
To keep up, remember to subscribe to our YouTube channel! SUBSCRIBE
1. How to change workgroup name using Windows 10 system properties
Step 1
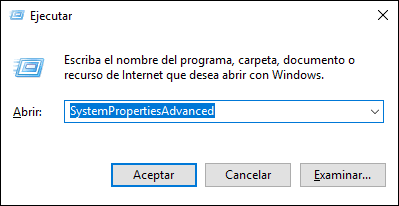
To start this method, we will use the Windows + R key combination and execute the following:
+ R
SystemPropertiesAdvanced
Step 2
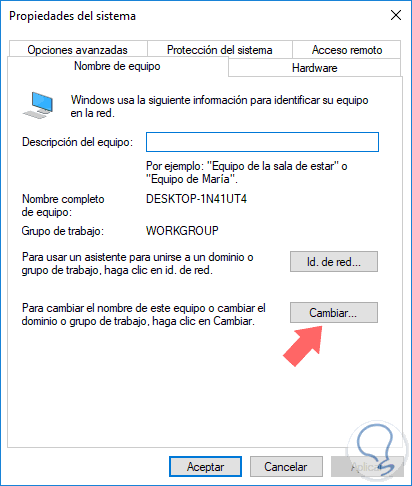
In the window that appears we go to the Name of the team section where we will see the following:
Step 3
As we see the default name of the workgroup is WORKGROUP, there we click on the Change button and in the Workgroup field we will enter the new desired name:
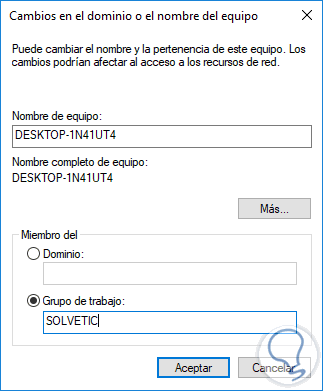
Click OK and it will be necessary to restart the computer to apply the changes.
2. Rename the workgroup from the Windows 10 command prompt
Step 1
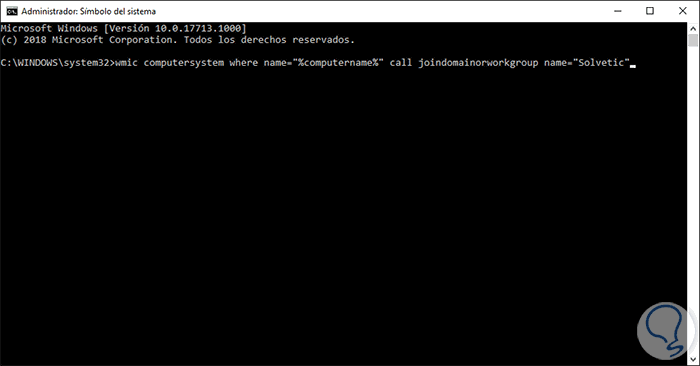
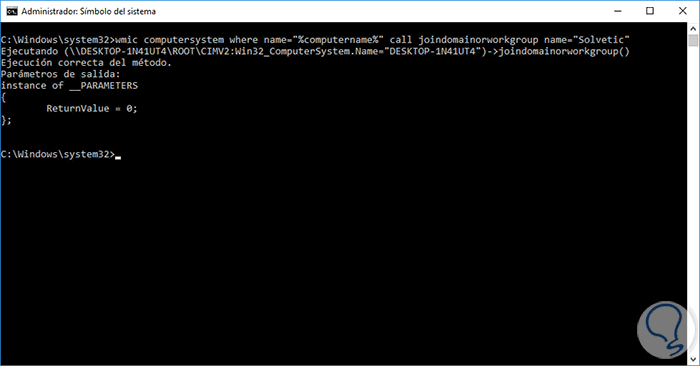
To use this method we access the command prompt as administrators and there we execute the following syntax:
wmic computersystem where name = "% computername%" call joindomainorworkgroup name = "Group_name"
Step 2
Press Enter and restart the system to apply the changes.
3. How to change the name of the workgroup from Windows PowerShell
Step 1
In this case we access Windows PowerShell as administrators and execute the following command:
Add-Computer -WorkGroupName "Group_Name"
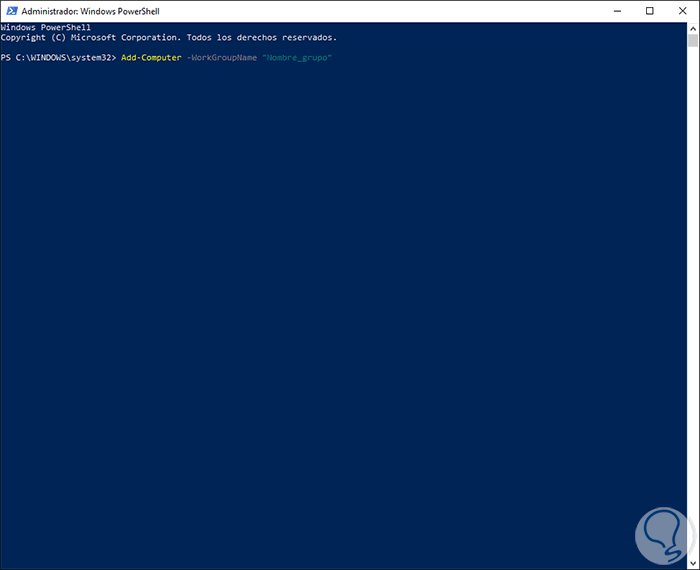
Press Enter and it will be necessary to restart the system to apply the changes.
Step 2
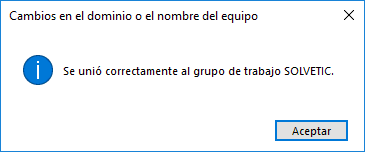
With any of these methods we will see that the team joins correctly to the new group created:
Step 3
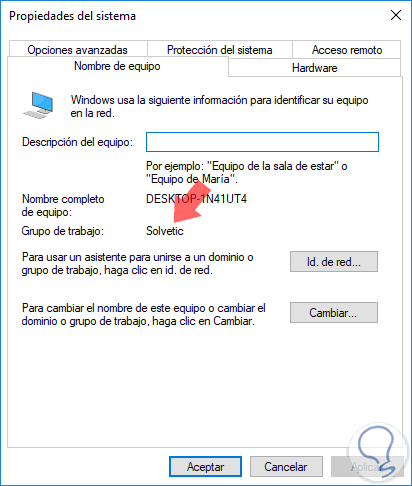
Once the system is restarted we can see that we are in the new group created:
Thus, with any of these methods it will be possible to modify our working group in Windows 10 in a simple and functional way.