When we decide to use a Microsoft account as an authentication method in Windows 10 we can see that the full name is always displayed at the time of logging in or blocking the computer: Normally this is a typical Windows 10 process and millions of users are at ease with this, but many others, especially for security or privacy reasons, wish that their full name not be displayed..
One of the simplest ways to avoid this is to modify the name in the Microsoft or local account, so that later Windows 10 will download automatically and use this information on the system screen. Next, we will see some practical solutions for this.
To keep up, remember to subscribe to our YouTube channel! SUBSCRIBE
1. Rename Microsoft account using the Configuration utility in Windows 10
This is one of the most practical options because Configuration is a kind of central console for editing system parameters.
Step 1
To access it we go to the Start menu and there we select "Settings":
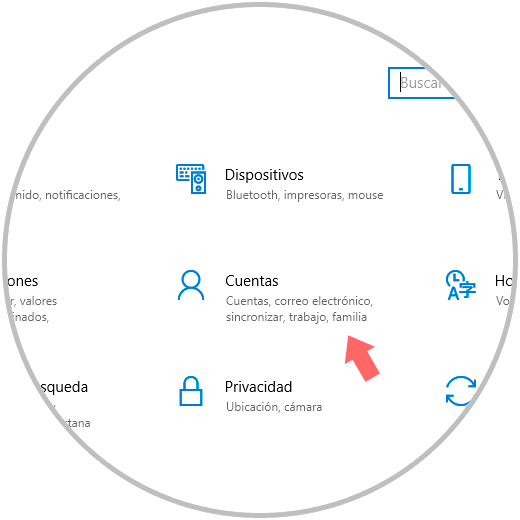
Step 2
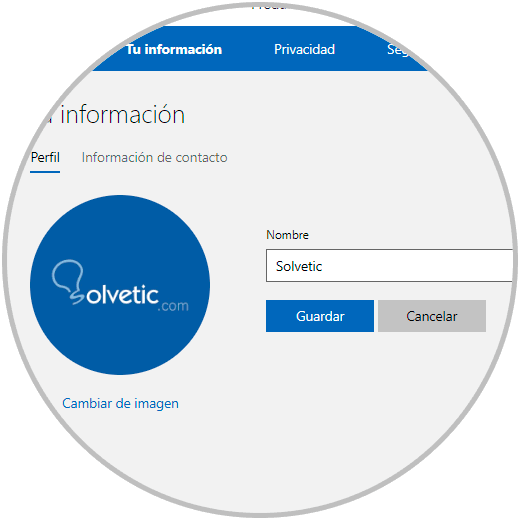
There we click on the “Accounts†category and in the new window we go to the “Your information†section where we will see the following:

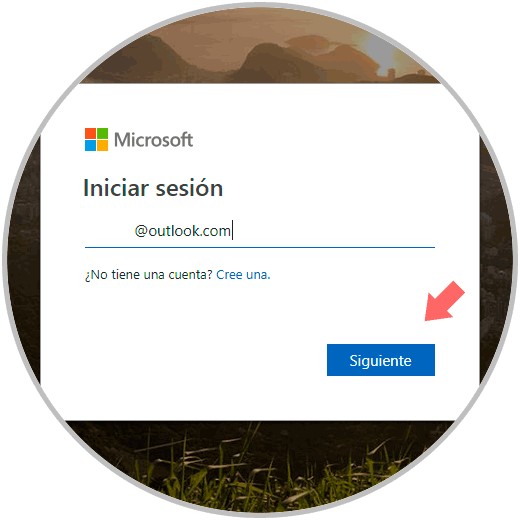
Step 3
There we click on the “Manage my Microsoft account†line and in the window displayed it will be necessary to log in if it is not already:
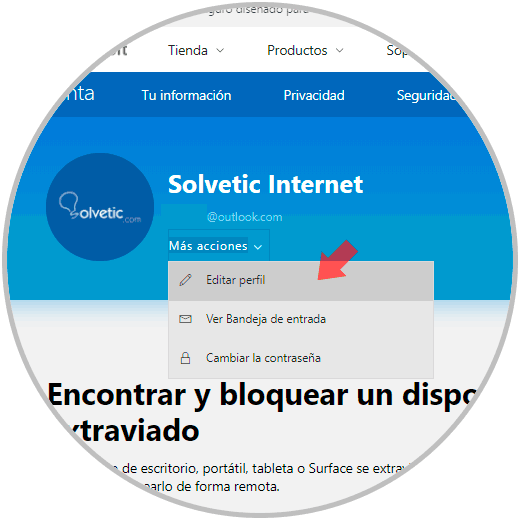
Step 4
Once logged in, click on the “More actions†line located under our profile picture and select the “Edit profile†option:
Step 5
The following will be displayed:
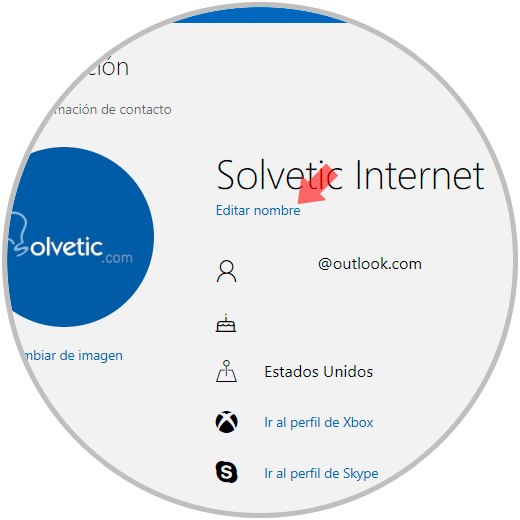
Step 6
There we click on the “Edit name†line and we will see the following window where we will enter the desired name. Click on the "Save" button to apply the changes and proceed to restart the system so that everything takes effect.
2. Rename local account using Control Panel in Windows 10
Step 1
The next alternative to use is to use the Control Panel and for this we will access it and see the following:
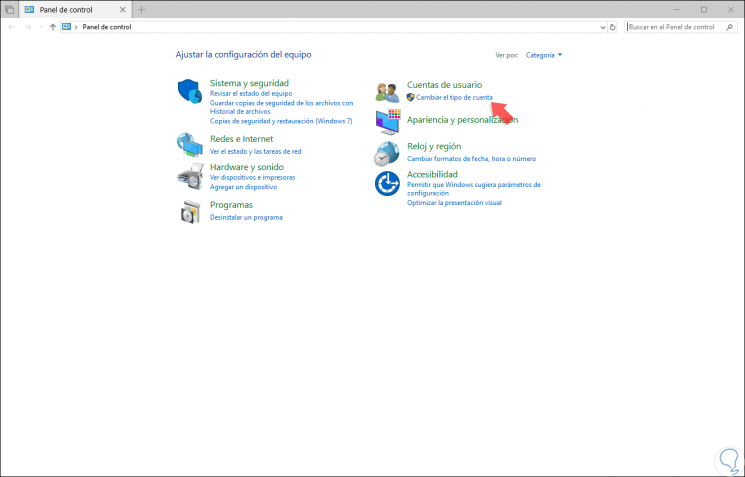
Step 2
There we click on the “Change account type†line and in the new window we will select the account to edit:
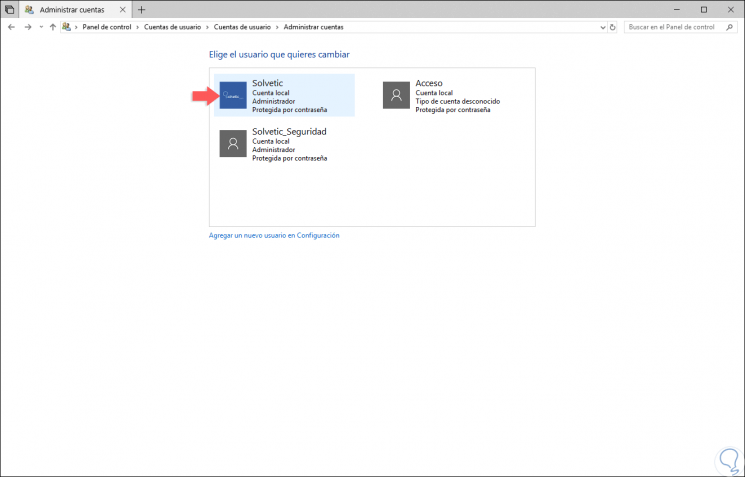
Step 3
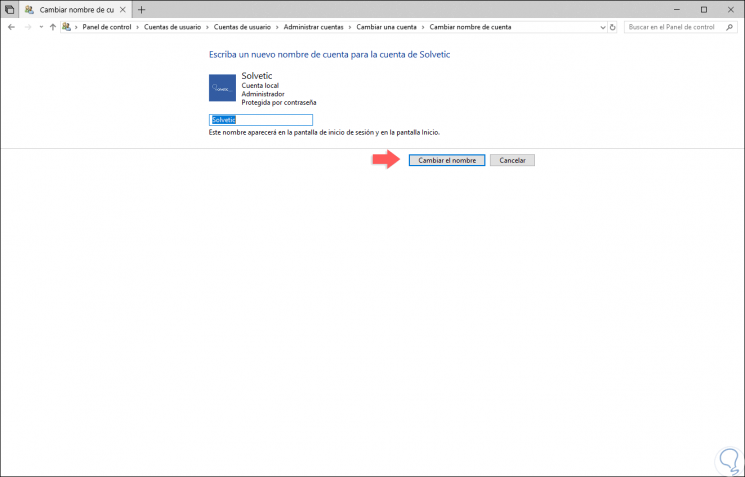
Now, in the new window, we will click on the line "Change the name of the account":
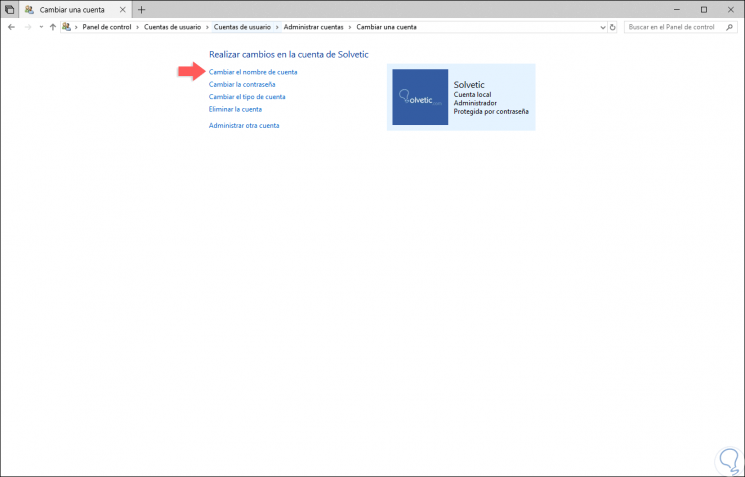
Step 4
In the new window we will enter the desired name and click on the “Change name†button to apply the changes:
3. Rename local account using User Account Manager in Windows 10
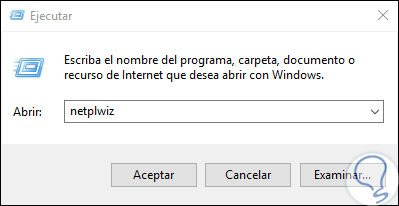
Step 1
To make use of this alternative we must use the following key combination and there execute the following command:
+ R
netplwiz
Step 2
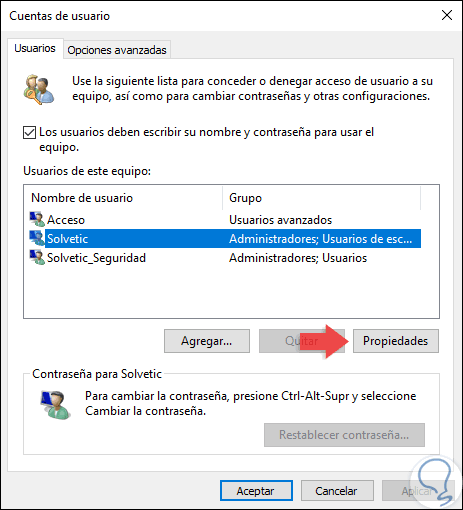
Press Enter or Accept and in the window that will be displayed select the user to edit and click on the "Properties" button:
Step 3
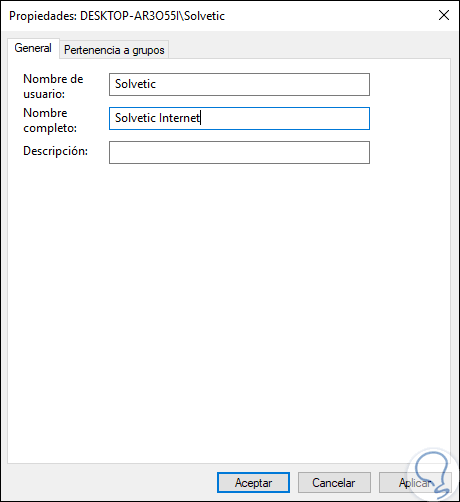
Now, we enter the new name in the "Full Name" field. Click on Apply and Accept to save the changes.
Thus, we have seen several alternatives to establish the new username to be deployed in Windows 10..