Microsoft Word 2016 is one of the most complete and comprehensive office automation solutions developed by Microsoft and one of its functions that we rarely use are the automatic content tables which will facilitate our action within the document, remember that a table of contents in Word is based in the titles of the current document..
We can define a table of contents as a way to show how the hierarchy of titles has been structured under themes or sub-themes that make up our document. Thanks to this table we can quickly see an organization of the contents through an index. This is usually at the beginning of the document and is a main guide to consult it as soon as you access it, it usually contains links that take us to each part.
To keep up, remember to subscribe to our YouTube channel! SUBSCRIBE
Create Automatic Table of Contents in Word 2016
Step 1
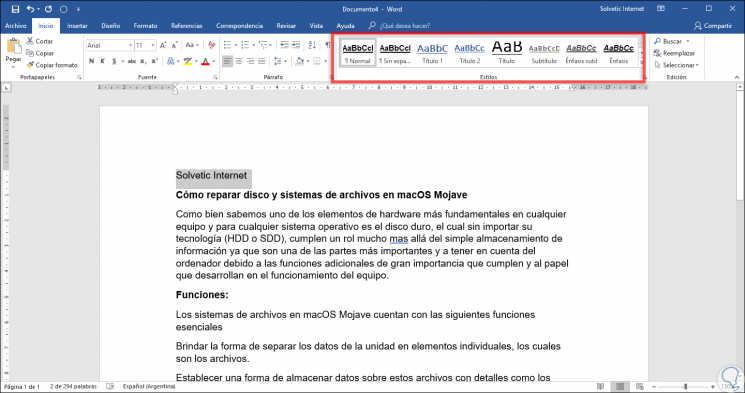
To start this process we will go to the document where you have the information, select the first desired title and go to the “Start†menu and in the “Styles†group we click on “Title 1â€:
Step 2
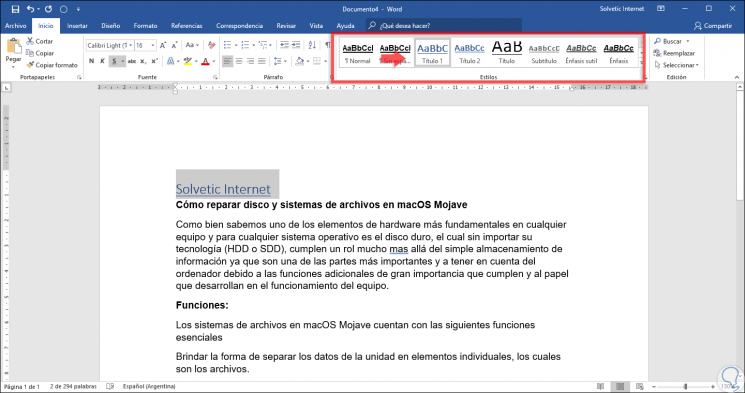
The selected text will look like this:
Step 3
If we wish we can focus this title for a better presentation. Now we will go to the following text and this time we select the option “Title 2â€:

Step 4
We repeat this same process with each of the desired titles.
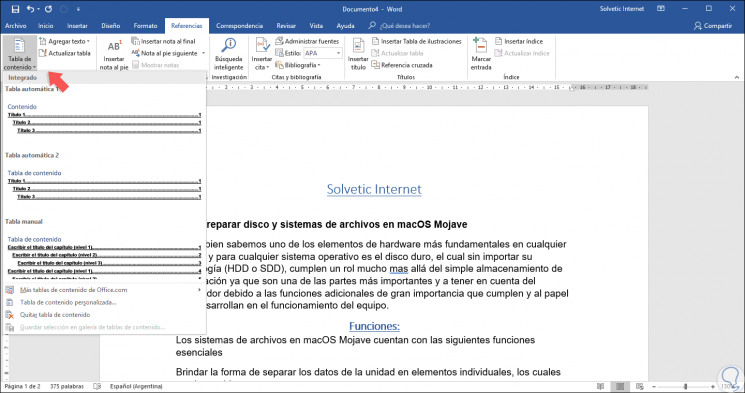
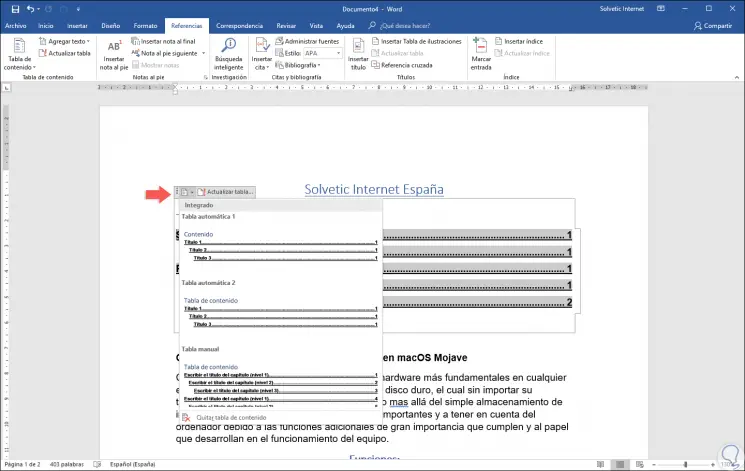
Now we go back to the top of the document and under the main title we give Enter to create a space and there we go to the "References" menu and in the group "Table of contents" click on the "Table of contents" icon and we will see the next:
Step 5
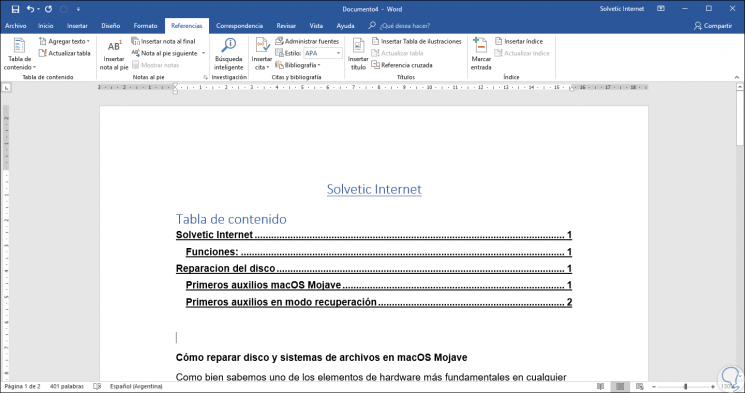
We can see that we have two alternatives of automatic tables, select table 2 and see the following:
Step 6
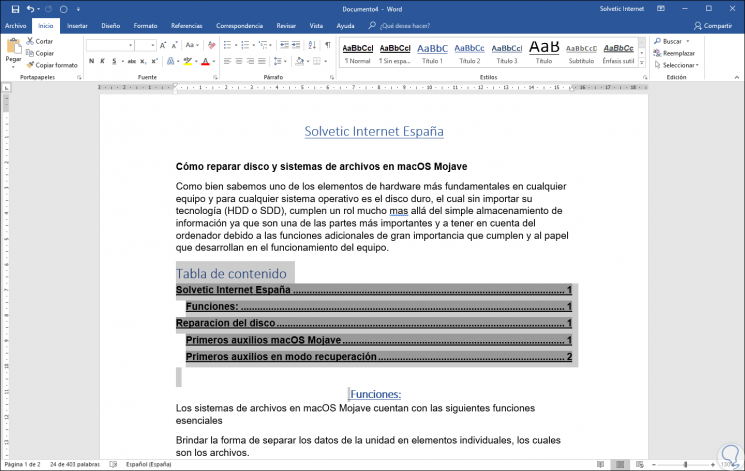
If we hover over any of the lines we can use the following combination to go to that link:
+ Clic Ctrl + Click
Step 7
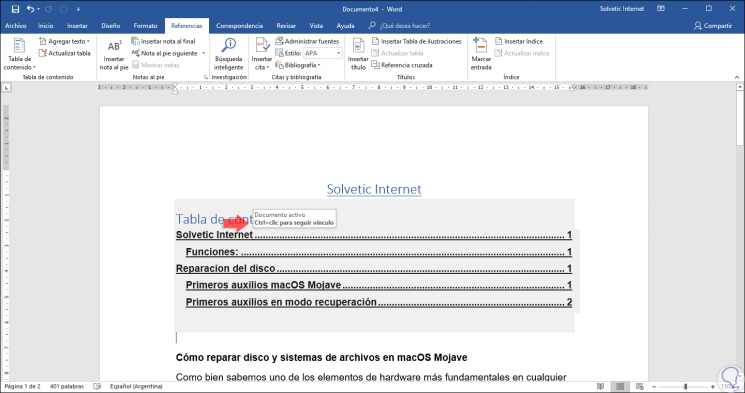
On the right side we find the page number where this link is located. In case we make any changes to any of the titles, just click on the automatic table and there select the option "Update table":
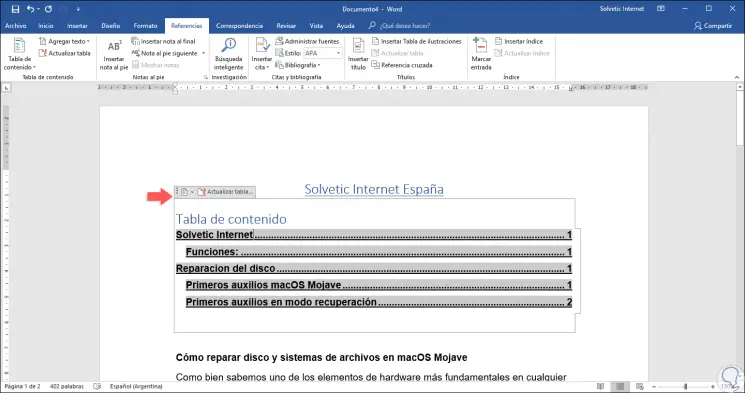
Step 8
The following message will be displayed:
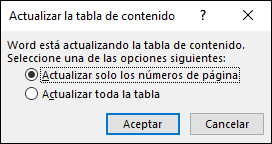
Step 9
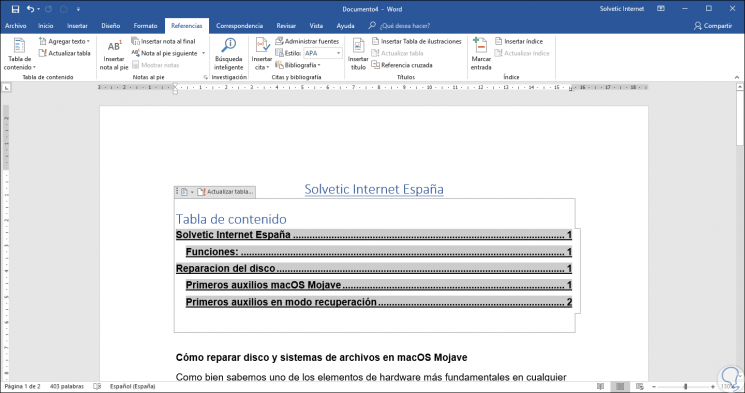
There we define what type of update to be executed, the whole table being the most ideal, when doing this we will see the result with the new text added:
Step 10
From the side icon we can select another table layout:
Step 11
And from the first icon, from left to right, we can move the table to some other place in the document:
Step 12
Like any text in Word 2016, we can apply new fonts, sizes or designs as needed.

As we see, the automatic tables of Word 2016 become a great ally when it comes to professional and complete presentations..