Currently, and thanks to the Internet, the flow of information is constant and we can connect and be informed of the news that surrounds us and the topics that interest us practically in real time. Internet browsers play a fundamental role in this since they are the platforms we use to access this information and that, depending on which ones, can offer us different characteristics..
For this reason and many other reasons, website developers create and incorporate functions that are responsible for sending notifications to our desktop using the web browser regardless of what it is: Google Chrome , Safari , Firefox Quantum and others.
This is done with the aim that when we accept to receive notifications from a specific website , we can receive the latest news or developments without being aware of it, even when we are not visiting that site or are not on the computer. This makes us always be informed whatever our circumstance..
Although as an initial point this may be practical to avoid losing any detail of what happens in our preferred sites, at some point it can become a headache when receiving constant notifications that can alter our concentration and that, depending on what situation, may even become annoying. It is for this reason that today TechnoWikis will explain how to manage these types of notifications generated by websites in Google Chrome.
1. Basic notification settings in Google Chrome
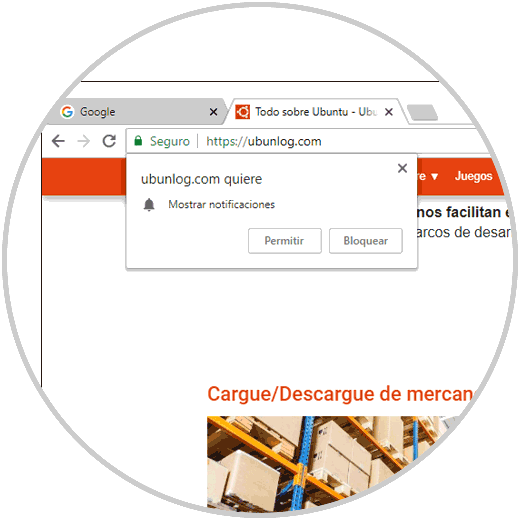
When we access a website that generates notifications, a pop-up window will be displayed at the top where we can allow or not allow such notifications.
Thus, if we click on the "Allow" button, every time that site generates a notification, it will be displayed in the notification center and if we click on the "Block" button we will prevent them from being displayed..
2. Notification settings for each website in Google Chrome
This option applies to sites that have been blocked and we want to allow notifications or vice versa, but its process is simple.
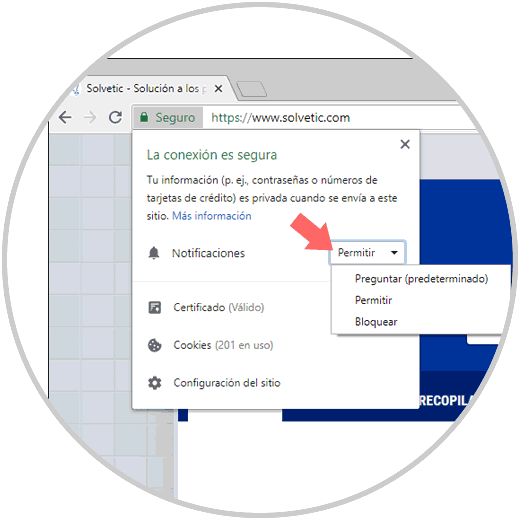
To do this we go to the website to manage and click on the "Safe" button located on the left side of the URL. There we will see a field called "Notifications" with the current permission of that site.
We can click on it to set any of the following options
As we select this will be the reaction of notifications on that site.
3. How to manage notifications in Google Chrome
Now let's see how to centrally manage all notifications in Google Chrome.
Step 1
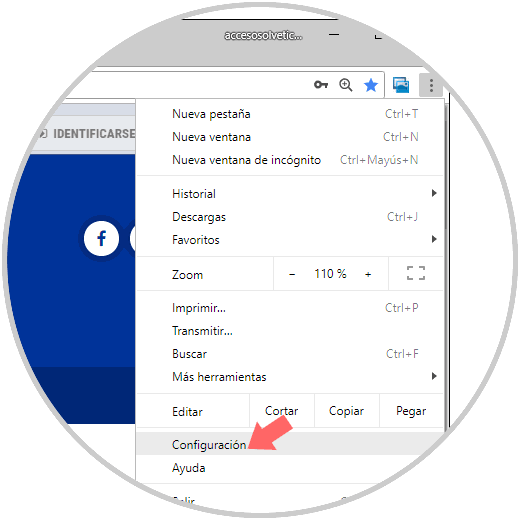
To do this, click on the "Customize and control Google Chrome" menu and select the "Settings" line:
Step 2
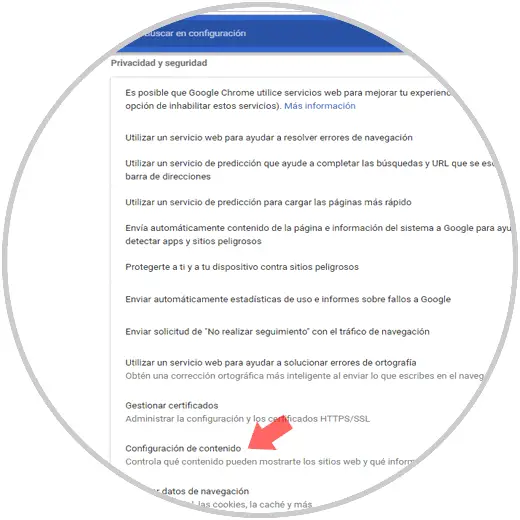
In the displayed window we go to the bottom and click on "Advanced". There we go to the "Privacy and security" section and click on the "Content settings" category:
Step 3
In the new window displayed we go to the "Notifications" section:
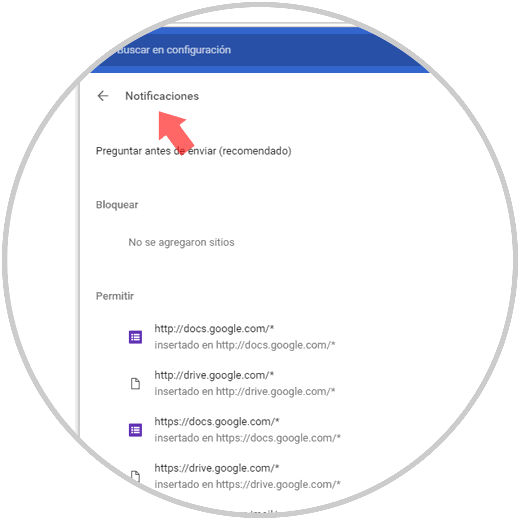
By clicking there we will have the following options
- Activate or not the Ask switch before sending in order to display the pop-up window
- View or allow sites to receive notifications
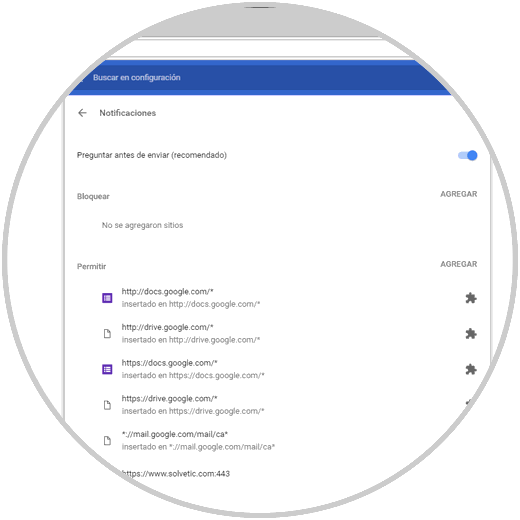
Step 4
First, if we want to add a specific site to block your notifications, click on the "Add" line and enter the URL or use the wildcard * to assign all the sites that contain that domain. Click on the "Add" button
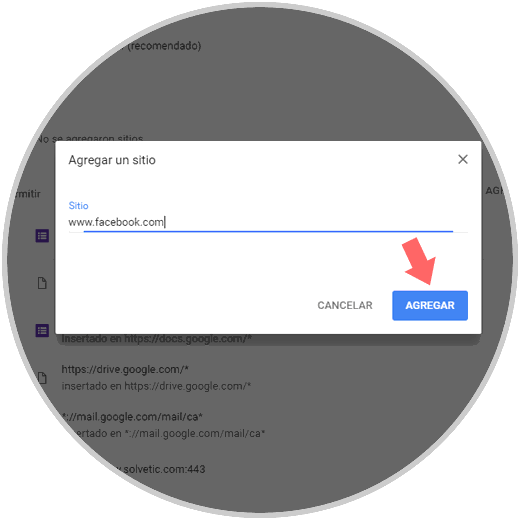
Now we will see this added site: This same process can be done with the sites we want to allow.
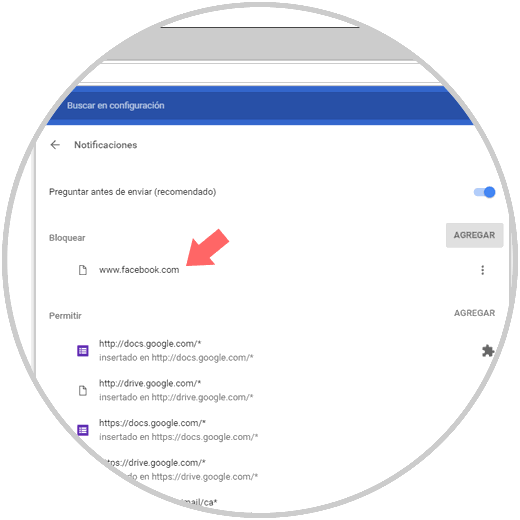
Step 5
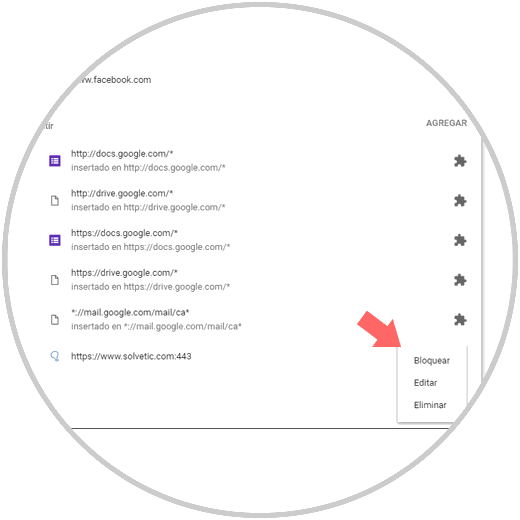
From this same route it will be possible to define the permissions of the stored sites. To do this, simply click on the side menu and select one of the following options.
To block
Block notifications for that particular site
Allow
Enable notifications for that website
Edit
It allows us to edit the parameters of the selected website
Step 6
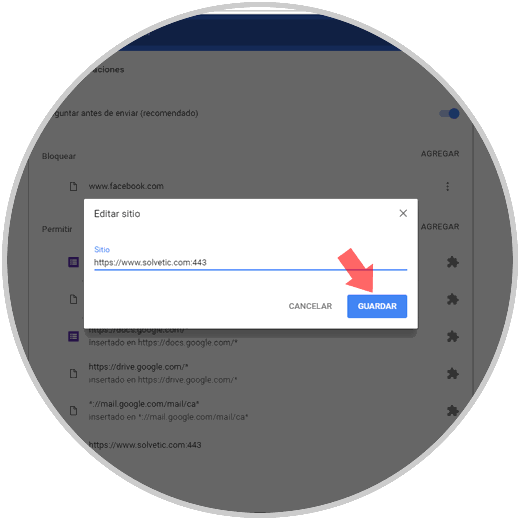
Now that we know the blocking and enabling options, if we click on "Edit" we will see the following: There we can edit what is necessary for the mentioned website and save the changes by clicking on the "Save" button.
It's that simple we can have control over notifications in Google Chrome.