Outlook is one of the most used mail platforms around the world thanks to its features, dynamism and versatility, remember that Outlook is owned by Microsoft, which is why it is cataloged as a secure and useful application for millions of users..
Now, if Outlook is one of the most used email platforms , Android, owned by Google, is one of the most used operating systems on millions of devices and is complemented by hundreds of new features and to allow both the Android system and the Outlook platform remain in constant communication for the end user a correct synchronization must be implemented, this so that everything that is done on the Outlook platform on any computer can be replicated in a short time on the mobile and thus be at So much of everything that happens without losing any detail.
Through this tutorial we will learn to configure and synchronize correctly our Outlook email account on Android..
1. How to download or update the Gmail application on Android and create an account in Outlook
Step 1
When we use Android, by default the Gmail application must be installed, but if we accidentally deleted it, we can download it for free from the Play Store in the following link:
Gmail
Now, if we already have it installed we can search if it has any kind of update.
Step 2
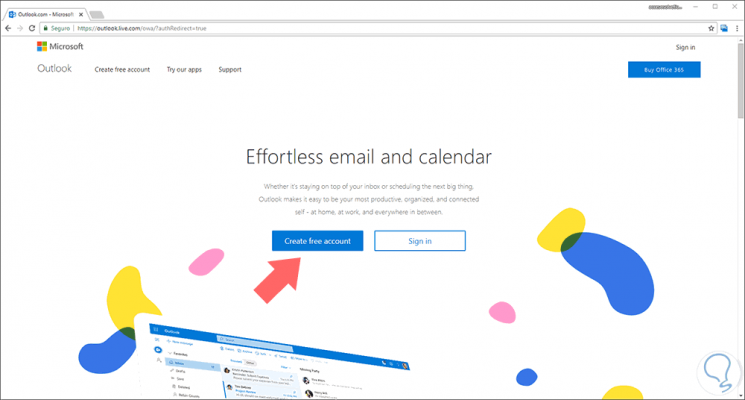
The next step is to create, if we do not have it, our Outlook account in order to perform the correct synchronization process with Android, for this we will visit the following link:
Outlook
Step 3
There we can click on the Create free account button to create a new account or click on the Sign in button to log in:
2. How to log in to the Gmail application on Android
Step 1
Once we have created or accessed our Outlook account, we go to the mobile and log in to Gmail with a Google account, and there we click on the menu icon and in the displayed options select Settings:
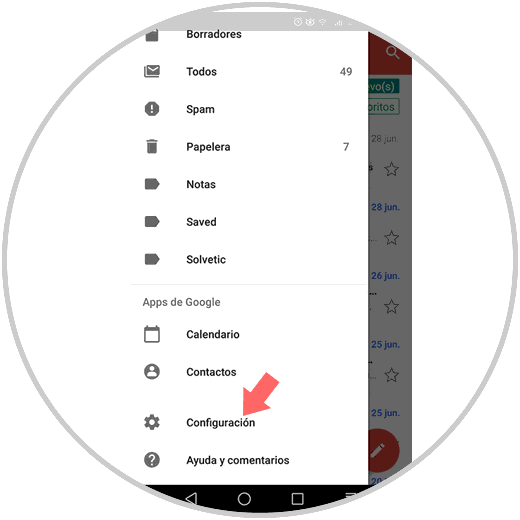
Step 2
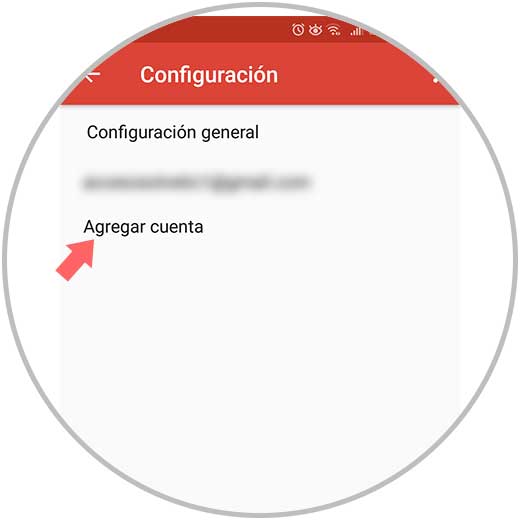
Clicking there will display the following window where we select the Add account line:
Step 3
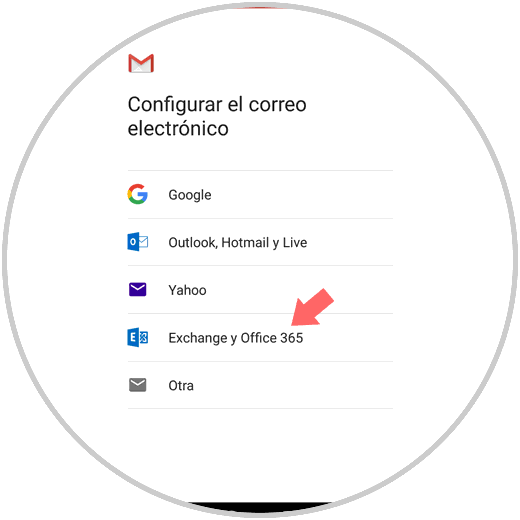
In the next window we will find a list of email providers compatible with the Gmail application, in this case we must select "Exchange and Office 365" and we should not choose the options "Outlook, Hotmail and Live" because they make use of POP e IMAP that are not compatible with calendar and contact synchronization:
Step 4
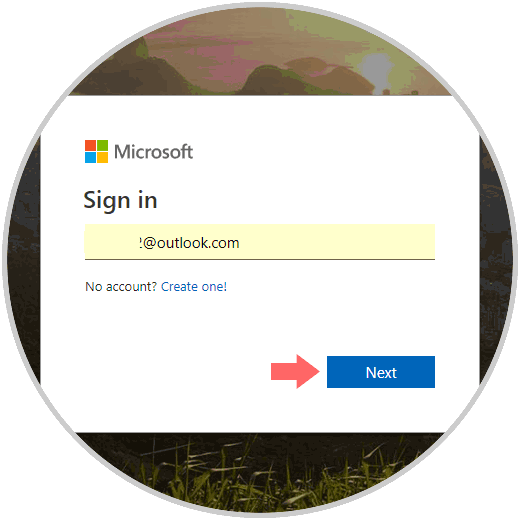
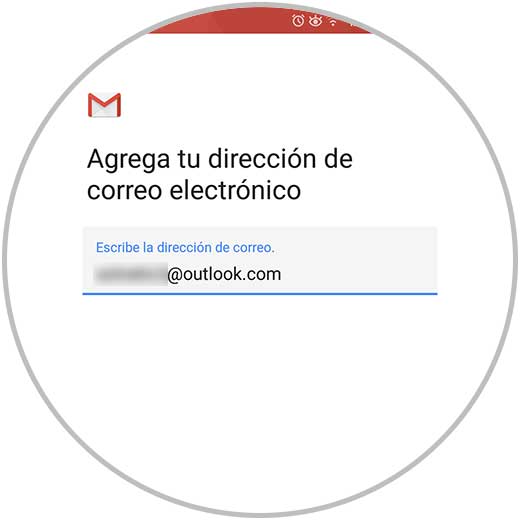
Once we select Exchange and Office 365, we will enter the email address of Outlook that was created in the previous step:
Step 5
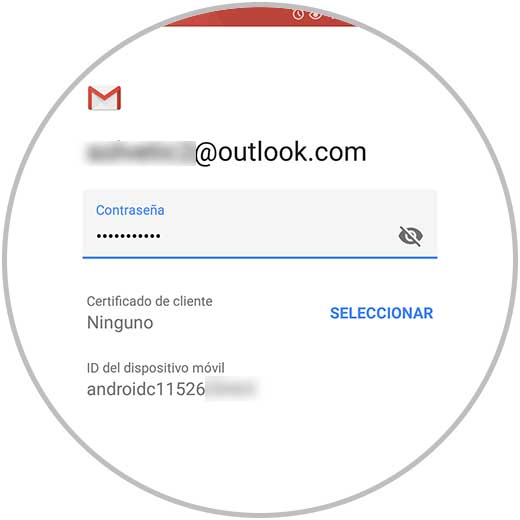
Click on the Next button and then enter the account password:
Step 6
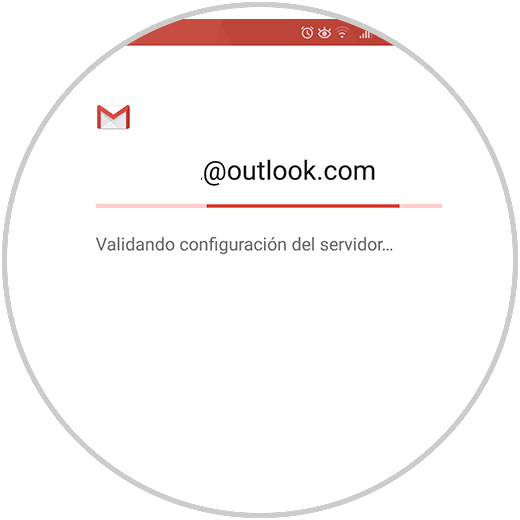
Click on the Next button again and we will see that the validation process of the selected account starts:
Step 7
Once the configuration is validated, we will see the following message displayed:
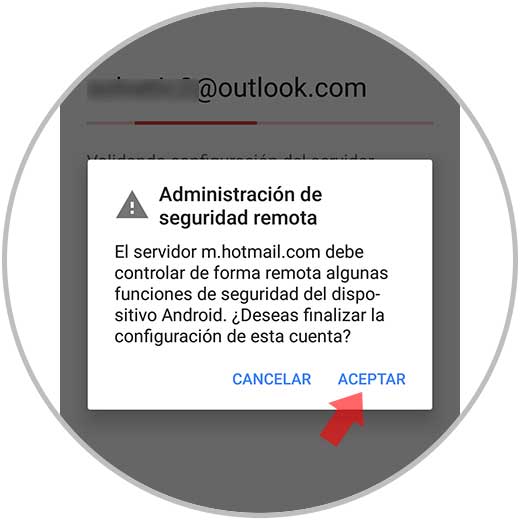
Step 8
There we click on the Accept option so that synchronization can be carried out comprehensively.
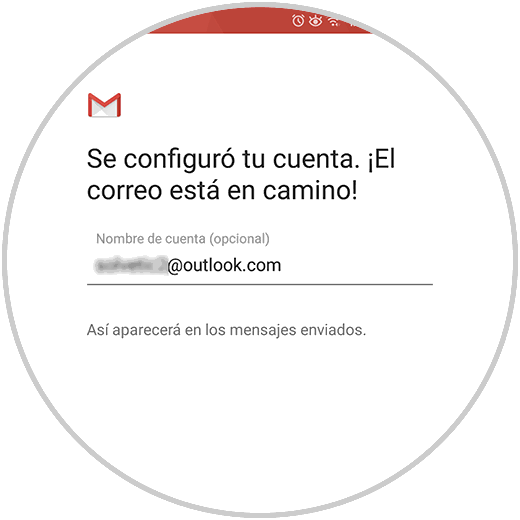
When everything has been configured we will see the following. Click Next to exit the wizard.
3. How to set f reminders to force Outlook Android sync
By default, when we have finished the configuration process, the contacts and calendar will be synchronized immediately, but sometimes we must force such synchronization.
Step 1
For this we will create one or two events in the Outlook calendar on the desktop, to do this we will click on the calendar icon located in the sidebar if we use the Outlook beta:
Step 2
Or click on the calendar icon located at the bottom if we use the traditional version of Outlook:
Step 3
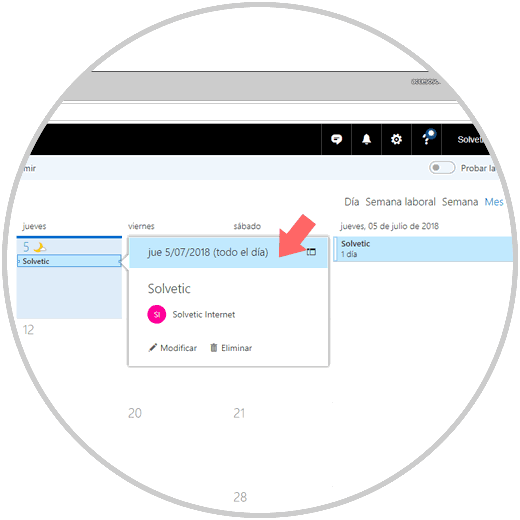
This will open the Outlook Calendar section where we go to the desired day, right click on it and select New and create the event:

Step 4
By clicking on Save we will see our event registered there:
4. How to configure synchronization from the Gmail application
Step 1
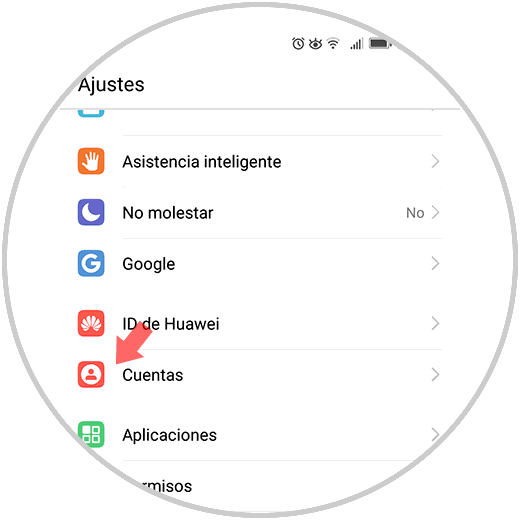
Once created the calendar event (s), we must go to the general settings of Android and there locate the Accounts section:
Step 2
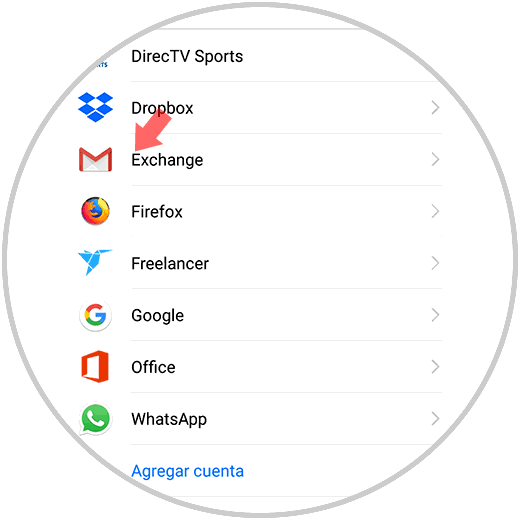
Click there and in the options displayed select Exchange:
Step 3
Clicking there will display the following:
Step 4
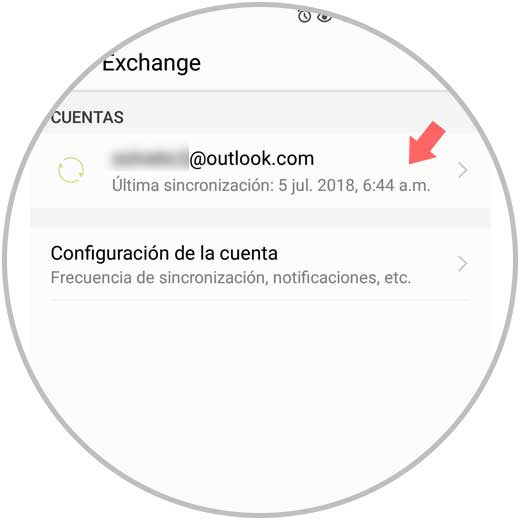
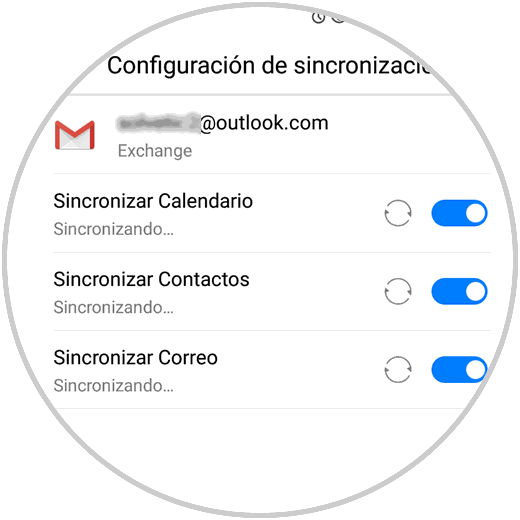
There we will see our account created and the date and time of its last synchronization, click on the Account Settings section to activate which options have to be synchronized with Outlook:
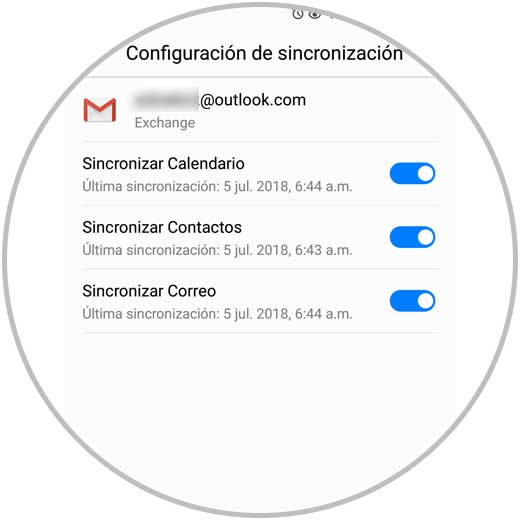
Step 5
We can click on the Synchronize now option to execute this action in real time:
Step 6
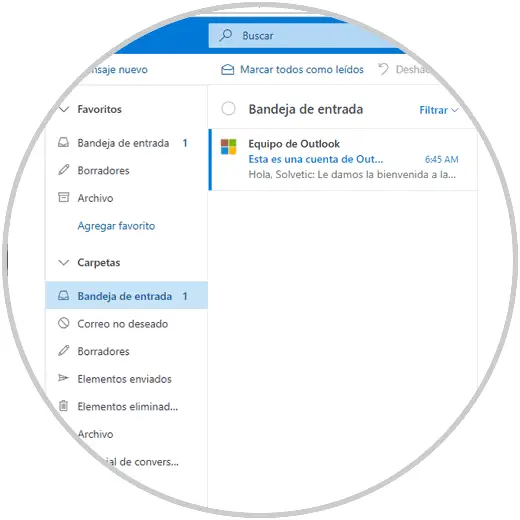
Now we go to the Outlook account in the Gmail application and by clicking on the menu we select Calendar:
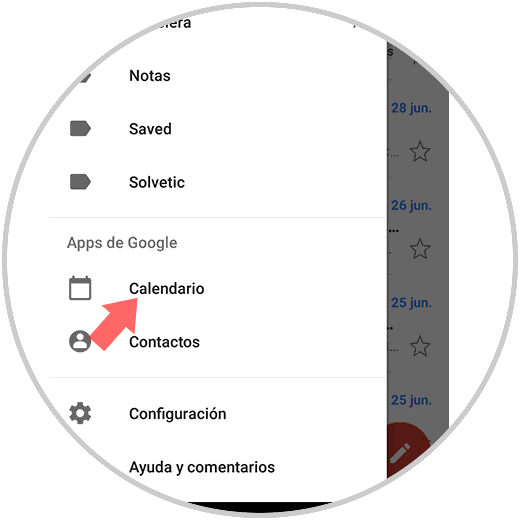
Step 7
By selecting this, we will see the event we created in Outlook on the respective day, in this case on July 5:

With this we verify that the synchronization of Outlook with Android has been correct and we will be sure that everything we do will always be updated..