In these times, our mobile phone has become a fundamental part of our life, partly because of the large number of actions we can take using these small devices and on the other hand because of the large amount of information we accumulate: Contacts , A multitude of messages that we have sent or received and files that include photos, videos, audio or any type of document are a small part of the information we can store here..
Making a backup of our information is very important because if for any reason we lose or steal our mobile or we need to reset it to the factory state we will not lose this valuable information that we have saved.
It is for this reason that today in TechnoWikis we will explain step by step how to make a backup on one of the most demanded Android devices today: The Xperia XZ2. This can be done from the computer or from the same mobile..
To keep up, remember to subscribe to our YouTube channel! SUBSCRIBE
1. How to backup Sony Xperia XZ2 on Windows PC or Mac
If you make the copy on the PC all this information will be stored and secure there for unforeseen future. To do this you will have to follow these steps:
Step 1
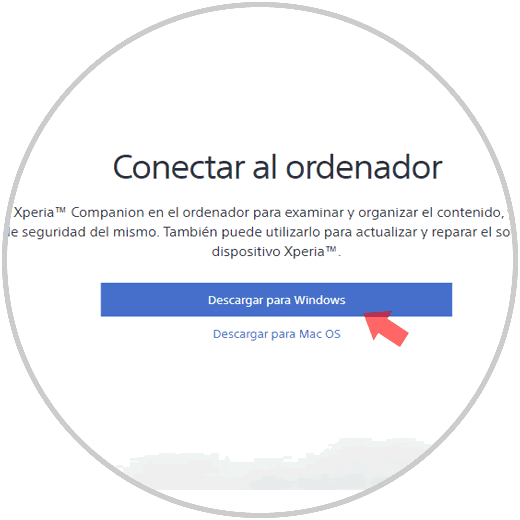
You must have the Xperia Companion program installed on your computer. If you do not have it installed, have a Windows PC or a Mac, you can obtain it in the following link, by clicking on "Download for Windows" or "Download for Mac" depending on your case.
XPERIA COMPANION WINDOWS AND MAC
Step 2
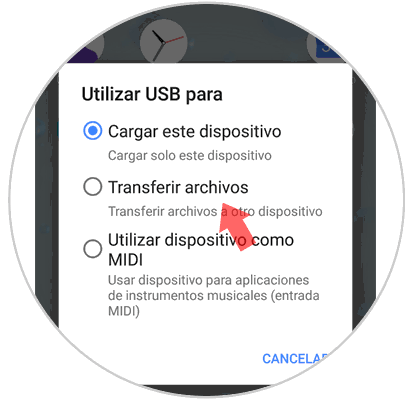
Once you have downloaded it, connect your Sony Xperia XZ2 mobile phone to your PC with a USB type C cable. The following message will appear on the screen, where you will have to click on the “Transfer files†option

Step 3
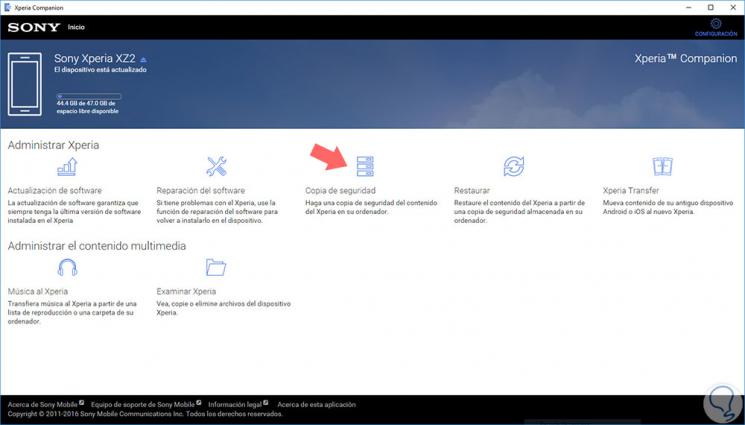
On the Xperia Companion screen, when it opens, click on the “Backup†option
Step 4
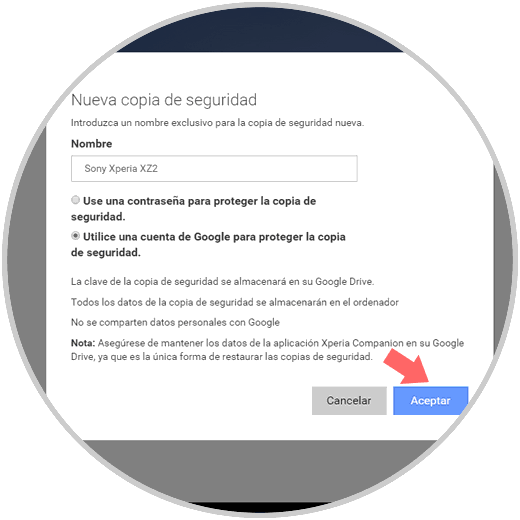
On the screen of your PC, accept so that the App can access your Google account and perform the Backup.
Step 5
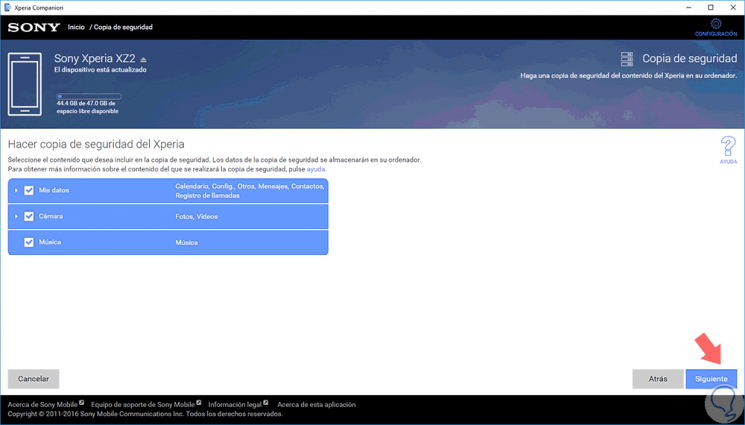
On the left side of the computer screen, select with a blue check the files on which you want the backup to be performed. When you have finished click on “Nextâ€
Step 6
A message will appear telling you that Xperia Companion requires a series of permissions to perform this backup.
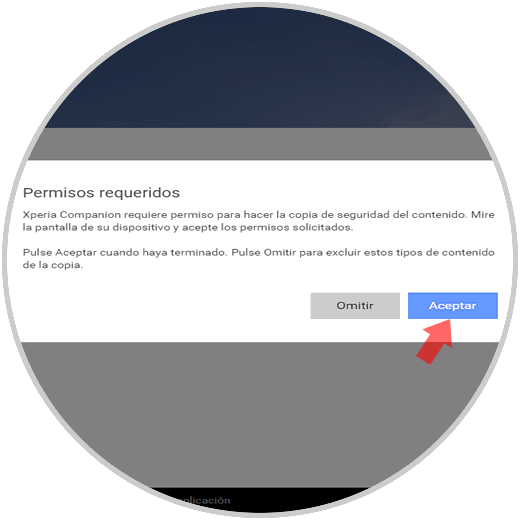
Look in the mobile screen and press "Allow" in all pop-up windows to accept these permissions and be able to make the copy.
Step 7
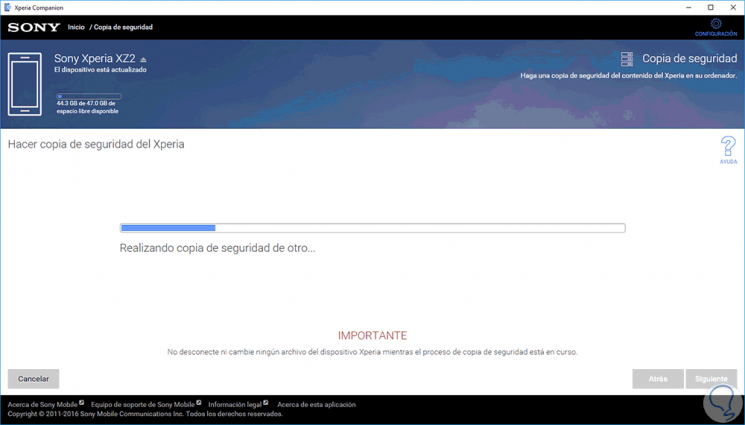
You will see the following on the screen, which will mean that you are successfully performing the backup.
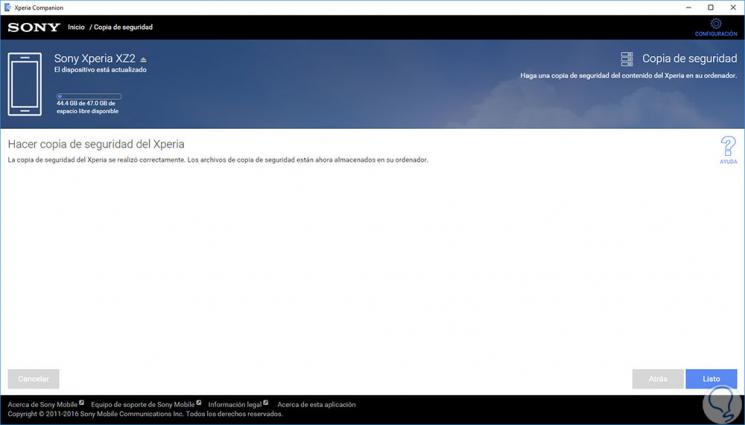
When finished, the following will appear on the screen. Press the "Done" button and you will have already backed up the information on your Sony Xperia XZ2
2. How to backup Sony Xperia XZ2 from your phone
.
From the phone itself, and using the Google Backup and Restore application, you can also make a backup copy of your phone information. For this you will have to do the following:
Step 1
Press the "Settings" icon on the main menu screen of your Xperia.
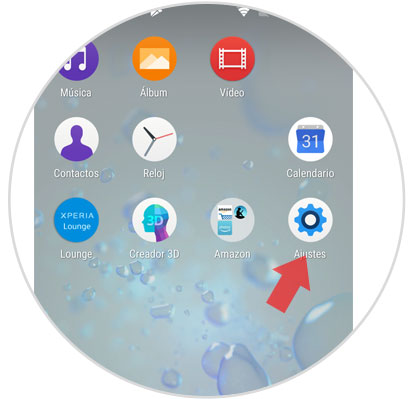
Step 2
Now swipe to the "System" option and click here.
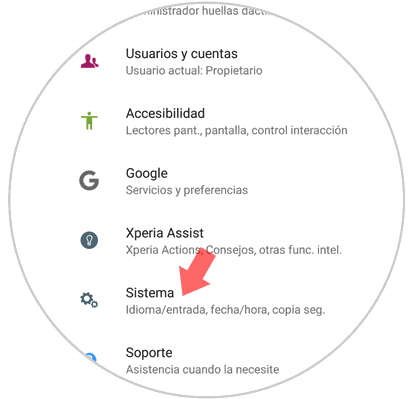
Step 3
Select the "Backup and restore Xperia" option to continue.
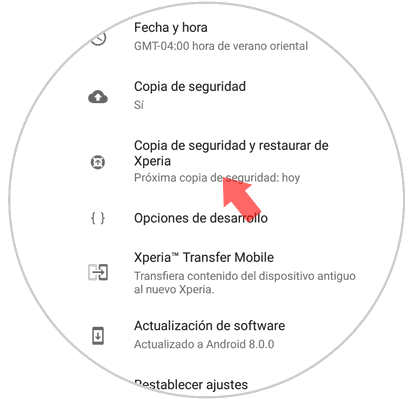
Step 4
Click on the “Automatic backup†option so that the device performs them in this way and does not lose information.
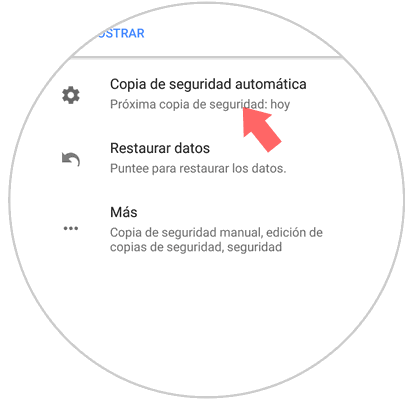
Step 5
At the top, activate the tab by sliding it to the right.
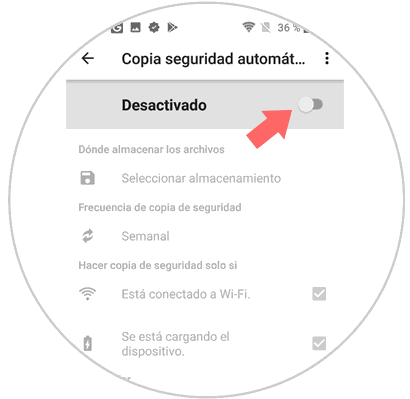
With these simple steps you will have activated automatic backup on your Xperia mobile..
3. How to restore backup information on Sony Xperia XZ2
To restore the information since the last backup on your terminal you will have to do the following:
Step 1
Access the "Settings" by clicking on this icon

Step 2
Click on the "System" option in the list

Step 3
Now press "Backup and restore Xperia" to continue.

Step 4
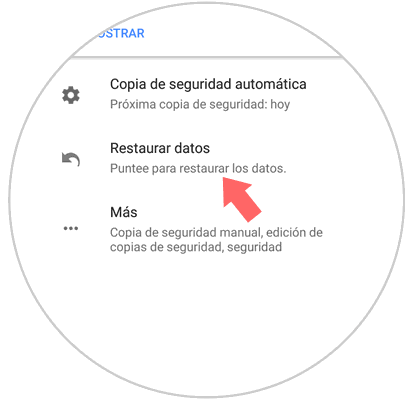
Press the second option “Restore data†on the new screen.
Step 5
Select "Sign in with Google" to allow backup and allow access to complete data restoration.

It will be that simple to make a backup and restore the data on the Sony Xperia XZ2 Android terminal.