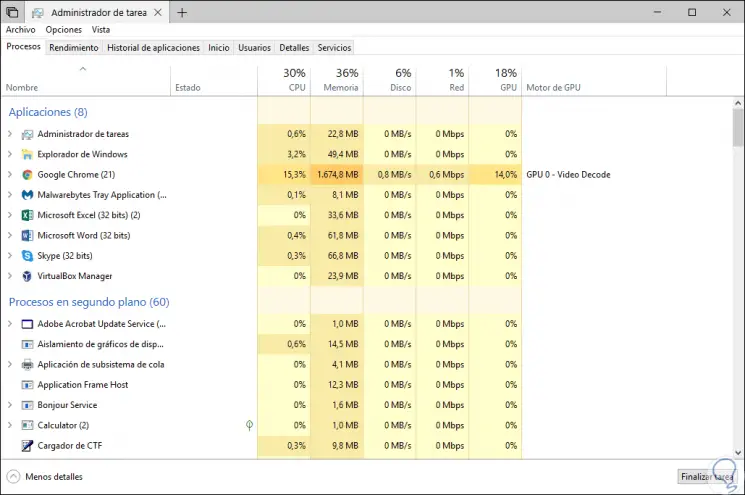
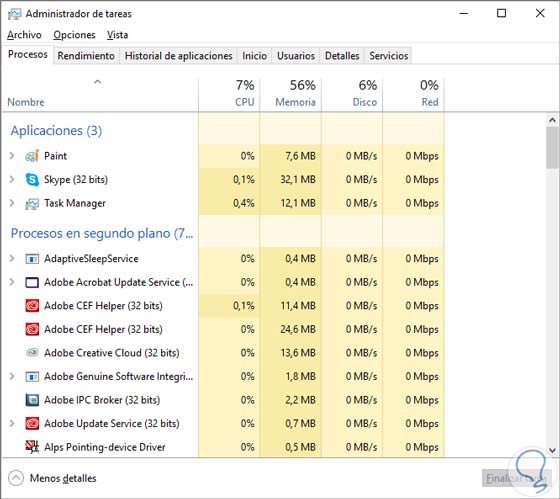
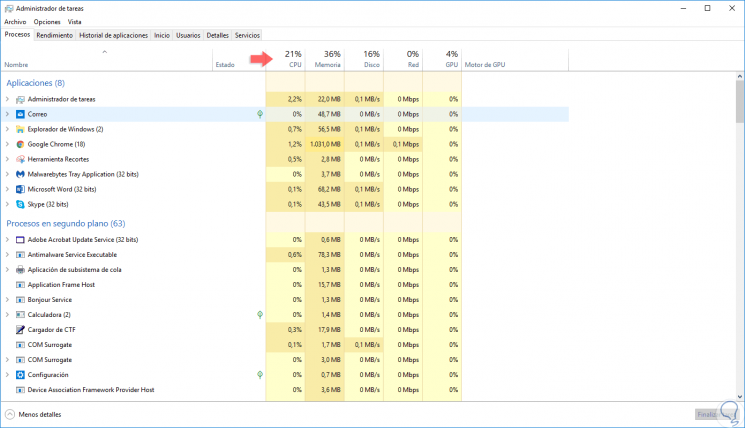
One of the objectives that we always set as Windows users is to have systems that are fast , dynamic and that respond in the best way to each user request. Although a large percentage of this is due to the hardware of the machine, especially CPU and RAM , another percentage is due to the services of the operating system itself. In specific situations, when we access the task manager we can see that the use of our disk is 100% without an apparent reason, it is normal that the disk is in a range of 5% to 10%:
Common mistakes
When a hard drive is 100% it can cause errors such as:
- Operating System Restarts
- Application and file blocking
- Read and write failures to disk
- Slow down of all Windows processes and services
In this way we will have different solutions to prevent our hard disk from collapsing and blocking slowing down the system and each of the tasks we do on our computer. TechnoWikis will give a series of useful tips to correct this error and once again have the best features of our hard drives..
1. Stop searching Windows 10, 8, 7 to fix 100% disk usage lock error
Windows makes use of a service called Windows Search which is linked to the entire issue of system indexing to optimize the search for items on the computer.
Although this is a natural occurrence in the system, Windows Search can sometimes cause a negative impact on system performance as it uses more resources than is necessary for search tasks. We can temporarily stop this service and if validate that our disk recovers its optimal operation.
To stop this service, we go to the command prompt as administrators and there we execute the following line:
net.exe stop "Windows search"
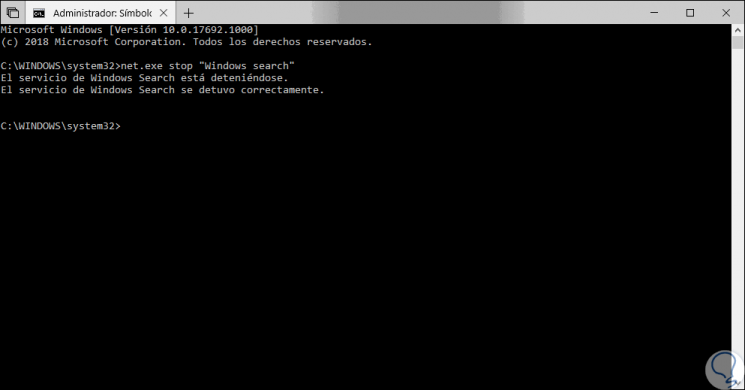
So we can wait for the disk to function normally to discard this service.
2. Use antivirus in Windows 10, 8, 7 to fix 100% disk usage blocking error
It is ideal and essential to have threat protection tools such as viruses or malware, but it has been proven that, at specific times, these applications can cause a slow effect in the system at a general level mainly due to background analyzes carried out carried out by the application or because its internal database is being updated which can be of a considerable size.
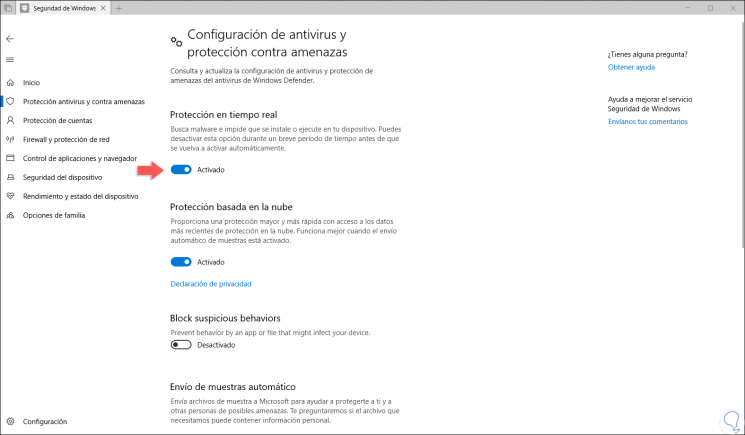
To validate this, it is enough to access the settings of our antivirus, or of the antivirus integrated in Windows, and there disable the protection temporarily with the goal of validating if this is the cause of this error..
3. Disable Windows 10, 8, 7 specific services to fix 100% disk usage blocking error
Although the services in Windows are vital for each component of the operating system and its applications to function correctly, some specific services may cause slowness due to the task they carry out.
These services themselves are:
Windows Search
As we mentioned, this is a service responsible for performing all search tasks in the system.
BITS (Background Intelligent Transfer Service - Background Intelligent Transfer Service)
It is a service whose task is to asynchronously transfer files that are in the foreground or background, and apart from this, it controls the flow of transfers in order to take care of the responsiveness of other network applications and is responsible for restarting File transfers if these have been interrupted by network disconnections or system reboots.
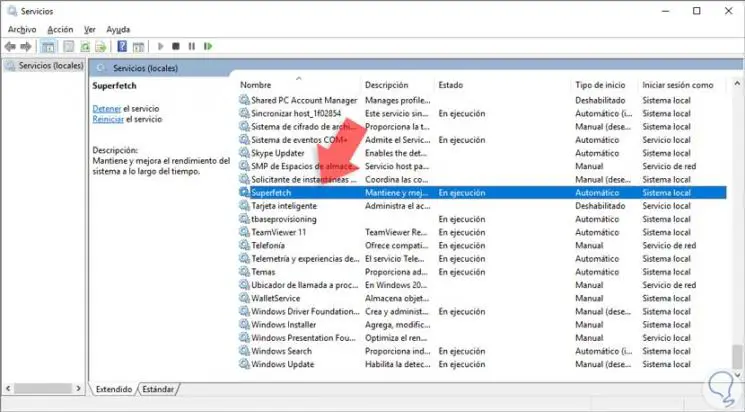
Superfetch
This service allows the most used programs as users to remain loaded in RAM which can cause slowness if they are too many.
Step 1
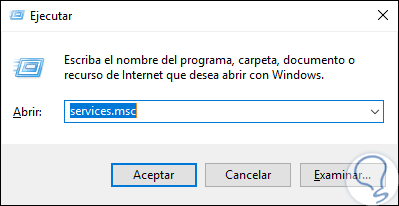
In this case we can stop them and check the behavior of the hard disk from there. For this task, we will use the following key combination and execute the following command:
+ R
services.msc
Step 2
Press Enter or Accept and in the pop-up window we will locate each of the mentioned services and double click on them, or right click / Properties:
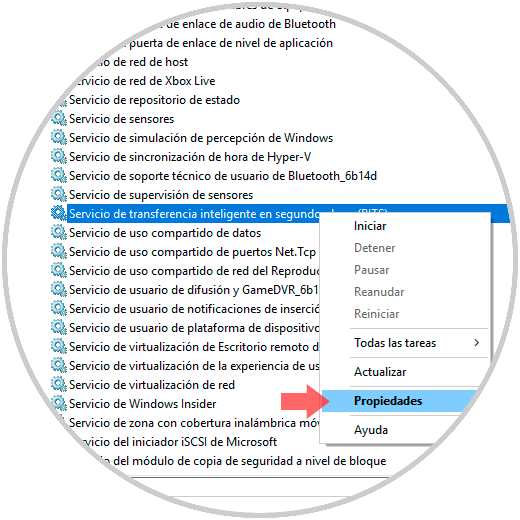
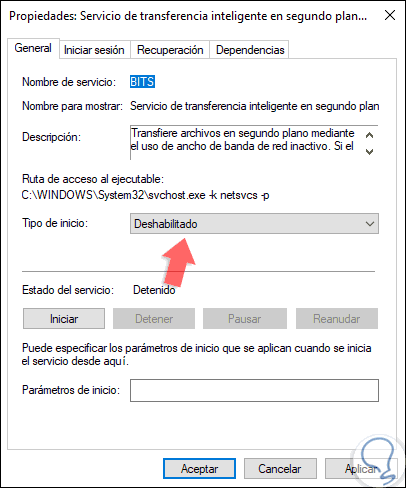
Step 3
In the window that will be displayed, we will define the "Disabled" option in the "Startup type" field and, if the service has been started, click on the "Stop" button. Click on Apply and Accept to save the changes. Remember to perform this process with each of the elements.
4. Update the SATA AHCI driver in Windows 10, 8, 7 to fix 100% disk usage lock error
ACHI (Advanced Host Controller Interface) is a technical specification responsible for optimizing both the operation and communication of the SATA connectors on the computer, but sometimes this can be a cause of errors.
Step 1
To reinstall this driver and check if this is the cause of this error, we must access the device manager using one of the following options:
To keep up, remember to subscribe to our YouTube channel! SUBSCRIBE
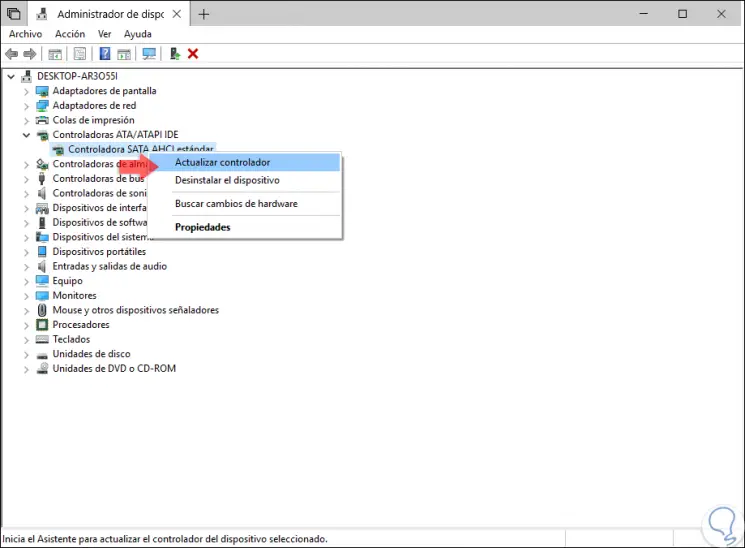
Step 2
In the pop-up window we go to the “Standard SATA AHCI Controller†section and we will right click on the controller to select the “Update driver†option:
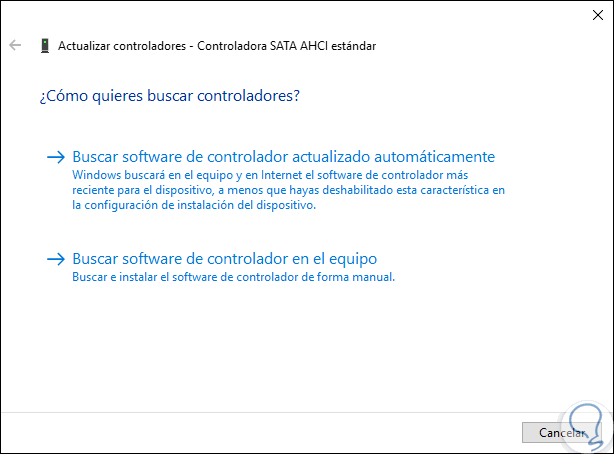
Step 3
In the displayed window we have two options:
- Update it manually having previously downloaded the driver from the manufacturer's website
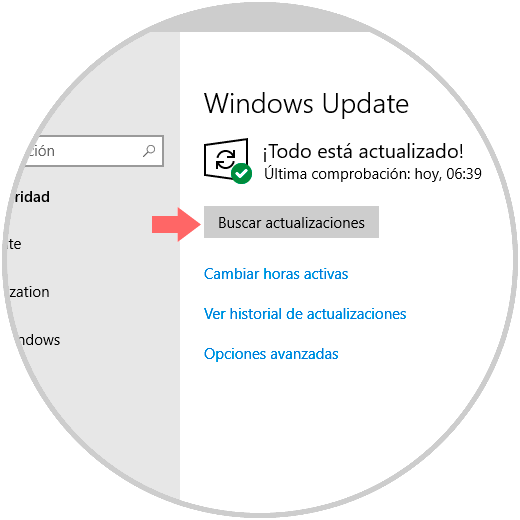
5. Update Windows 10 to fix 100% disk usage blocking error
A common cause for this error to be displayed is due to the outdating of some components of the system or of the operating system itself, remember that Microsoft frequently releases new updates for Windows where improvements and new layers of security are included.
Step 1
To check for updates, we go to the following route:
Step 2
There, in the "Windows Update" section, we can validate whether or not there are new updates:
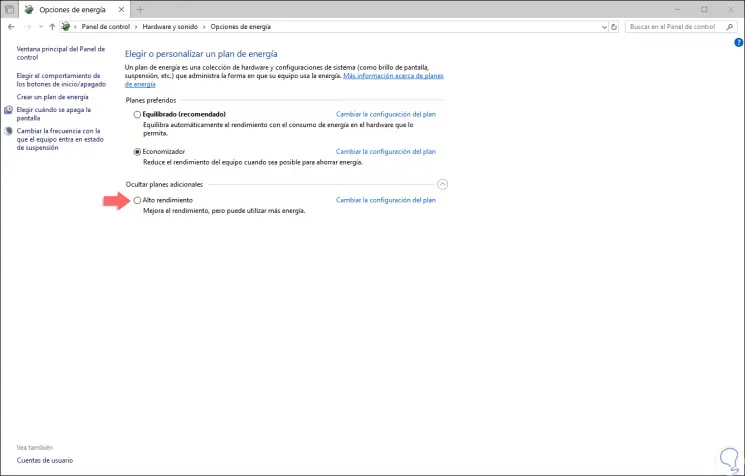
6. Verify Windows 10 power options to fix 100% disk usage lock error
Windows offers us various energy plans focused on optimizing the savings or performance of the elements of the system itself, but some of these plans may have an influence on disk performance.
Step 1
To validate this configuration we will go to the following route:
Step 2
There we will select the plan called “High Performance†in order to make the system energy much better managed.
7. Reset virtual memory to solve 100% disk usage blocking error
The virtual memory has been designed as a complement when our RAM is scarce, so that the virtual one is in charge of executing certain actions on the system optimizing its use, but if it is very high it can create the opposite effect.
Step 1
To verify this we will go to the following route:

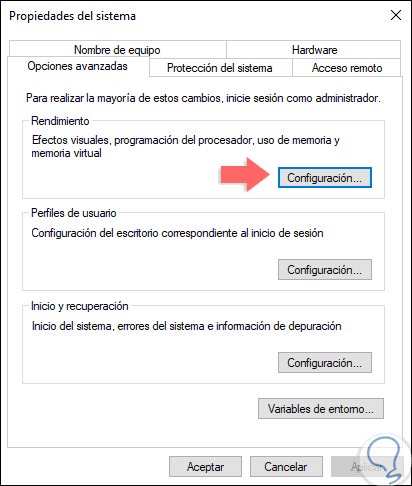
Step 2
There we click on the "Advanced system configuration" section and in the window we will go to the "Advanced options" tab and click on the "Configuration" button in the "Performance" section:
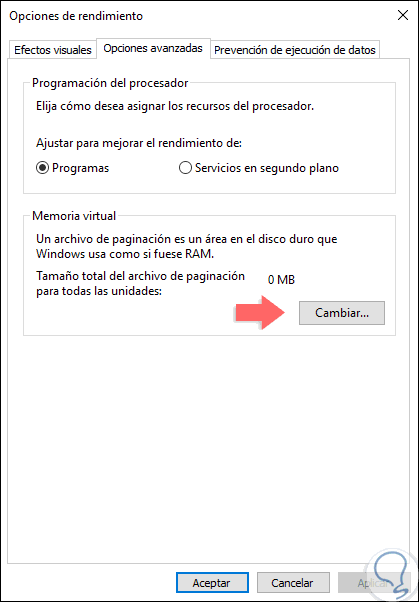
Step 3
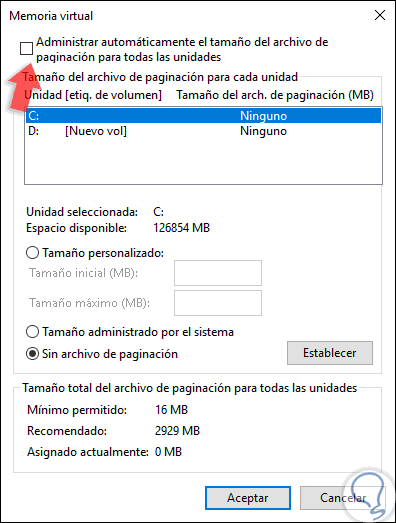
In the new window we go to the "Advanced options" tab and click on the "Change" button located in the "Virtual memory" section:
Step 3
There we uncheck the box “Automatically manage the size of the paging file for all unitsâ€. Then we select the units to configure and set the desired size, click on Apply and Accept to save the changes.
8. Change the network drive in Windows 10, 8, 7 to fix 100% disk usage blocking error
In case the errors persist, the last option is to modify the hard disk drive since the error can be caused by some physical error on the disk either in its sectors or its head, which directly affects its behavior.
9. Disable defragmenting the disk to fix 100% disk usage lock error Windows 10
Another option that we can take into account to improve the performance of the disk and that the 100% error does not appear is defragmenting the hard disk. Defragmenting a disk is a fairly important task when we want to manage our discs well and thus improve their performance.
This method consists in returning an order inside the disk because when copies of a file are made, it is distributed in different parts and they are randomly distributed on the disk creating a fragmentation since it is stored in the first cluster it finds free. When we defragment, we get these parts to be grouped thus improving space management. Despite its virtues, we expose ourselves to the system consuming too many resources giving some failures..
Step 1
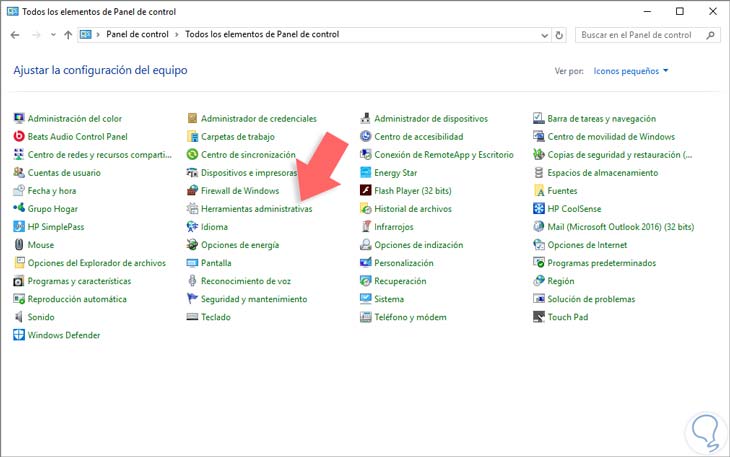
To defragment the first thing we will do is go to our Control Panel and look for the "Administrative Tools" icon. You have to set the view mode to "Small icons".
Step 2
Next, you must choose the “Defragment and optimize units†option. Then select Change settings.
Step 3
Here we must uncheck the "Scheduled execution" box so that Windows 10 is not constantly using disk resources.
Step 4
Once done we will see that the cost of our hard drive decreases.
10. Disable Superfetch service to fix error blocking disk usage 100% Windows 10
The Superfetch service is responsible for improving system performance, but occasionally consumes excess system resources. Therefore, if you want disk locking, it is convenient that you deactivate this service. To enter the Superfetch service we will do the following.
Step 1
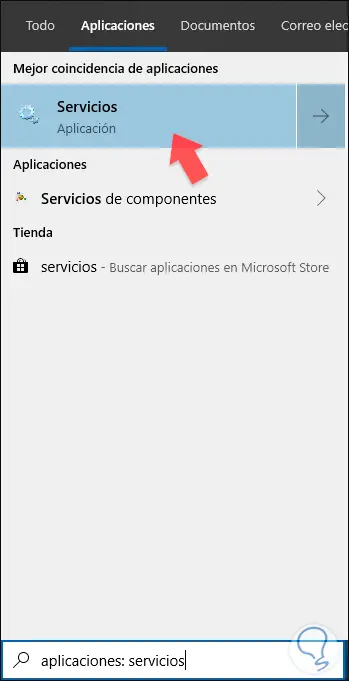
Type services into the Windows 10 search engine and click on it to open it.
Step 2
Now look for the Superfetch process, double click on it and disable it by choosing “Disabled†under “Startup Typeâ€.
11. Use the chkdsk command to fix 100% disk usage lock error Windows 10
The CHKDSK command is a utility that allows us to manage our hard drives and check if their status is correct. It is quite useful because it has additional parameters that help us analyze exactly whether we have errors or not within our storage disks. This command is simple to use as follows.
Step 1
The first step will be to open our CMD command terminal.
To keep up, remember to subscribe to our YouTube channel! SUBSCRIBE
Step 2
Now we will execute the following chkdsk command:
chkdsk / f / r
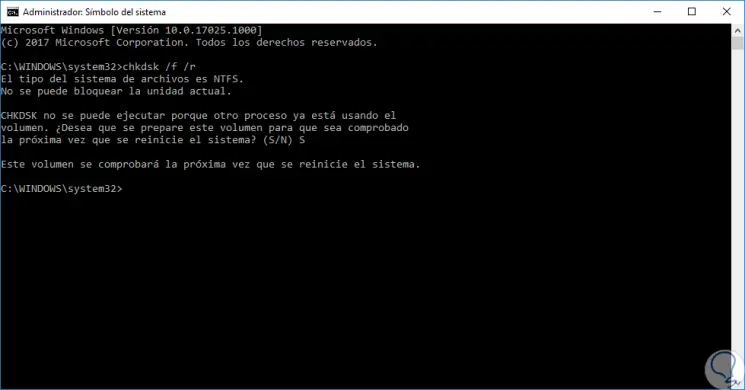
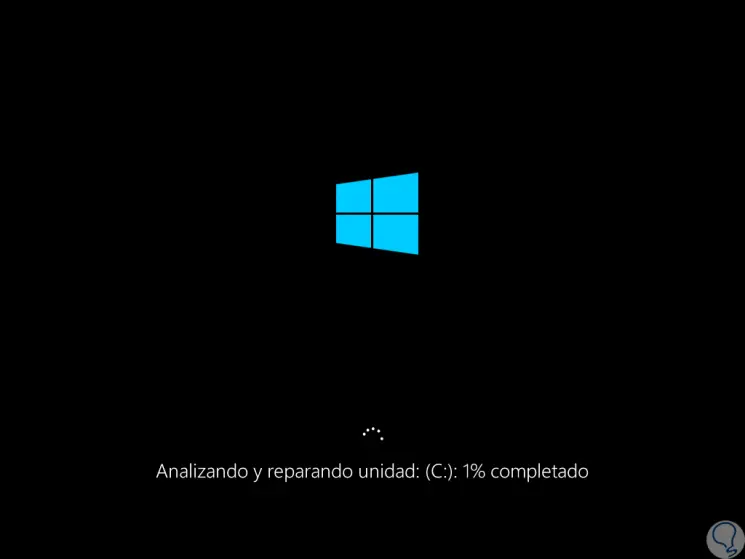
Step 3
When we have executed the command we will need to restart the system and see how the disk analysis begins.
Step 4
When the hard disk analysis is finished we can access the Task Manager again and we will see that the disk usage error is gone.
We can see the various solutions to have a healthy hard drive and with the best performance benefits in Windows.