Windows operating systems are composed of various services and processes that are focused on optimizing in the best way all the operation of the system and its applications..
One of these elements is the DLL (Dynamic Link Library) files, specifically we talk about autorun.dll, which are programs, identical to the executable .EXE files and whose mission is to run several software programs to share the same feature or function.
The AutoRun.dll file contains vital information on how to run a particular software, and AutoRun.dll errors prevent us from successfully starting a program as Windows users, so today TechnoWikis brings a series of comprehensive solutions for correct this error in Windows and thus enjoy all its advantages.
These errors occur because a DLL can be used by several programs at the same time so that the result is an error response..
Common Errors Autorun.dll
The most common errors associated with Autorun.dll are:
- Cannot find C: \ Windows \ System32 \\ autorun.dll.
- The file autorun.dll is missing.
- The autorun.dll file could not be loaded or is damaged. the configuration cannot continue the error code is 0x7e
- Unable to register autorun.dll.
- Windows cannot start. A required component is missing: autorun.dll. Please install Windows again.
- This application failed to start because autorun.dll was not found. Reinstalling the application could solve the problem.
- Autorun.dll error code 0x7e Windows 7, 8, 0xc1 Windows 10
- Autorun.dll Access Violation.
1. Causes to generate Autorun.dll error in Windows 10, 8, 7
There are certain errors that result in this error, the most common are associated with corrupted or missing autorun.dll files or an incorrect computer shutdown. These DLL errors tend to occur when we start our computer, open a program or for example execute a specific function such as scanning or printing a document. When the dll file is not found, it may be due to the following:
- Another program uninstalled the autorun.dll file.
- Invalid or corrupt autorun.dll registry entry.
- Another program overwritten the required version of autorun.dll.
- Another program deleted the file autorun.dll in an erroneous or malicious way.
- A malware or virus infection has occurred that has affected the autorun.dll file.
- Microsoft hardware failure, such as a bad hard drive, which affected the autorun.dll file.
Now we will see how to solve these errors.
2. Validate the Recycle Bin to fix Autorun.dll error in Windows 10, 8, 7
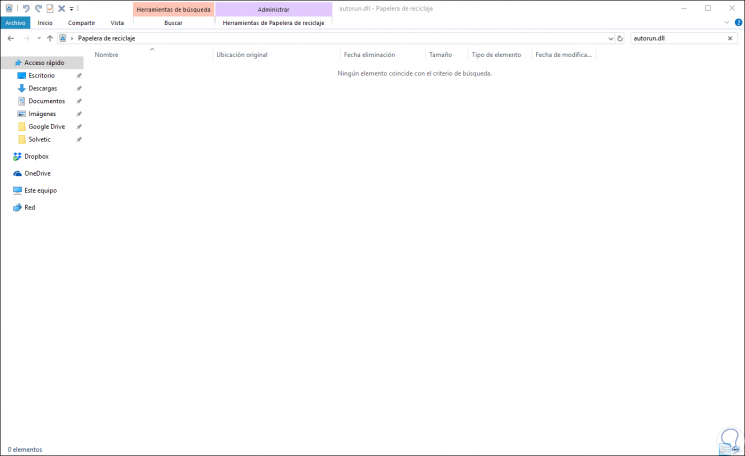
A probable cause is that the autorun.dll file has been accidentally deleted from the system which results in this error, remember that the files deleted using the Delete key or right click / Delete, go to the recycle bin.
To confirm this point, we access the Recycle Bin and once there we go to the search field or use the following keys and enter the term autorun.dll. In case the deleted file is there, just right click on it and select the "Restore" option..
+ F Ctrl + F
3. Use SFC to fix Autorun.dll error in Windows 10, 8, 7
Windows operating systems have a utility called SFC (System File Checker) which is responsible for analyzing in detail and deep file system in order to detect faults and anomalies to proceed with its restoration.
Step 1
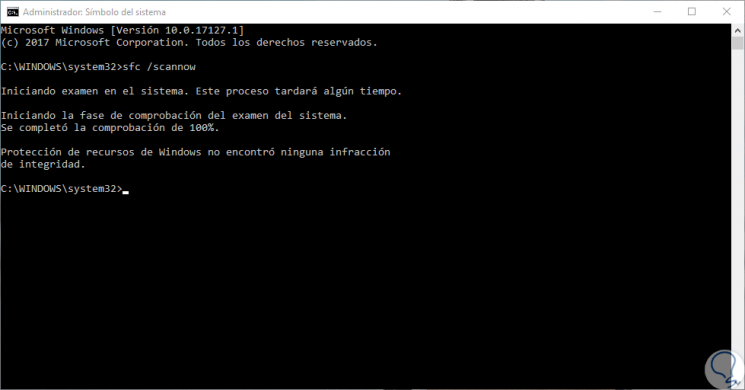
Autorun.dll error can be associated with this type of situations in the file system and to run SFC we will access the command prompt as administrators and there we execute the following:
sfc / scannow
Step 2
In case the fault persists, we can use the following command. This DISM utility is responsible for analyzing the system image to correct various errors generated in Windows.
DISM / Online / Cleanup-Image / RestoreHealth
4. Update the Operating System to fix Autorun.dll error in Windows 10, 8, 7
As TechnoWikis always mentions, it is important to update our operating system since the developers are responsible for publishing security updates, applications, etc., and within these we can find the solution for the Autorun.dll error.
Step 1
To check for new updates, in the case of Windows 10, we go to the following route:
Step 2
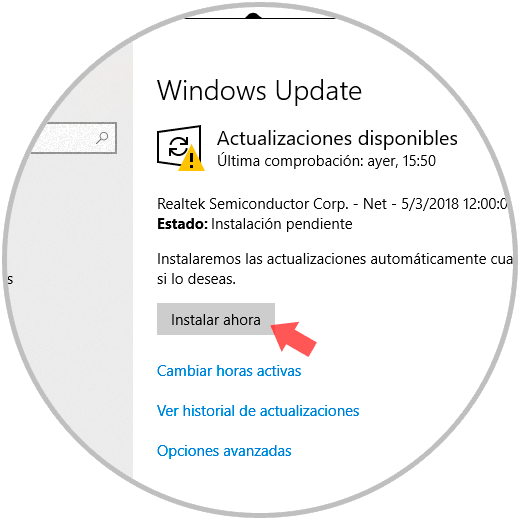
There we click on the "Check for updates" button and confirm that everything is up to date:
5. Run a system scan to fix Autorun.dll error on Windows 10, 8, 7
Viruses or malware are another cause that conflicts with DLL libraries triggering Autorun.dll error.
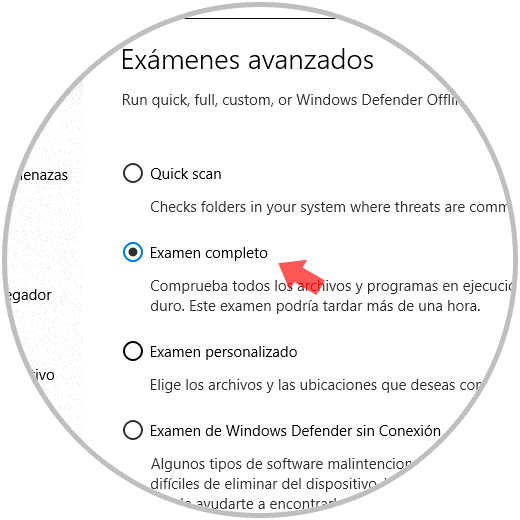
To validate this option, it is recommended to run a full scan of the operating system to detect and eliminate malicious programs or applications that may generate autorun.dll errors.
For this we can use the preferred antivirus software or use the integrated option of Windows 10: Windows Defender.
We select the option "Complete exam" and wait for the whole process to finish to rule out that some virus is causing this error.
6. Restore system to fix Autorun.dll error on Windows 10, 8, 7
The system restore function gives us the possibility of returning to a previous point in time where the equipment worked in the best way, this with the objective that the system be used again at a point where all its configuration worked correctly.
It is important to clarify that for this we must have the option to restore system enabled .
To keep up, remember to subscribe to our YouTube channel! SUBSCRIBE
Step 1
To make use of this restore point, we will go to the following route:
Step 2
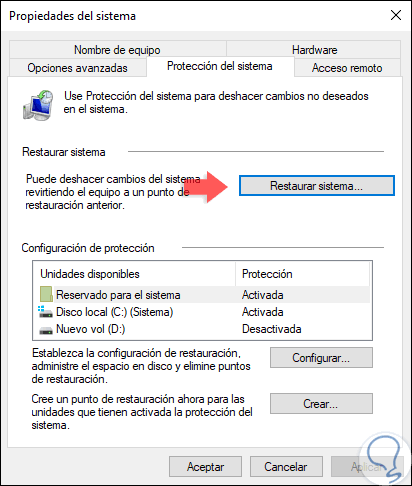
There we click on the "Advanced system configuration" option and in the window we will go to the "System protection" tab:
Step 3
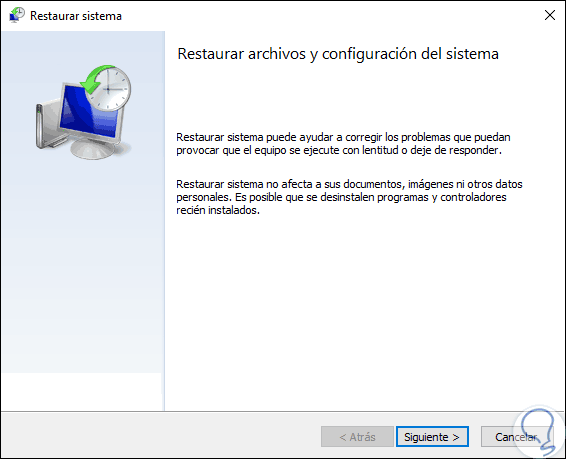
Click on the "System Restore" button and the following will be displayed. There we click on Next and we will follow the steps of the wizard to define the point to use.
7. Check the DVD drive to fix Autorun.dll error in Windows 10, 8, 7
Here we find different situations related to the DVD drive and that can result in this error.
The first is to install Windows from a DVD, there, if the DVD drive is defective, it can result in the Autorun.dll error due to a read failure, in this case the solution is to try to install Windows from a medium USB or replace DVD drive.
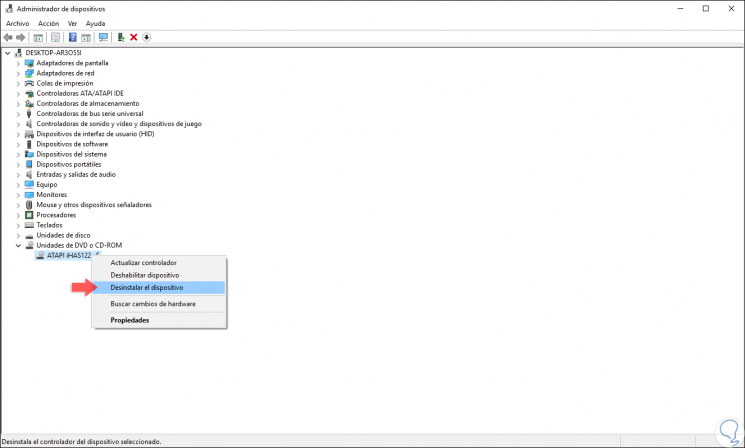
Now, another option that arises is to reinstall the DVD drive and for this we access the Device Manager by right clicking on the Start menu and selecting the option “Device Managerâ€.
In the window that will be displayed, we go to the “DVD or CD-ROM drives†section and there we will right click on our DVD drive and select the “Uninstall the device†option. Thus, when Windows is restarted again, all the configuration will be taken again.
As we see, the options to correct this type of error in Windows environments are varied and some of them will give the solution and thus we will not have problems when executing any program.