The use of the network in Windows environments is more than important because thanks to it it will be possible to access a complete world where we can go to develop our daily tasks such as reading the mail, accessing educational platforms, watching videos, listening to music and others. In Windows 10 operating systems, each of the network interfaces used has an assignment with an automatic priority value which is based on their respective network metric, this results in the way in which the interface will be used to send and receive all network traffic..
Currently, it is normal to use Wi-Fi and Ethernet connections in Windows 10 for all the related connectivity issue and for backup reasons it is not advisable to disable any of them, if it is possible to carry out the task of adjusting the metric of the interface in order to specify in what order our team with Windows 10 has to use each network adapter and today in TechnoWikis we will see the possible ways to do so.
To keep up, remember to subscribe to our YouTube channel! SUBSCRIBE
1. Change network priority using Control Panel in Windows 10
Step 1
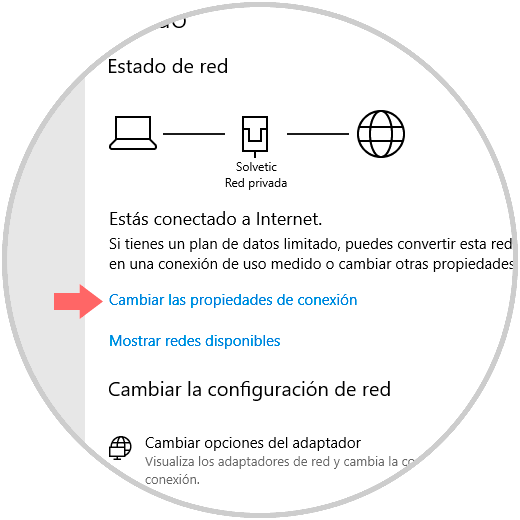
To use this method, we will initially go to the next route. There we click on the "Change adapter options" option.
Note
If we prefer, we can go directly to the following route:
Step 2
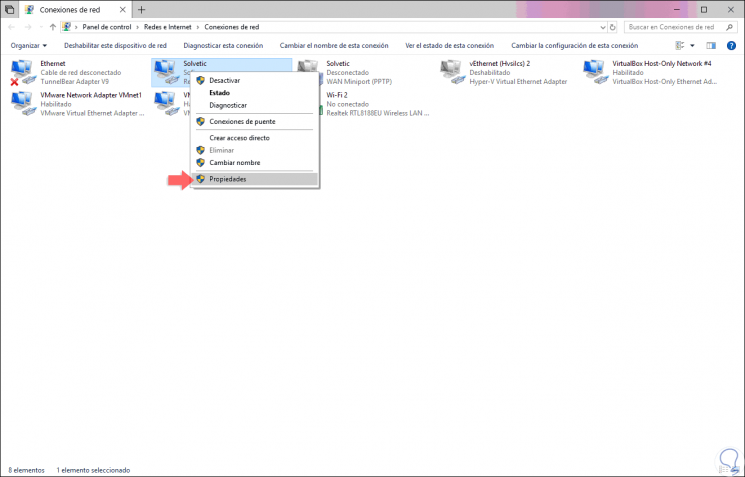
The following window will be displayed where we will right click on our network adapter and select the “Properties†option:
Step 3
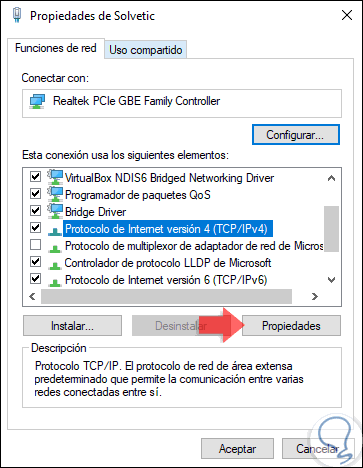
Now, in the window that appears, select the line "Internet Protocol version 4" and click on the "Properties" button:
Step 4
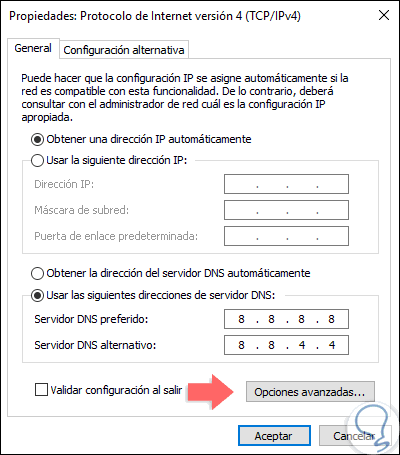
The following will be displayed:
Step 5
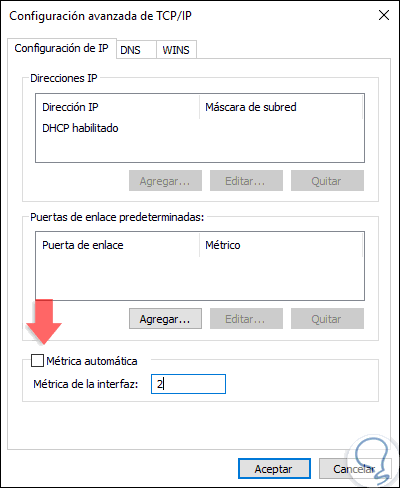
There we go to the “General†tab and click on the “Advanced options†button located at the bottom and in the new window that will be opened, we deactivate the “Interface metric†box and set the desired value:
The lower the assigned number, the higher the priority level of this network. Click on OK to save the changes.
When using the Control Panel option and based on the network configuration, it may be necessary to adjust the metric for Internet Protocol version 6 (TCP / IPv6) in case of using that protocol. When we want to omit this priority, just check the “Automatic metric†box..
2. Change network priority using Windows PowerShell in Windows 10
Windows PowerShell is the console that is being included in Windows 10 and thanks to which we can carry out various administrative tasks in the system.
Step 1
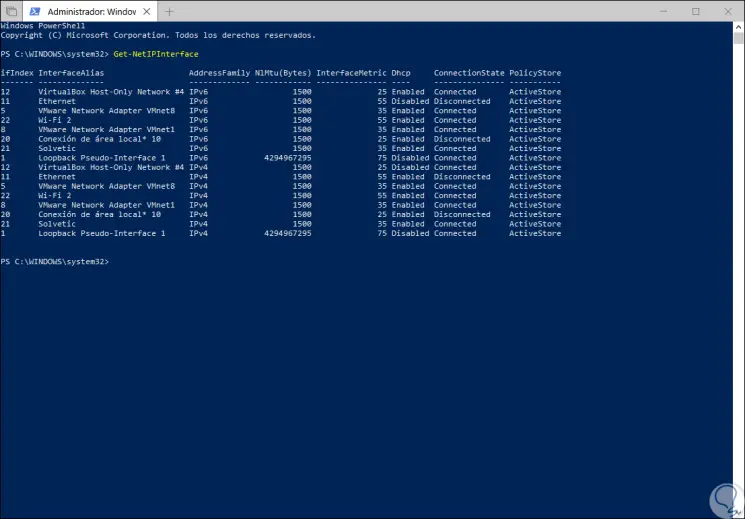
To make use of this method, we will access Windows PowerShell as administrators and there we will execute the following line:
Get-NetIPInterface
Step 2
There we find two fundamental details that are:
- Interface Identifier (ifIndex)
- Metric level used (InterfaceMetric)
Step 3
Now, we will use the following syntax to define the metric to indicate:
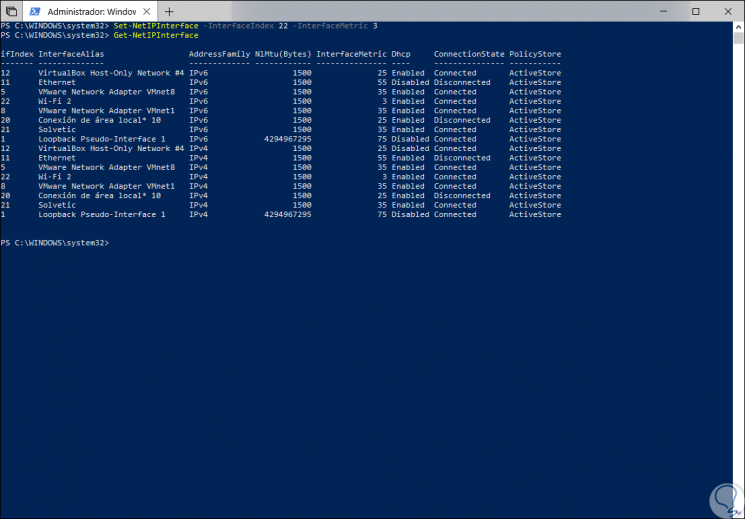
Set-NetIPInterface -InterfaceIndex (interface #) -InterfaceMetric (Metric level)
Step 4
In this case we will select interface 22 (Wi-Fi) and we can see that its current metric is 55, we will assign priority 3.

Step 5
We can execute the “Get-NetIPInterface†command again to verify that this change has been made correctly:
Step 6
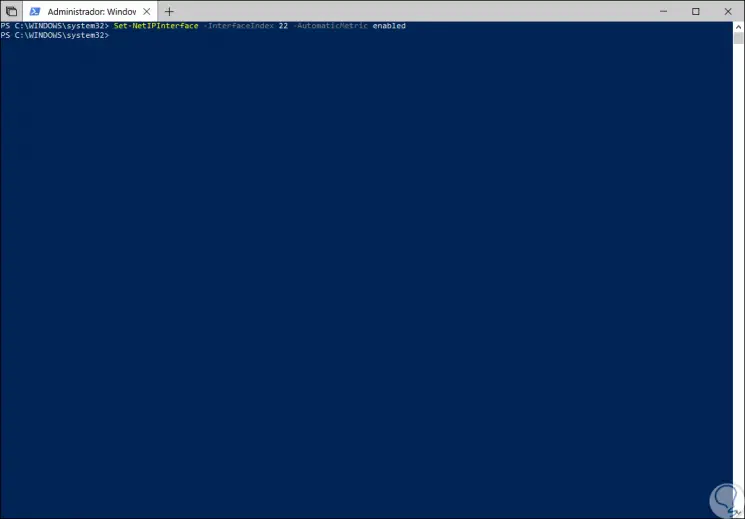
After completing this process, Windows 10 will prioritize network traffic as this configuration is defined when connecting multiple network adapters. At the moment we want to set the default configuration again, we must run the following line as administrators in PowerShell:
Set-NetIPInterface -InterfaceIndex 22 -AutomaticMetric enabled
Step 7
We must indicate the correct interface for this:
With any of these methods we have the opportunity to set the network priority in Windows 10.