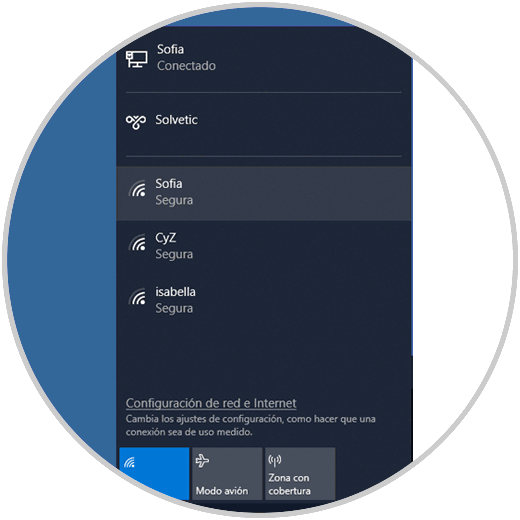
Our Windows 10 device is able to connect to different Wi-Fi networks that are available around where we are located:

The selection process to which the wireless network will be connected in Windows 10 is based on the priority system assigned to each particular connection, so that this allows the system to connect to a single particular network automatically. This is useful when the Wi-Fi network is known, such as that of our home or office, but not when it can be connected to an open or untrusted network where we have connected at some point since for the vulnerable security reasons of This type of networks can be exposed to suffer some kind of attack..
For this reason TechnoWikis will explain the process to change the order that Windows 10 has defined for automatic connection to Wi-Fi networks.
1. How to change the order of Wi-Fi networks from the notification center in Windows 10
Remember that from the notification or action center located in the taskbar at its far right we can carry out a series of actions on the system and one of them is precisely to edit Wi-Fi connection preferences.
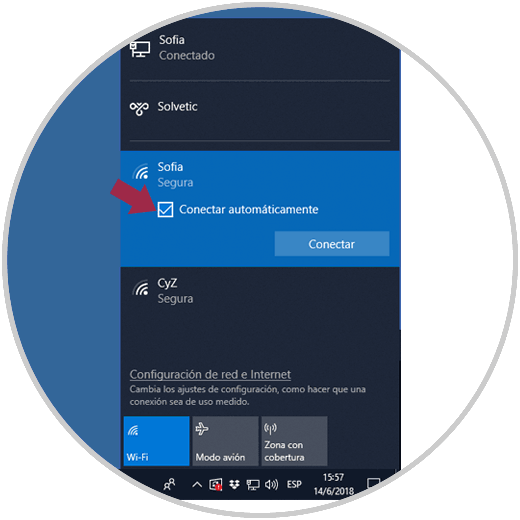
To perform this action we go to the notification center, click on the Wi-Fi icon and when the available networks are displayed, select the one of our preference and activate the "Connect automatically" box. Click on the "Connect" button to complete the action..
Thus, by activating the "Connect automatically" box, the connection is being configured as the new priority in Windows 10.

Note
To prevent a particular Wi-Fi network from being set as a priority in Windows 10, we can uncheck the "Connect automatically" box.
2. How to change the order of Wi-Fi networks from the command prompt in Windows 10
The command prompt is the Windows 10 administration console to carry out different tasks within the system and one of them is to edit the order of our Wi-Fi networks.
Step 1
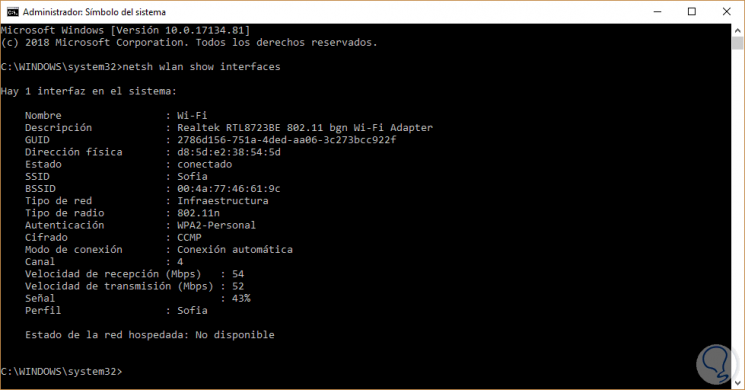
For this we must access as administrators and in the terminal execute the following:
netsh wlan show interfaces

There we must keep in mind the name of the adapter we use to connect to the Wi-Fi network, in case we have only one wireless adapter, the default name will be Wi-Fi..
Step 2
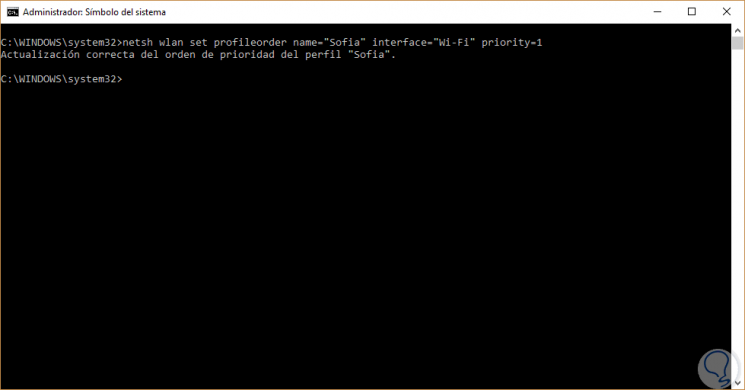
Now, we can use the following syntax to establish the new order of our Wi-Fi network.
netsh wlan set profileorder name = "Network profile" interface = "Interface name" priority = 1

We can see that the priority process has been established correctly. In this way, Windows 10 will always connect to the Wi-Fi network that we have defined as a priority and if this network is not available, it will try to connect to the next network in priority of the list.
So we can manage this order in Windows 10.