Windows 10 has positioned itself as a dynamic system full of various features and functionalities that are designed to maximize the experience of each user. One of the most striking for its use is the timeline or Timeline , which we remember that it was announced in Windows 10 Anniverssary, but it entered strongly and in operation in Windows 10 April 2018..
What is the timeline or timeline of Windows 10?
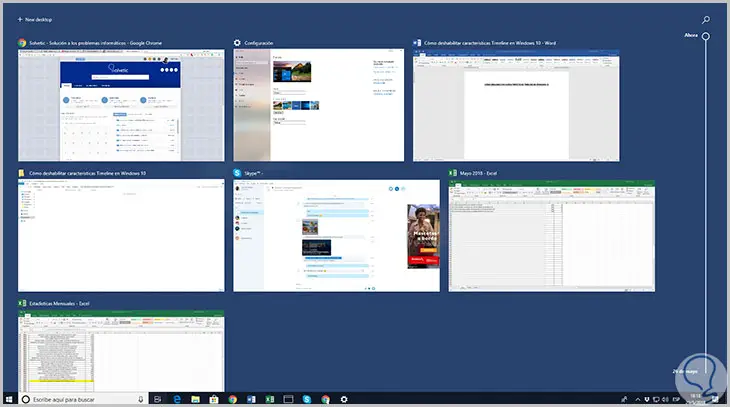
Basically the timeline or Timeline has been designed as a kind of timeline in which we can scroll in order to see what application or files were used on a given day. We can have a period of up to 30 days of searching, by default we will see 3 days, but when using Timeline we can click on the "Activate" button located at the bottom to enable up to 30 days.
The timeline stores the history of the applications and services we use, the files we open and the websites we explore, and when this is done exactly. All this activity history is collected and stored locally on the computer, and if we are logged in with a Microsoft account and activated the necessary permissions, Windows will send this activity history to Microsoft.
Once our history of activities is in the cloud, Microsoft uses that information in order to allow experiences between devices, provide us with personalized experiences and relevant suggestions, and to help improve Microsoft's own products and services, but we know that in a The world where everyone's private information is at risk will sometimes be ideal to prevent Windows 10 from using this data.
Through this tutorial we will learn to disable this feature in Windows 10 if we want to obtain better security features..
1. How to disable the timeline or Timeline from "Settings" in Windows 10 April 2018
If we choose to use this option, the timeline is disabled only for the user account with which we have logged into the system.
Step 1
To do this, we go to the "Start" menu and there we select the "Configuration" utility where we will see the following. We click on the "Privacy" section

Step 2
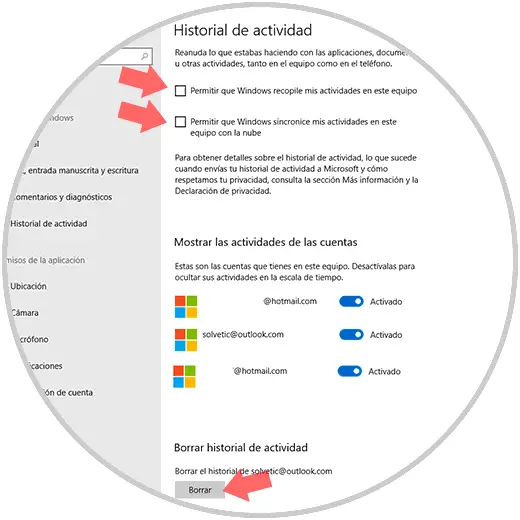
In the new window we go to the "Activity history" section. There we must deactivate the following boxes located at the top:
- Allow Windows to collect my activities on this computer
- Allow Windows to synchronize my activities on this computer with the cloud
Now, we can delete the entire activity history by clicking on the Delete button located in the Delete activity history section.
Note
If we want to activate this feature again, it will be necessary to activate these boxes again.
2. How to disable the timeline or Timeline from group policies in Windows 10 April 2018
Note
This option is available only for Pro and Enterprise editions of Windows 10.
Step 1
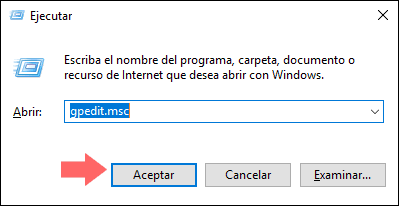
To access this option, we will use the following key combination:
+ R
Then we execute the following command:
gpedit.msc
Press "Enter" or "Accept"
Step 2
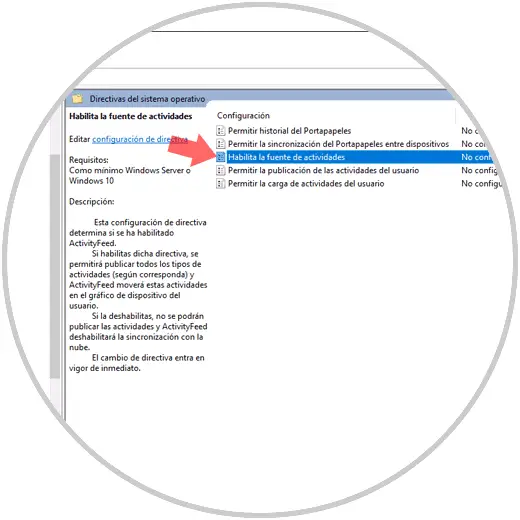
In the new window we will go to the following route:
- Operating System Policies
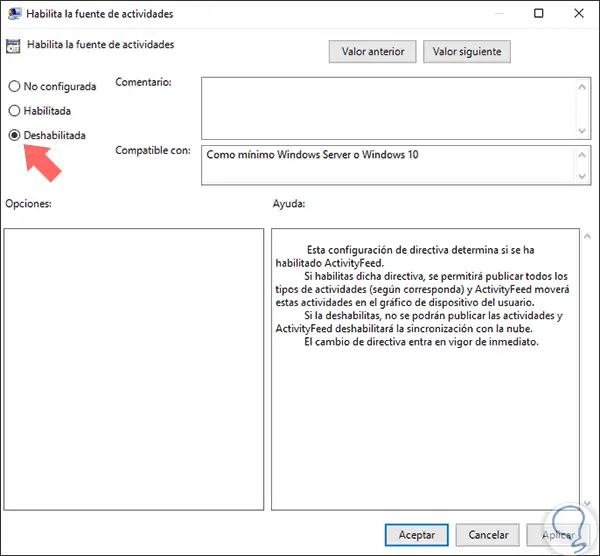
There, we will double click on the policy called "Enable the source of activities":
Step 3
In the window that will be displayed, we activate the "Disabled" box. Click on the "Apply and Accept" button to save the changes.
3. How to disable the timeline or Timeline from the Registry Editor April 2018
This method applies to all editions of Windows 10.
Step 1
To do this, we will use the following key combination:
+ R
Then we execute the following command:
regedit
Then press "Enter or Accept"
Step 2
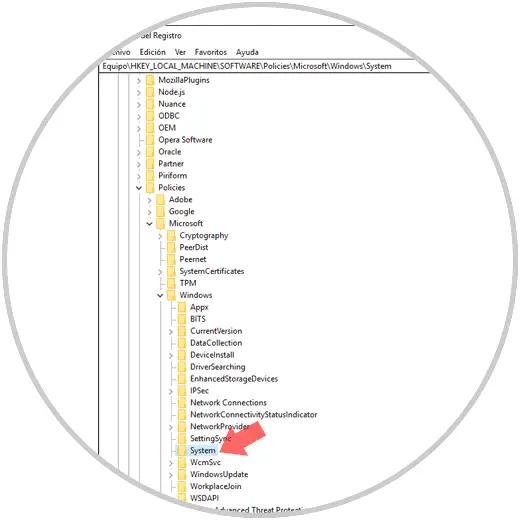
In the displayed window we will go to the following route:
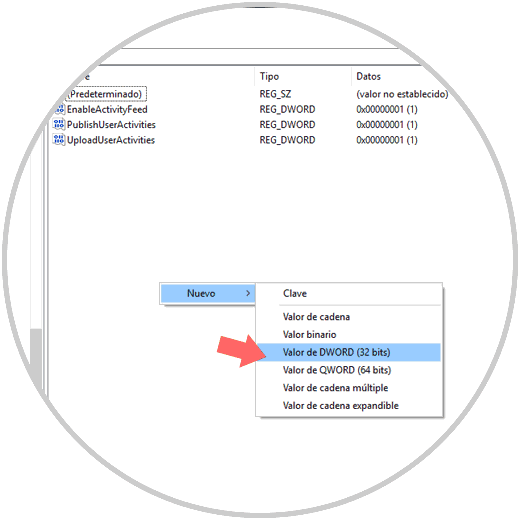
There we will double click on the record called EnableActivityFeed
If you do not have it, we will create it by right clicking on a blank space and selecting the New / DWORD Value option (32 bits). In the opened window we will enter the name "EnableActivityFeed".
Step 3
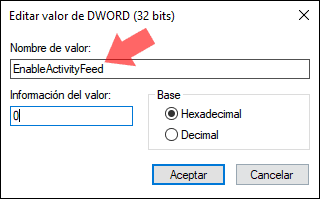
Now, by double clicking on this record, in the field "Value information" we will set one of the following options:
Click on "Accept" to save the changes.
In this way, we can disable this practical Windows 10 functionality..