No one doubts that WhatsApp is one of the most used applications by users to communicate worldwide: The exchange of messages, sending files such as photos, videos or voice memos or making video calls through the application have become in part of our day to day without realizing it..
We must grant WhatsApp various permissions for the application such as the camera, microphone or location among others. But it is possible that for various reasons you do not want the location to be active in WhatsApp for use. It is for this reason that today in TechnoWikis we will precisely explain how to deactivate the location in WhatsApp step by step.
Note
The steps to follow may vary slightly depending on the mobile device from which you perform the action, but they will basically be the ones that we will describe below regardless of the terminal you have.
1. How to remove the location in WhatsApp
Step 1
Access the “Settings†of the phone

Step 2
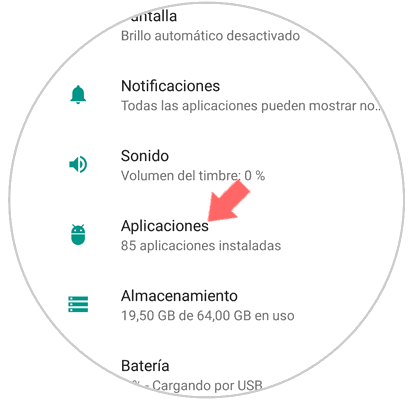
Enter the "Applications" of the phone by sliding to the option and clicking here.
Step 3
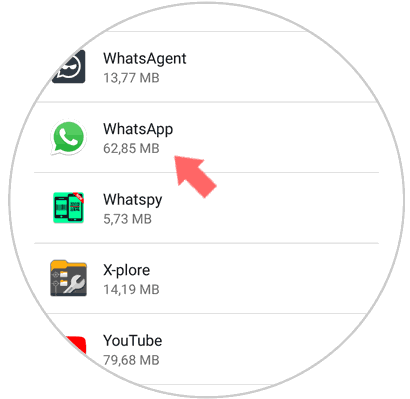
A list of all Apps downloaded to the phone will appear. In this case you must click on "WhatsApp"
Step 4
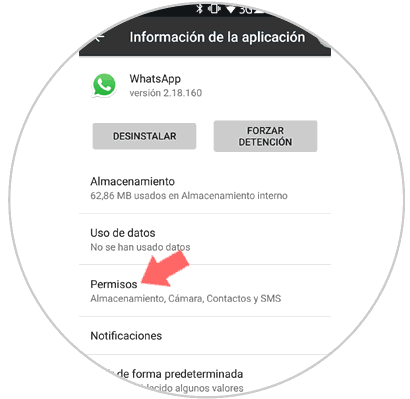
Several configuration options corresponding to this application will appear. Select "Permissions"
Step 5
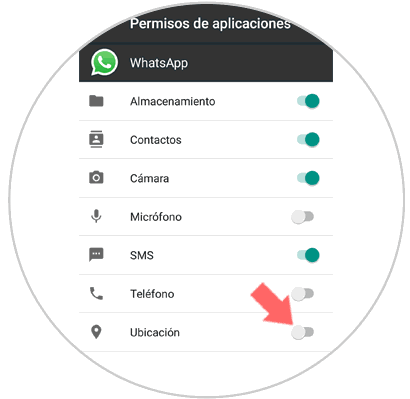
Turn off the "Location" tab by sliding it to the left side and you're done.
2. How to give permissions to send location in WhatsApp
You might have the WhatsApp location disabled but want to send it. For this you will have to give the application permissions on your location as follows:
Step 1
Enter the WhatsApp application and once inside select the contact to send the location.

Step 2
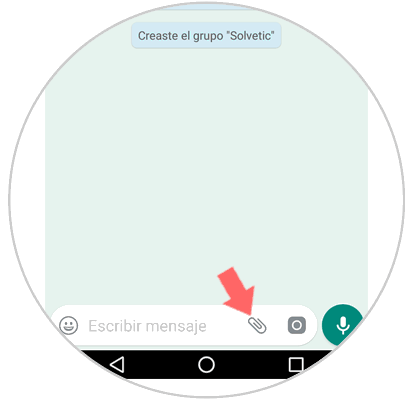
Now click on the clip icon in the writing bar at the bottom that serves to “Attachâ€
Step 3
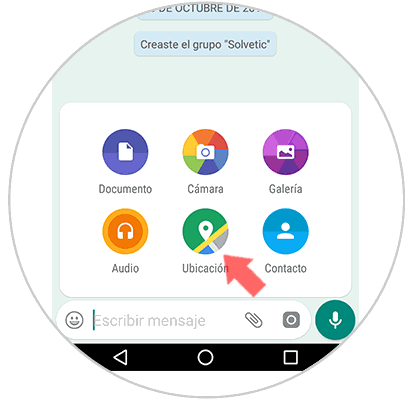
A window will be displayed where you must select the “Location†option
Step 4
A message will pop up asking you to grant WhatsApp permissions to access the location of your device. Click on “Continue†and it will be possible to send this location without any problem.

It will be that simple to deactivate the WhatsApp location on your terminal..
Step 2