Since the launch of Windows 10, significant improvements have been added to the level of personalization of its surroundings , which offers its millions of users the option to customize the environment according to their tastes and preferences .
As a general rule in Windows 10, the windows have a color window border and a shadow for it, it is possible to modify the color of the edges of these windows and deactivate the shadow if required by any display theme ..
By default the color of the border becomes predetermined as gray so that it blends with the shadow and looks suitable for the system without being too excessive, but it is also possible to enable the edges of the color window in new editions of Windows 10.
Through this tutorial we will see how we can set a window border and edit the shadows in Windows 10..
To keep up, remember to subscribe to our YouTube channel! SUBSCRIBE
1. Select a border color for window in Windows 10
In the new version of Windows 10 called April 2018, recently launched, like the previous versions of Windows 10, the system automatically selects a window color that is consistent with the currently established desktop background to obtain Better synchronizations when accessing windows and menus.
Step 1
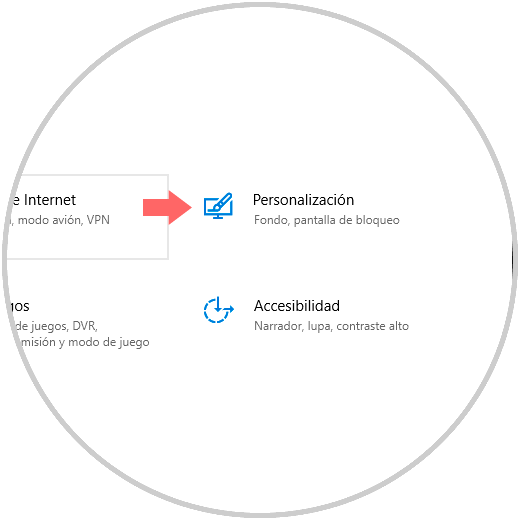
For this we go to the Start menu and there we select the “Configuration†utility where we will see the following:
Step 2
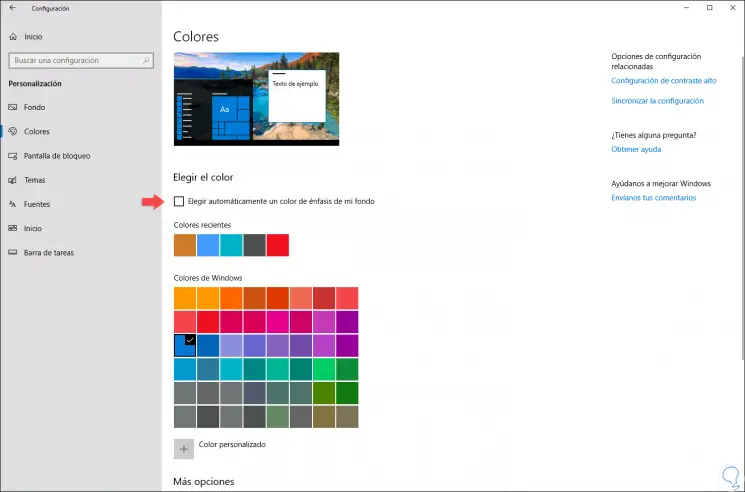
There we select the “Personalization†category and in the new window we go to the “Colors†section:
Step 3
There, in the "Choose the color" section we must validate that the "Automatically choose an emphasis color from my background" box is cleared We can see a color palette that the system offers, but it will be possible to click on the "Custom color â€At the bottom of the list to select a different color according to our preference.
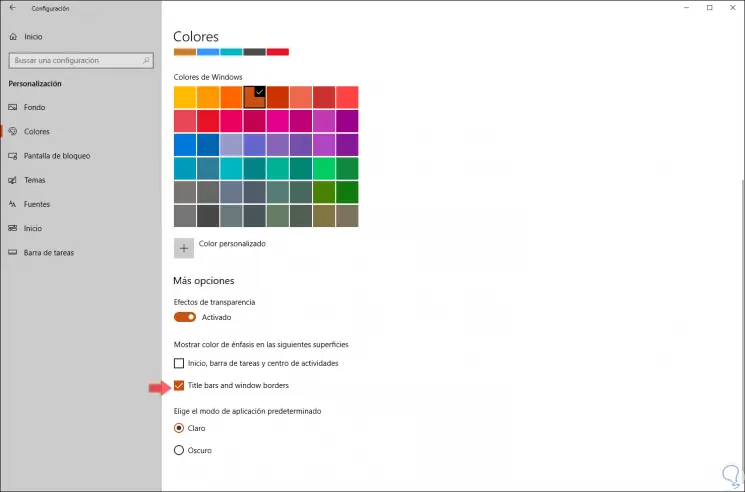
Now, we click on the desired color and at the bottom, in the section "Show emphasis color on the following surfaces" we activate the boxes where we want this to be displayed:
Step 4
The main option to activate here is "Title bars and windows borders". We can see that this color is applied to the edges of the window and to the title bars in Windows 10:

2. Enable or disable shadows in Windows 10 windows
The new edition of Windows 10 enables parallel shadows for each window by default, but these can be disabled if we consider that they are not useful or that they can have a negative impact on system performance.
Step 1
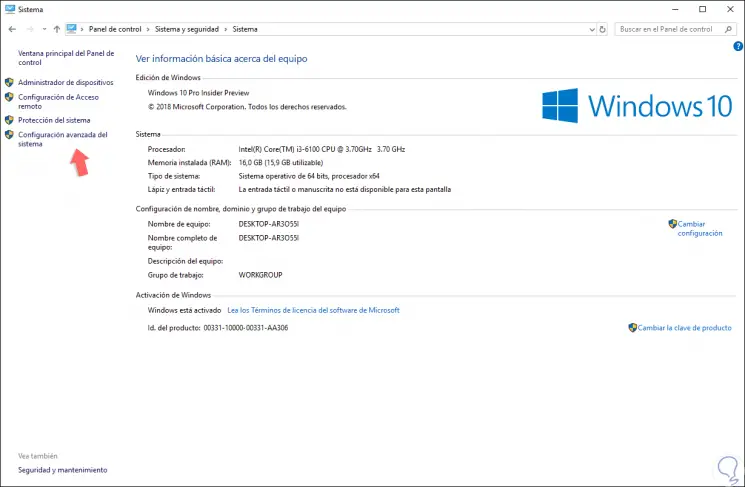
To carry out this process we will go to the following route:
Step 2
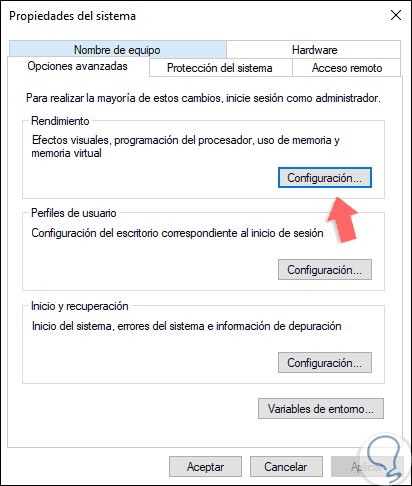
There we click on the “Advanced system configuration†line located on the left side and in the new window displayed we go to the “Advanced options†tab and click on the “Configuration†button located in the “Performance†section:
Step 3
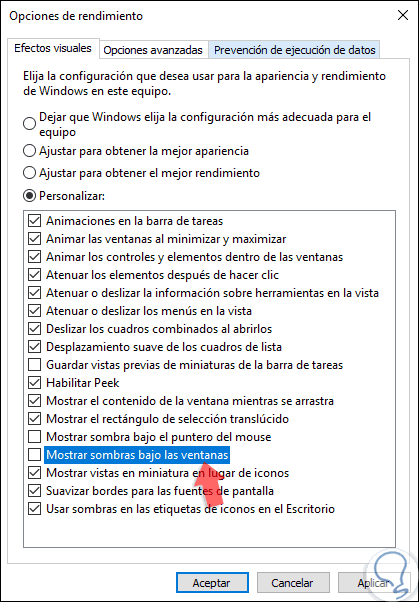
In the new window displayed we go to the "Visual effects" tab and there we activate the "Customize" box and it will be necessary to uncheck the "Show shadows under the windows" box. Click on the Apply button and then click OK to apply the changes.
The shadows of the windows in Windows 10 will disappear automatically and to re-enable them, simply check this box again.
Thus we have learned to perform this process in a simple way in the new version of Windows 10..