By default in Windows 10 when a new program or application is installed , as a game, these are installed on drive C which is where the operating system is installed unless we define a different path during the installation process..
Although this does not affect at all the optimal behavior of the system or applications , we know very well that there are games and applications that consume large space on the hard disk, some with more than 5 GB, at some point the limit collapse may occur of storage which would affect much more than a simple game or program.
We know that in Windows 10 we have the opportunity to move applications and games installed from the Store but it is not possible to move desktop games or classic games that we install, therefore, TechnoWikis will explain clearly how to perform this process in Windows 10.
1. Move folders using FolderMove in Windows 10
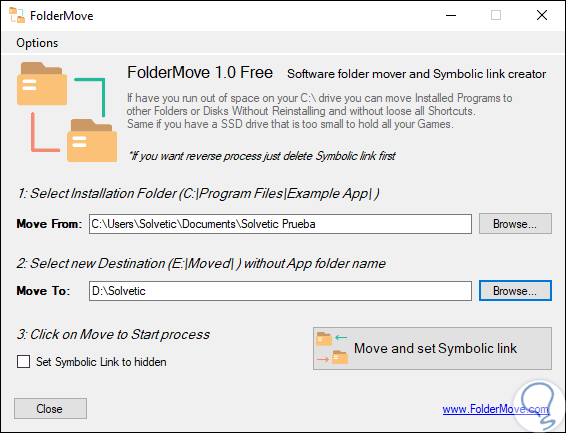
FolderMove is a free application through which users are allowed the ability to simply move installed program and game folders to a new location or unit without the need to install the program or game again.
When using the FolderMove program, it is possible to relocate the installed program or the game folder without problems since FolderMove creates symbolic links to move folders, that is, a symbolic link will be created from the directory before the new one. To get to know this process a bit, a symbolic link contains in itself a text string which is interpreted and automatically followed by the operating system as a path to another directory..
The symbolic link itself is a second file that exists independently of the objective, so, if a symbolic link is deleted, the objective will not be affected in any way, if a symbolic link points to a goal, and at some point this objective undergoes some change as it moves, renames or deletes, the symbolic link is not updated or deleted automatically, but will continue to exist and pointing to the previous objective which guarantees the availability of the folder.
Step 1
We can download FolderMove for free and portable in the following link.
FolderMove
Step 2
Once we run the portable, simply define the following:
- Destination where that folder will move
Step 3
Once this is defined, click on the “Move and set Symbolyc link†button and we will see the following. In this way we will move folders in Windows 10.

2. Move applications using Steam Move in Windows 10
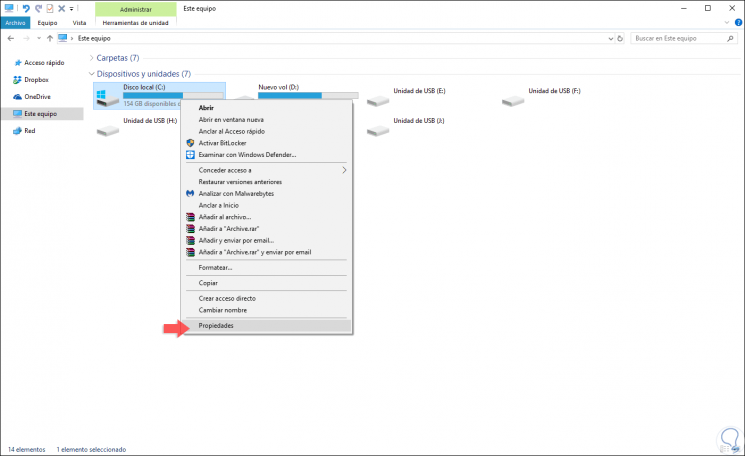
Steam Mover is a free and lightweight application that allows us to easily move applications or programs in Windows 10. This application relocates the programs creating junction points, and we must emphasize that Steam Mover is not compatible with the FAT32 file system.
Step 1
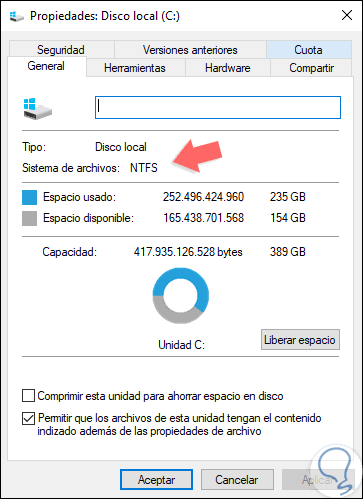
Therefore, before using it, we must verify the type of file system on the disk, for this, we will right-click on the drive and select “Properties†there:
Step 2
In the displayed window we will see the current file system:
Step 3
Now, Steam Move can be downloaded at the following link:
Steam Move
Step 4
It is ideal to keep in mind some details such as:
- It will only be possible to relocate entire folders, not individual files
- We must create backups or restore points in case something goes wrong
- Only works with NTFS file systems
Step 5
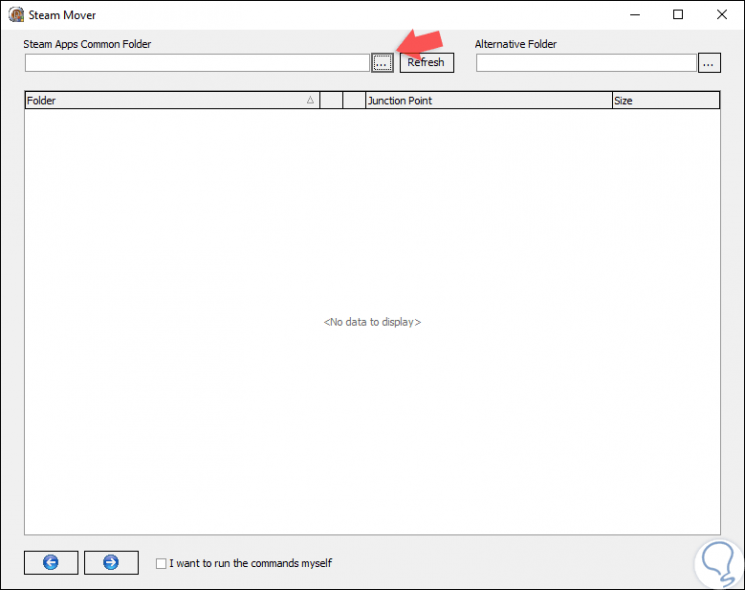
Now, we extract the downloaded content and run it as Administrators for effective use of the program and the following will be displayed:
Step 6
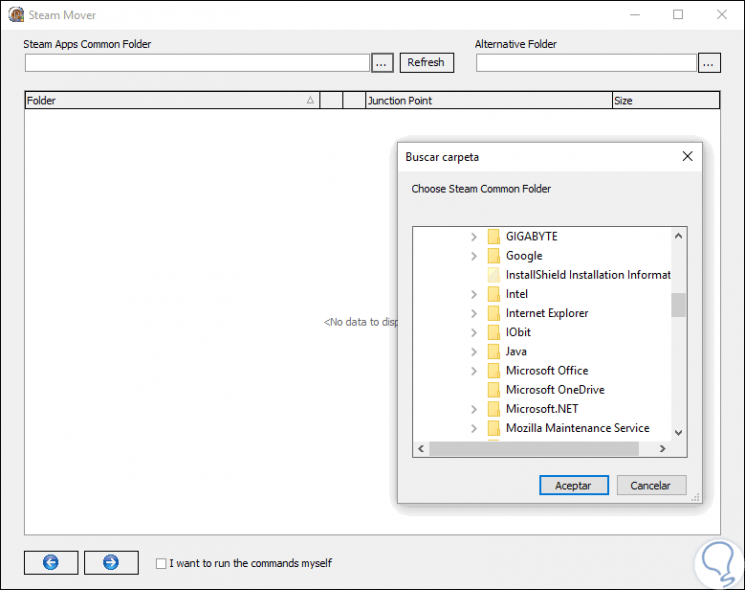
We can see that not all the programs installed in Windows 10 are deployed, in the section of the common folder of the Steam applications, we will click on the “...†button and then we will go to the “Program Files†folder which Contains the installed programs, if you are running a 64-bit system, the program to be moved may be available in the Program Files (x86) folder.
Step 7
Once we select the folder we will see the list of available programs:

Step 8
Now, we will select the program to move, in the "Alternative Folder" field we define the destination and click on the lower button that is activated to execute the action:

Step 9
We can see that the location of said program is automatically updated. With this application we can move games and programs in a simple way.

3. Move applications and programs with Application Move in Windows 10
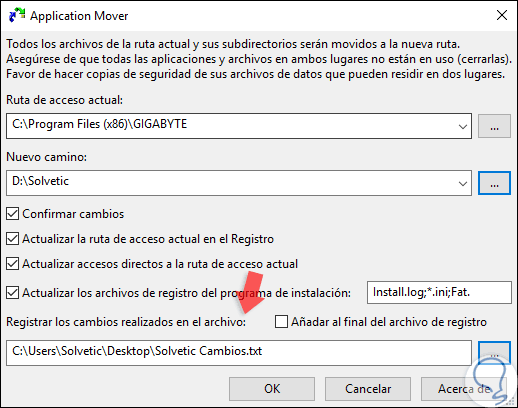
As the name implies, this application is developed with the objective of allowing us to move applications and programs in Windows 10. Application Mover is a simple tool that relocates installed programs from one route to another on the hard disk in a practical way, its way of Acting is simple, Application Mover is responsible for collecting the available files in the path indicated in the "Current path" field and moves them to the "New path" path.
Then Application Move scans the Windows 10 registry for references to the files located in the 'Current' field and changes those references to the 'New' path thus allowing optimal execution of the selected program or application and, in addition to this, scans All the Windows 10 shortcuts in the Start Menu and adjust the route references to the new program location so that the redirection is complete..
Step 1
Your download is available at the following link:
Application Move
Step 2
When installing this application, we define the routes as indicated above:
Step 3
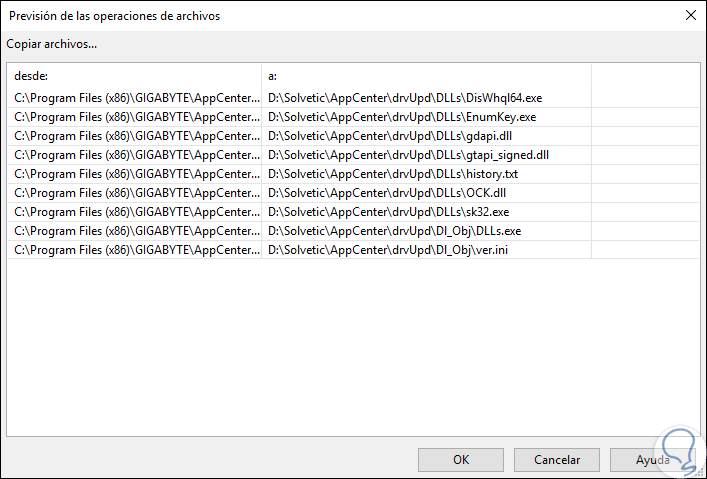
In the lower field, "Record the changes made to the file", we can specify a path where there is a file for management tasks on the tasks to be performed. Once this is defined, click on the OK button to start the process of moving the application or game in Windows 10 and we will see the following:
Step 4
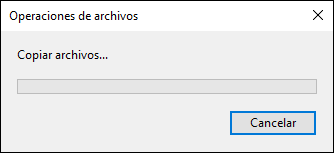
Press OK again to perform the action.
Thus, we have seen various methods to move various elements in Windows 10 in order to improve the storage capacity of the C drive.