The mobile phone has become an essential element of our lives due to the amount of efforts we make from this device and the large amount of information we store and use. Photos, videos, audio files and even documents in multiple formats are elements that we often send and receive using our phones..
Because of this, it is normal that we store a lot of information in these small devices. When the volume of information is so large, you may need to connect your phone to your computer to manage it more comfortably.
For this it will be necessary to activate the USB debugging mode on your device, to avoid possible errors or that the PC does not recognize the connection with the mobile device. This is why today in TechnoWikis we will explain step by step how to do it in one of the most used Android terminals of the moment: The Samsung Galaxy J5. For this you will have to do the following:
To keep up, remember to subscribe to our YouTube channel! SUBSCRIBE
Step 1
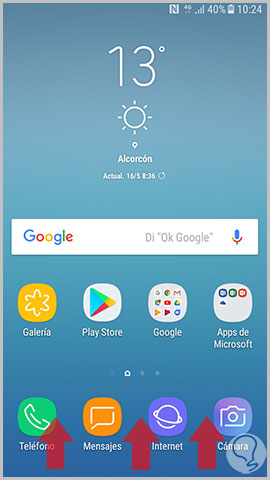
Swipe the main menu screen up to access its mobile icons.
Step 2
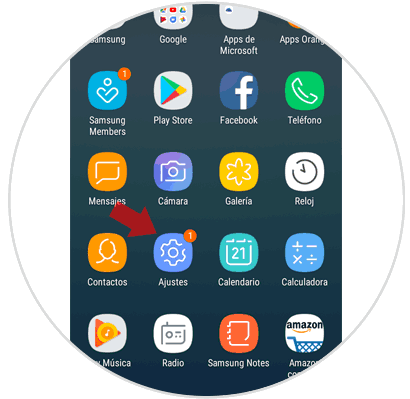
Now, once in the menu, click on the "Settings" icon represented by a cogwheel on a blue background.
Step 3
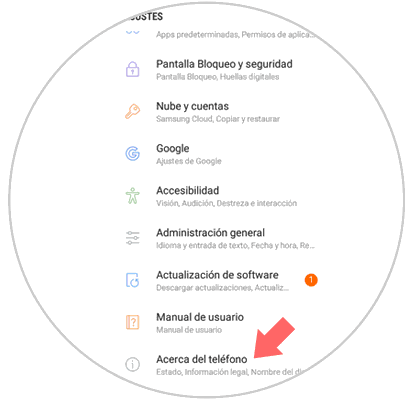
Now you will appear on a new screen. Swipe to the “About phone†option located last and click here.
Step 4
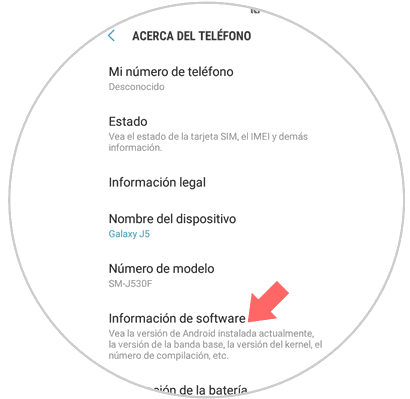
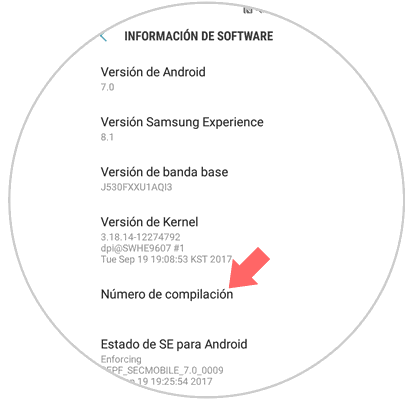
Once inside, swipe the screen to the "Software information" option. Click on it to continue.
Step 5
Now, among all the possible options you will see a call "Build number". Press 7 times on this option to activate the developer mode on the phone.
Step 6
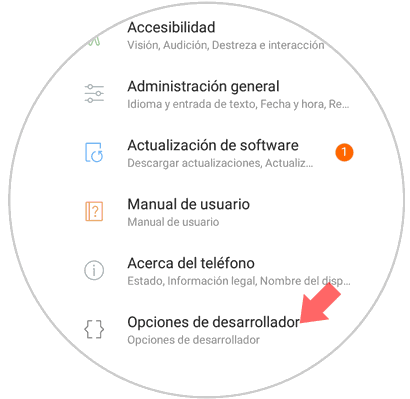
Once you have done it, tap on "Back" to return. Now you will see the "Developer options" from the Settings menu on your Samsung Galaxy J5. Press here.
Step 7
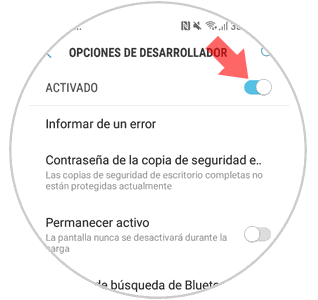
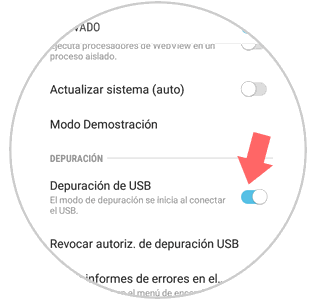
Here you must activate the "Developer mode" option by sliding the "On" tab at the top and then swiping to the "USB Debugging" section and also activate that tab.
It will be that simple to activate developer mode and USB debugging on the Samsung Galaxy J5 Android terminal..