When we take a picture we work under a series of expectations that we try to capture from the start, although sometimes it doesn't work out the way we want. The subsequent edition is a great help to achieve the objectives we are looking for since it can give us what we have lacked to achieve it..
When we make a portrait, we must have a series of elements in mind so that the photograph looks professional: light, color , pose, lens use ... We want the final image to show the person perfectly.
There are several aspects that we can touch up in a portrait image such as hair, makeup, eye color and even the color of the teeth. And yes, it is that imperfections can be eliminated from Photoshop if we propose it. This tutorial is going to focus today on improving the appearance of the smile by improving the white color of the teeth from Photoshop CC 2017 or CS6..
To keep up, remember to subscribe to our YouTube channel! SUBSCRIBE
1. Whiten teeth using the Hue / Saturation tool in Photoshop CC 2017
Step 1
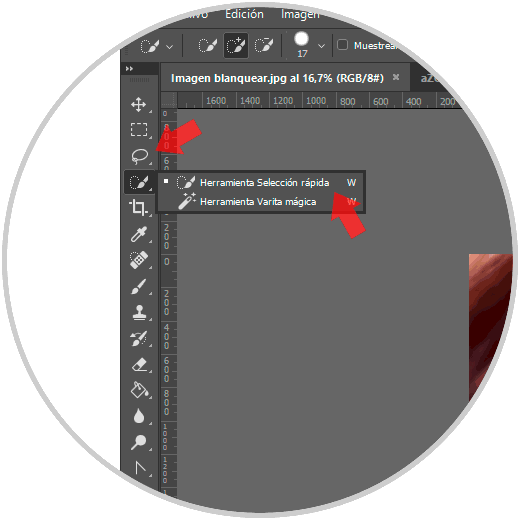
The first thing will be to go to the tools area and select the "Polygonal lasso" function. If you prefer something faster we can go to "Quick selection".
Step 2
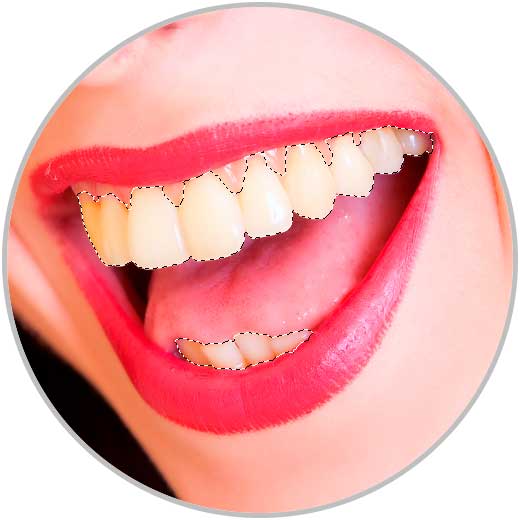
With the tool that we have chosen we will go to the part of the teeth of our image avoiding selecting the part of the gums.
Step 3
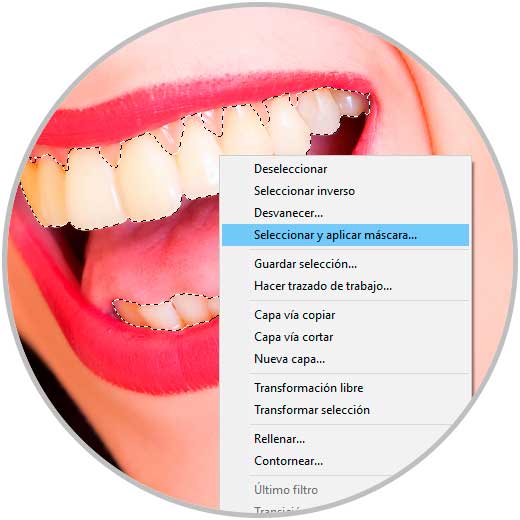
Once with the selection made we will right click and click on the option "Select and apply mask".
Note
To make these options appear, make sure you have the selection tool used selected.
Step 4
From here we will work the edges so that they are not strictly with hard edges and the result is more natural. Work with the "Fade" factor. Play with other settings to improve it like contrast or radius. Once you have it click on Ok.

Step 5
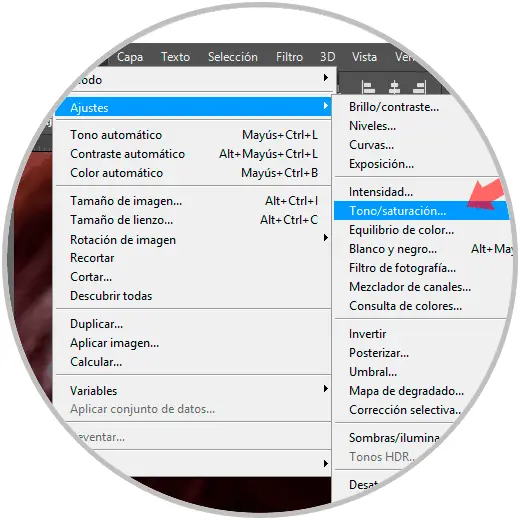
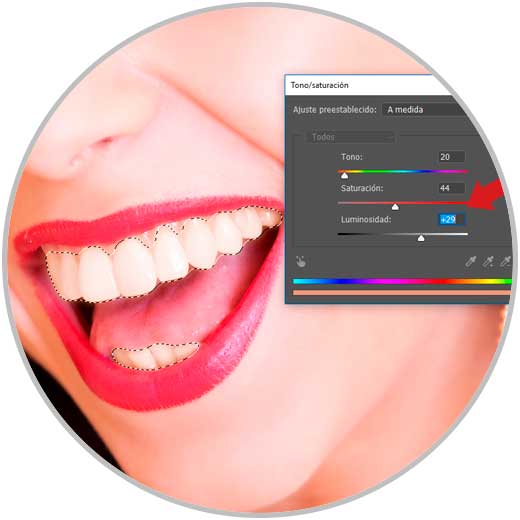
Now we go to the "Image - Adjustments - Hue / Saturation" section. We can also use the following shortcut.
+ U Ctrl + U
Step 5
In these adjustments we will vary the 3 aspects of Hue, Saturation and Brightness until a good result is achieved. What we are looking for is to reduce the tone to a reddish one, we reduce the Saturation and finally, we increase the Brightness.
Step 6
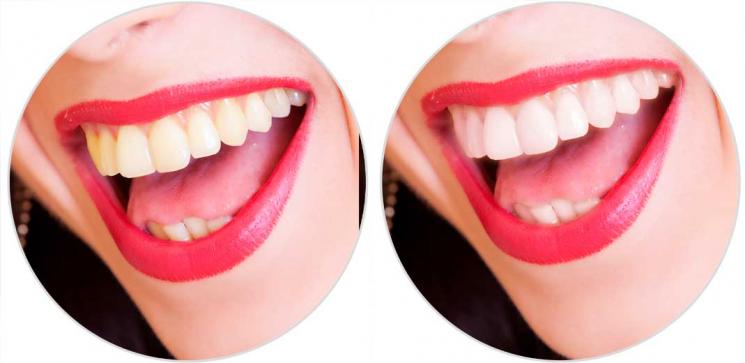
We can see the result by comparing the before and after.
2. Whiten teeth using Color Balance in Photoshop CC 2017
Step 1
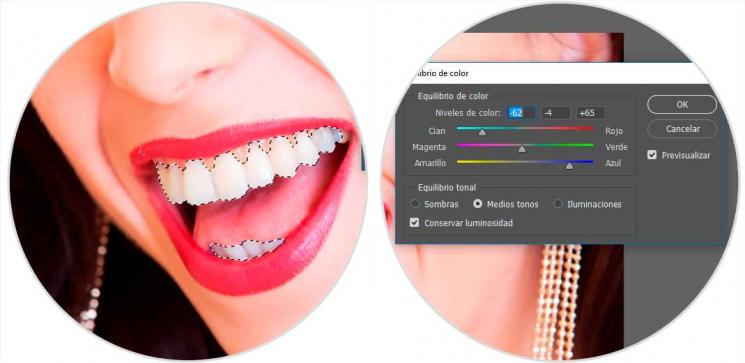
We re-select the part of the teeth as we did in the previous section with some of the available tools.
Step 2
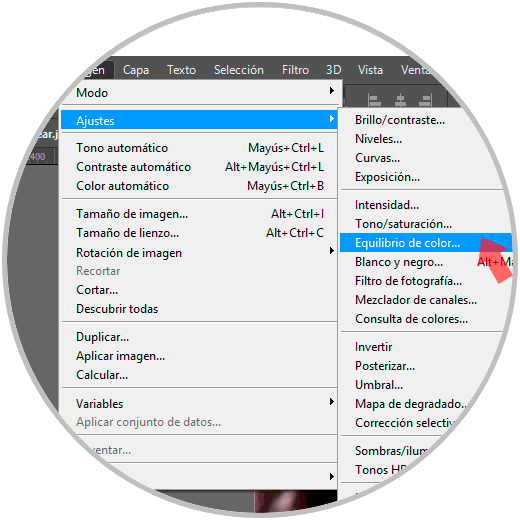
We go to the “Image - Adjustments - Color balance†path or use the following shortcut:
+ U Ctrl + U
Step 3
Although these adjustments can remind us of the "Hue / Saturation" balance is applied to a range of specific colors. The modification will consist of transforming red to more bluish, Magenta towards green and yellow towards blue. Although there will be a small bluish hue in the teeth, the final result is much better than the initial.
Step 4
We can see the difference between the previous and the final color.
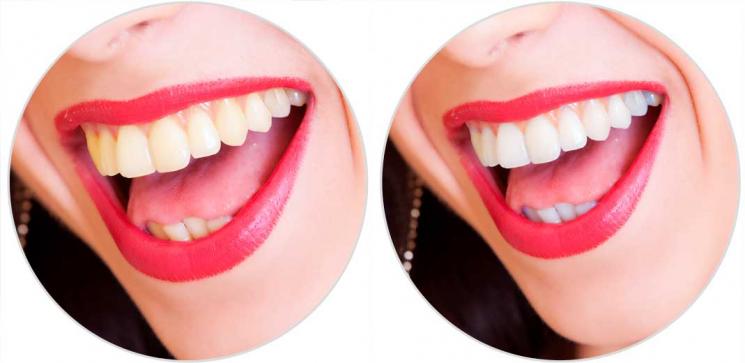
In this way we have managed to turn yellow teeth into improved white teeth that will extol the character of your portrait using Photoshop CC 2017. We can use any of the two forms since it will depend on the initial color, even so perhaps the first method is more effective than the second.