DNS servers have the main function of converting domain names to IP addresses and vice versa, which makes it much easier for us to access a site like TechnoWikis.com and not enter the IP address of the mentioned site.
When we access a website, the team will contact the DNS servers that have been listed in the system and then the server searches for the IP address for that specific domain name and with it the scan request will be sent to that address IP in particular and in this way we will access the website..
Most DNS servers are provided by ISPs (Internet Service Providers) and the problem is that many of these servers do not have enough high or adequate hardware resources to support multiple requests simultaneously which triggers the access the DNS is slow or of erroneous results affecting the natural operability of the sites.
To solve this, the goal is to establish another DNS IP address in the system and the best resource is to use public DNS servers such as Google DNS or OpenDNS..
What is Google DNS?
It is developed by the giant Google and has high performance equipment which guarantees security and speed for the entire process of the necessary DNS requests.
It is important to keep in mind that Google DNS only gives us the opportunity to resolve DNS and not to use these servers to host a domain or block websites, which is a private task. The IP addresses that are implemented on these servers are:
8.8.8.8 8.8.4.4
What is OpenDNS?
The goal of OpenDNS is to provide DNS resolution services, just like Google's public DNS, only that certain additional functions are added. Among its novelties we have:
- Phishing and botnet protection
- Detailed statistics and correction of typographical errors.
When using OpenDNS there are three alternatives that are:
The IP addresses used by OpenDNS are:
208.67.222.222 208.67.220.220
We can use some of these solutions, understanding that OpenDNS has better options, but it will be necessary to pay an annual fee for acquiring greater functionality, while the free options of both will always be an ideal solution for stable navigation.
To keep up, remember to subscribe to our YouTube channel! SUBSCRIBE
1. How to put a new DNS in Windows 10
Step 1
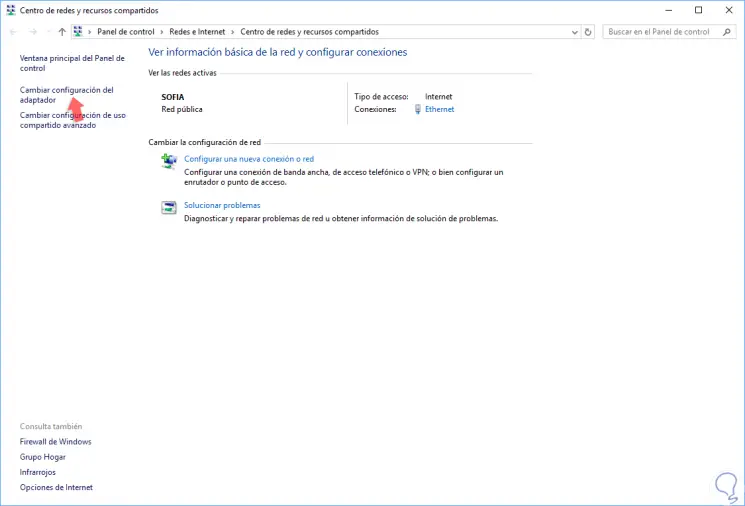
For this we will go to the following route:
- Center network and sharing
Step 1
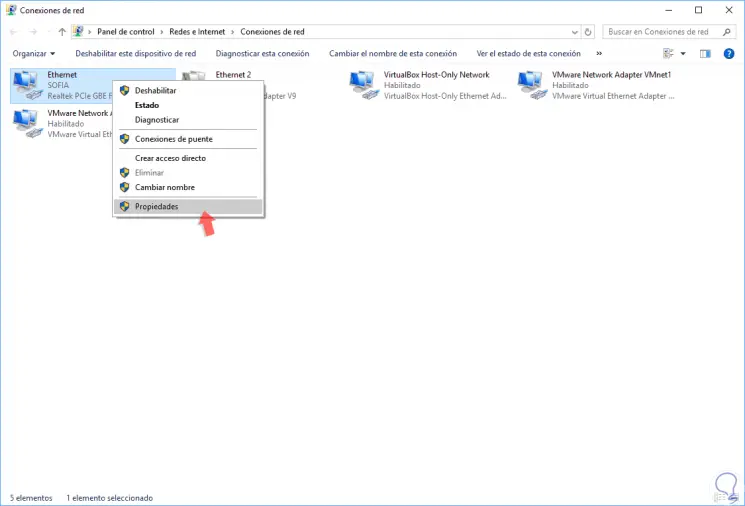
There we click on the “Change adapter settings†line located on the left side and in the new window we will right click on the current adapter and select the “Properties†option:
Step 1
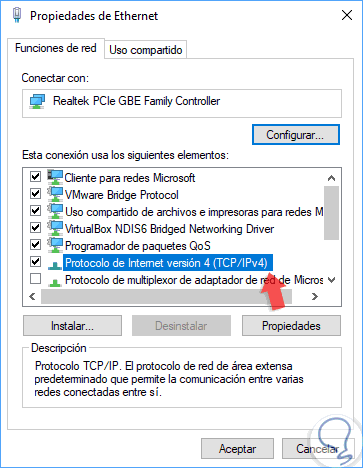
In the pop-up window we select the "Internet Protocol version 4" option and click on the "Properties" button:
Step 2
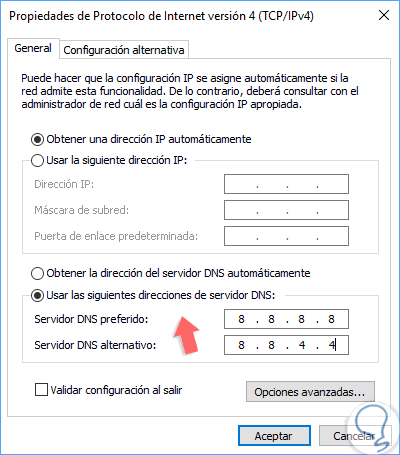
Now, we check the box “Use the following DNS server addresses†and in the respective fields we will enter the desired address as well. Once we do this, click on the Accept button to apply the changes.
Google DNS
Preferred DNS server: 8.8.8.8 Alternative DNS server: 8.8.4.4
OpenDNS
Preferred DNS server: 208.67.222.222 Alternative DNS server: 208.67.220.220
2. How to put a new DNS in macOS High Sierra
Step 1
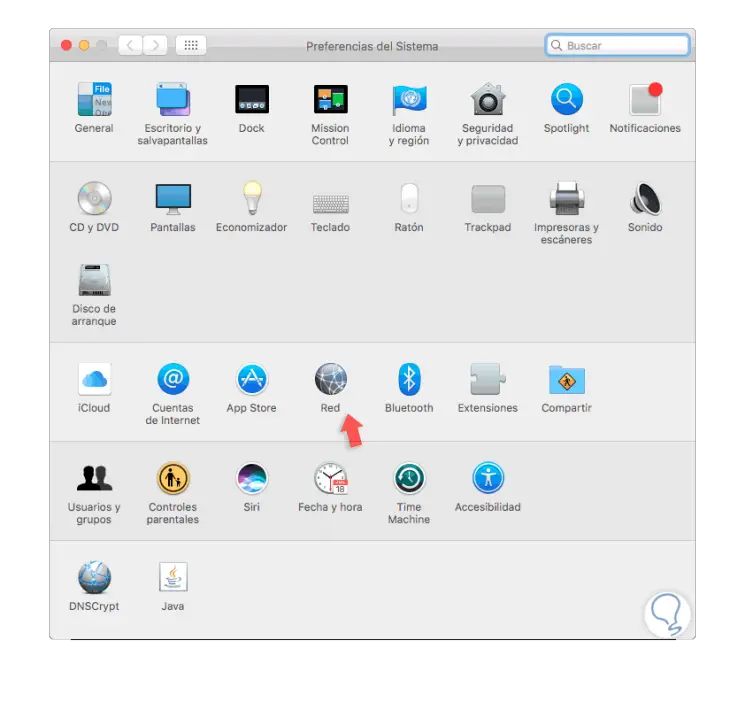
In the case of macOS High Sierra, we go to "Preferences" and select the "Network" option:
Step 2
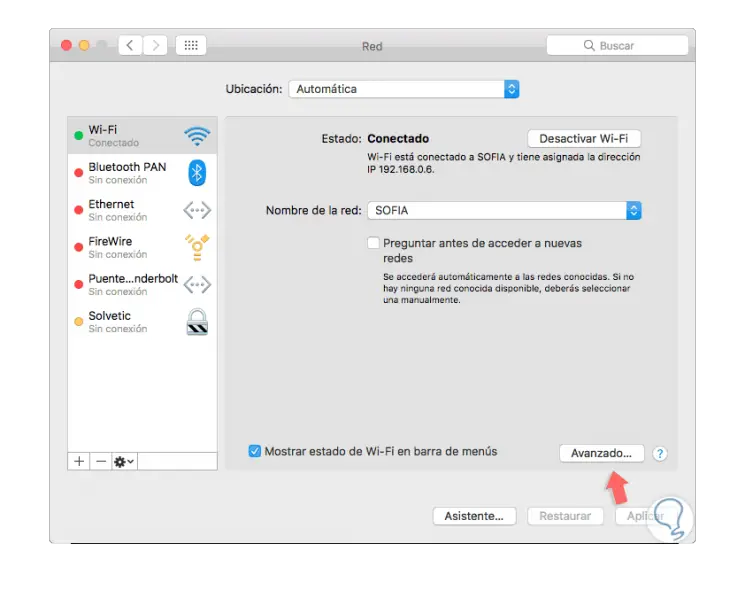
In the displayed window we go to the "Wi-Fi" section and there we click on the "Advanced" button:
Step 3
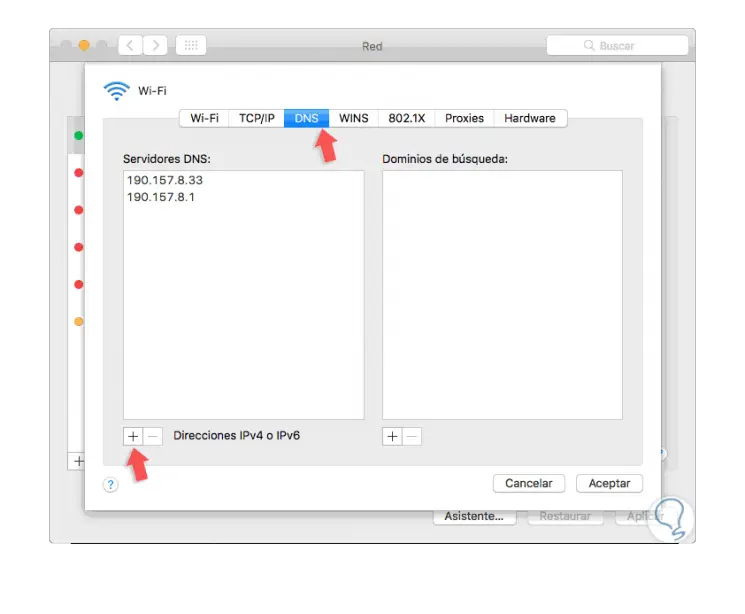
In the new window we will go to the "DNS" tab where we will see the following:
Step 4
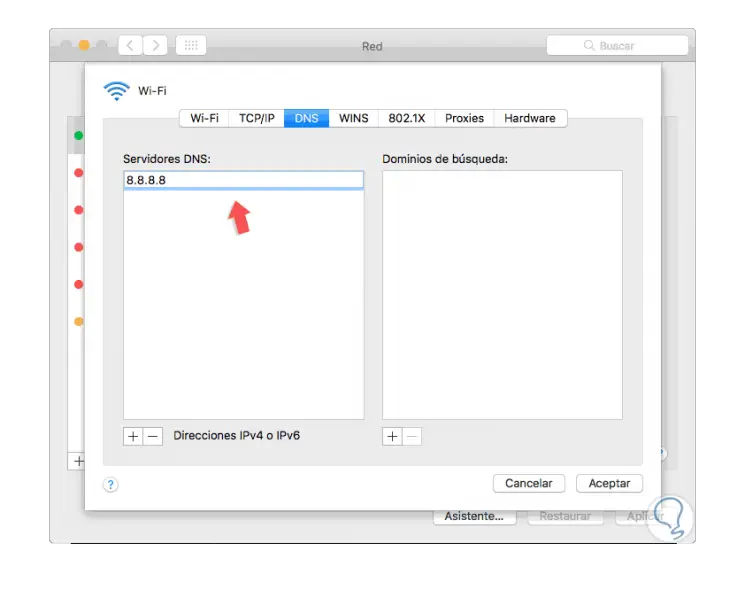
There we click on the + sign located at the bottom and in the new window we will enter the respective desired IP addresses. Click on OK to apply the changes.
It's that simple to edit the DNS servers in Windows or macOS and thus get the best navigation without name resolution errors and in a completely secure way..