Windows 10 is an operating system that requires constant updates since, as we know, it is a constant target of thousands of attacks and threats that jeopardize the security of not only the system but our information..
For this there is Windows Update, but currently the error 0x80070422 has been presented which is presented at the time of trying to update Windows 10 through Windows Update, and this error prevents us from completely downloading Windows 10 updates which, in terms of security and reliability, it is a delicate failure.
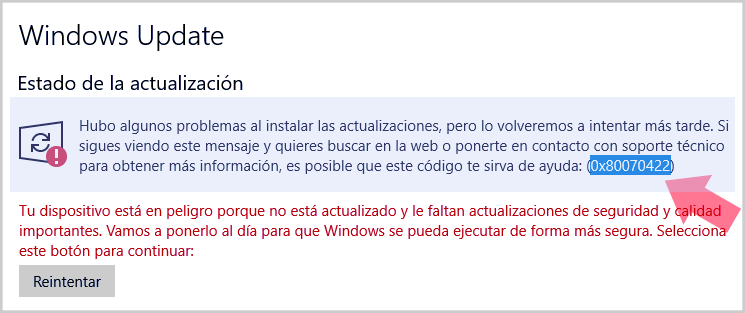
Fortunately this error has a solution and today TechnoWikis will give them through this tutorial..
1. Disable IPv6 to fix error 0x80070422 in Windows 10
Although in the very near future IPv6 will be the IP addressing standard, it is still in the process of coupling and administration, so we continue to use IPv4.
Step 1
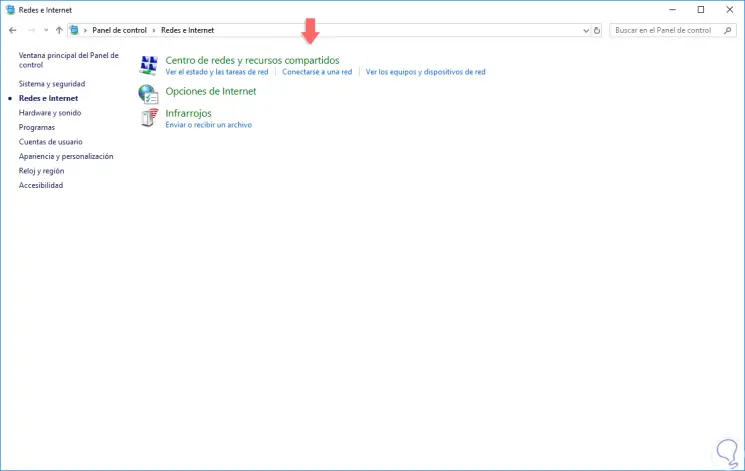
The fault is that Windows 10 automatically enabled both standards which triggers a communication error at the time of downloading in Windows Update. To correct this, we will go to the following route:
Step 2
There we select the option "Network and Sharing Center" where we will see the following:
Step 3
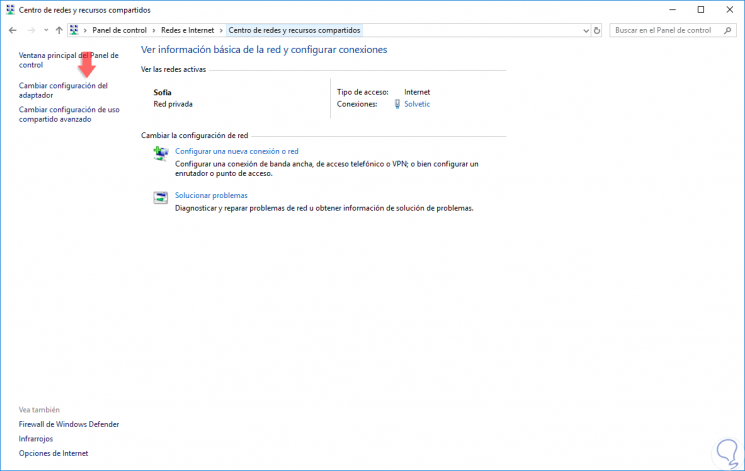
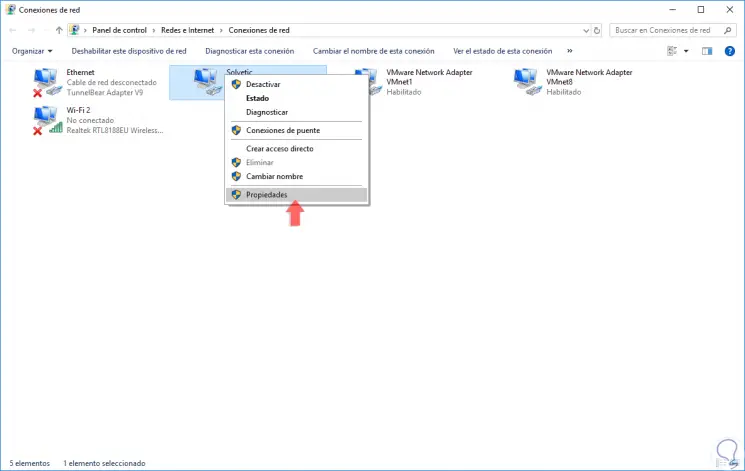
There we click on the “Change adapter settings†line and there we will click on the current network adapter and select the “Properties†option:
Step 4
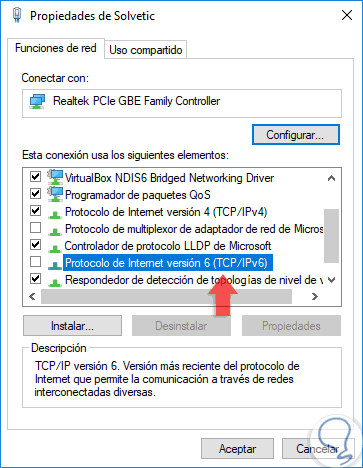
In the window that will be displayed, we will locate the line called "Internet Protocol version 6" and proceed to deactivate its box. Click on OK to save the changes.
Note
We can also execute this process in the Windows registry editor, always with the necessary care and responsibility.
Step 5
To do this, we use the following key combination and execute the regedit command and in the displayed window we will go to the following route:
+ R
HKEY_LOCAL_MACHINES / YSTEM / CurrentControlSet / Services / TCPIP6 / Parameters
Step 6
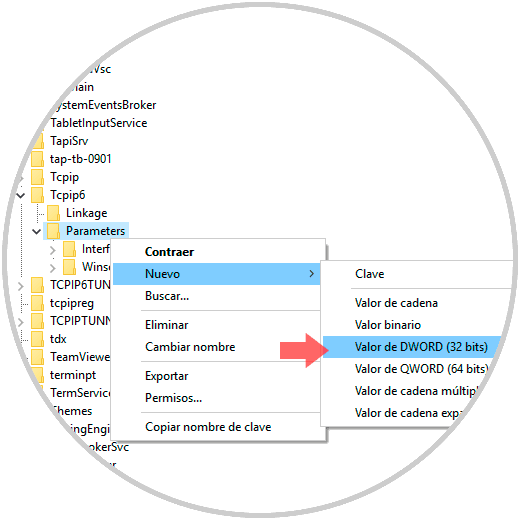
There we will right click on the “Parameters†key and select the “New / DWORD Value (32 bits)†option:
Step 7
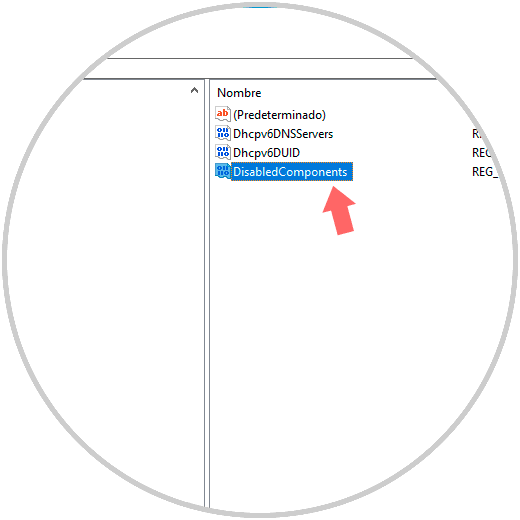
We will call this value "DisabledComponents":
Step 8
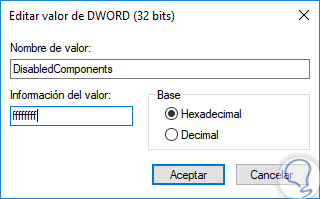
We will double click on this DWORD value and in the “Value information†field we set the value “ffffffffâ€. Click on OK to apply the changes.
2. Validate the Windows Update service to fix error 0x80070422 in Windows 10
The Windows Update service must be running in order for all updates available to the system to be downloaded and installed on the system periodically, but if this service presents any type of failure, it is cause for the error 0x80070422 to be generated.
Step 1
To check the current status of the service we will use the following key combination and execute the "services.msc" command.
+ R
Step 2
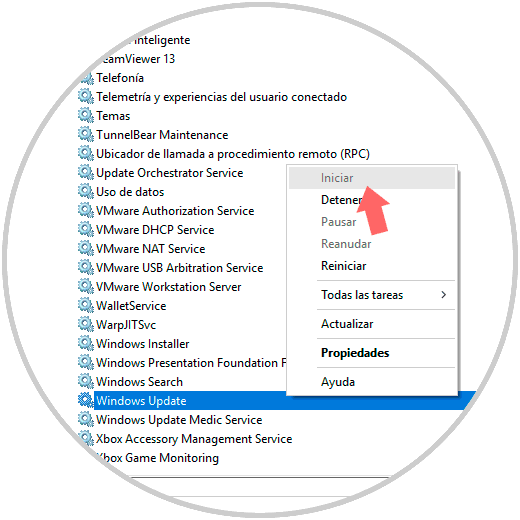
In the window that appears, we locate the “Windows Update†service and if it is stopped, we will right click on it and select the “Start†option:
3. Check the EnableFeatured Software Data data to fix error 0x80070422 in Windows 10
Step 1
For this check we will go back to the editor again to the Windows 10 record editor using the following keys and execute the regedit command.
+ R
regedit
Step 2
There we go to the next route.
HKEY_LOCAL_MACHINE \ SOFTWARE \ Microsoft \ Windows \ CurrentVersion \ WindowsUpdate \ Auto Update
Step 3
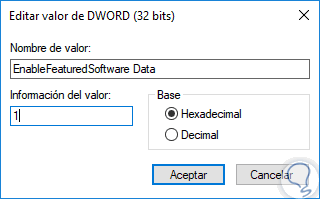
There we must verify that the DWORD value “EnableFeatured Software Data†is in one. Click on OK to save the changes.
4. Restart the Network List service to fix error 0x80070422 in Windows 10
The network list service is responsible for going to Microsoft servers and locating the best options for downloading updates, but if this service presents some type of error, downloading the update will generate the indicated error, in this case we must Restart the network list service.
Step 1
To do this, we use the following keys and execute the services.msc command and press Enter or OK.
+ R
services.msc
Step 2
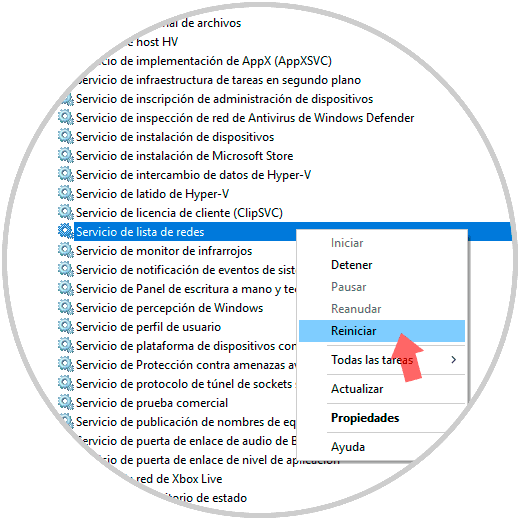
In the pop-up window we locate the service called “Network List Serviceâ€, we will right click on it and select the “Restart†option:
5. Run the Troubleshooter to fix error 0x80070422 in Windows 10
As we know, the Windows 10 operating system has a tool created to help us solve the most common problems that arise in the system and thus have a comprehensive solution without the need for technical support.
Step 1
To do this, we go to the following route:
Step 2
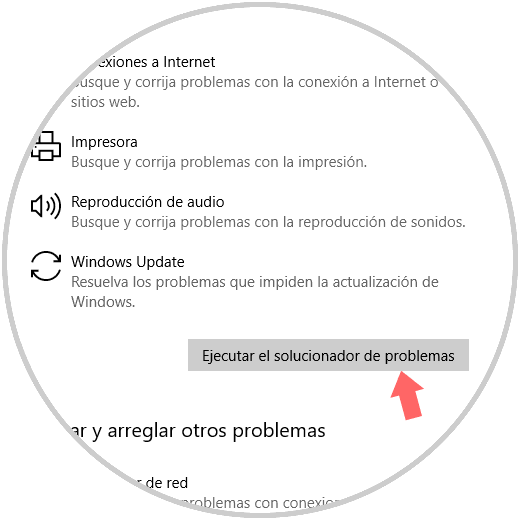
There we locate the "Windows Update" option and clicking on it we will click on the "Run the troubleshooter" button:
Step 3
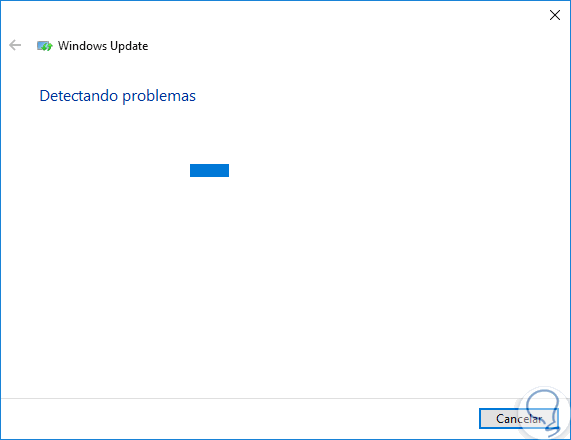
There, the analysis process will begin in search of failures:
Thus, we have comprehensive solutions at hand to correct this error and allow Windows 10 to be updated as expected.