Microsoft has worked on launching the new edition of Windows 10 Spring Creators (version 1803) for the month of April, so there will be an overload on Microsoft's central servers since this edition is now available for Windows Insider users..
Even many Windows 10 users are reluctant to accept such updates for reasons such as application compatibility , security or errors of some programs, which is normal in new editions of any operating system.
Through this tutorial TechnoWikis wants to explain some ways to prevent our system from being updated to this new version of Windows 10..
1. Defer the new update Windows 10 Spring Creators Update
Step 1
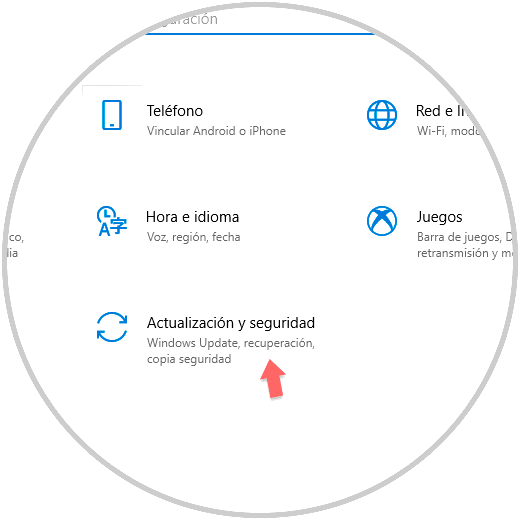
This option gives us the opportunity to postpone the installation process of the new editions of Windows 10 available and to achieve this we will go to the "Start / Settings" menu where we will see the following:
Step 2
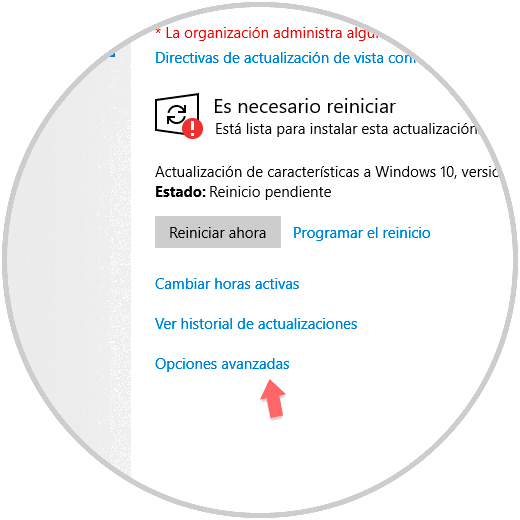
There we click on the "Update and security" section and in the new window we will go to the "Windows Update" category:
Step 3
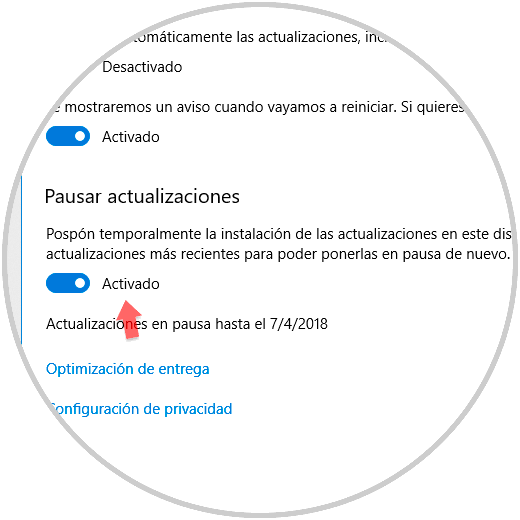
There we click on the “Advanced options†line and in the new window we will activate the “Pause updates†switch. This way the available updates will be paused for 7 days.
2. Postpone an installation in Windows 10
The next option is to postpone the system update process using the active system hours so that only in the range that is stipulated, we will be notified and this process can be carried out.
Step 1
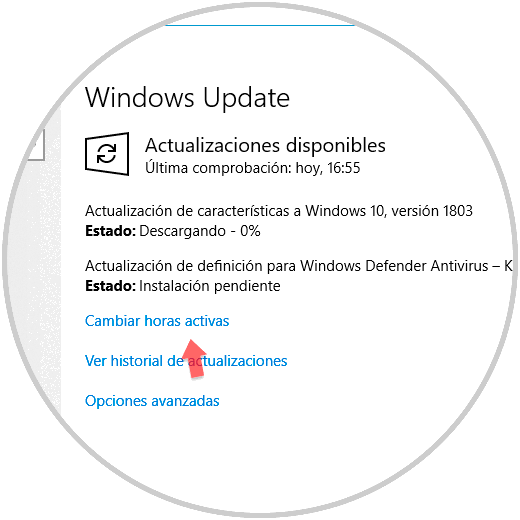
To do this, from the same route above, "Start / Settings / Update and security / Windows Update" ¸ we will click on the "Change active hours" line:
Step 2
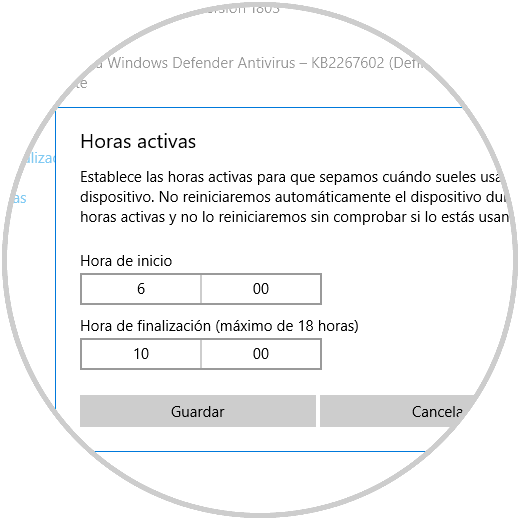
The following table will be displayed where we will define the time range where Windows cannot install these updates:
Step 2
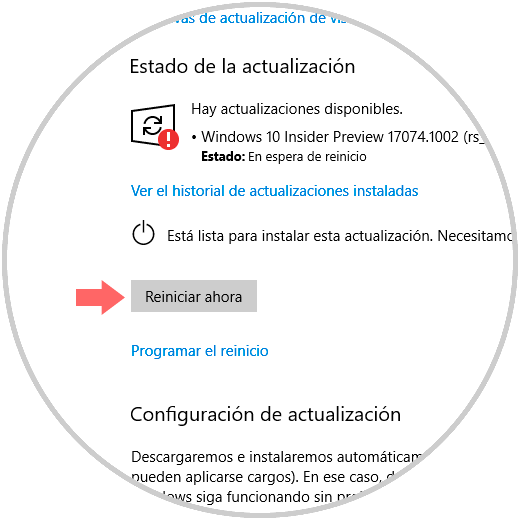
Once the time range is defined, click on “Save†to apply the changes. In some cases, we will have the option "Schedule restart" available:
Step 3
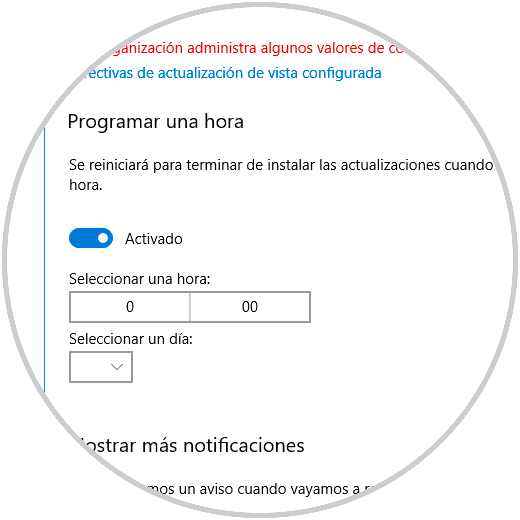
By pressing there, it will be possible to activate this switch and define a time and day range of the week in which the equipment will be restarted to install the respective updates:
3. Block Windows 10 updates
Although the goal is always to keep the system with the latest updates available, we do not always have time or resources to do so, in this case one of the problems that many users may encounter is to have limited networks which have a data cap and we know very Well, a new edition of Windows weighs enough to be used in a limited network.
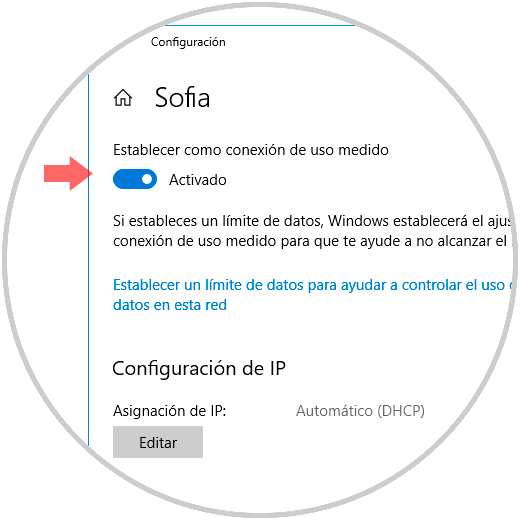
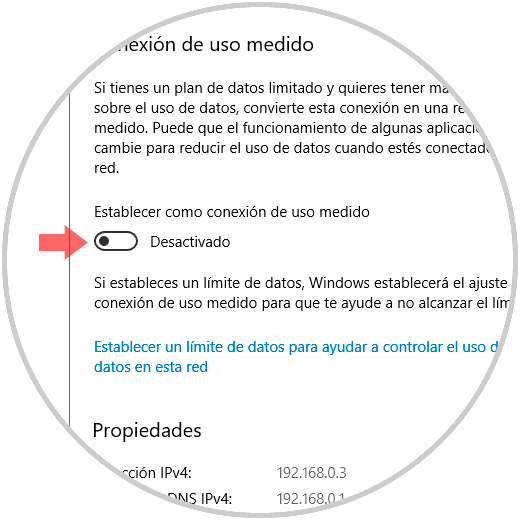
To avoid this, we can make use of the measured connections which establish a data cap at the level of use.
Step 1
For this, we go to "Start / Settings / Network and Internet":

Step 2
There we will click on the Wi-Fi network to which we are connected and activate the “Set as measured use connection†switch:
Step 3
In the case of using an Ethernet network, we go to the “Ethernet†section, click on our network and in the new window we will activate the “Set as measured use connection†switch:
With any of these methods it will be possible to edit that the new Windows update is installed on our computer..