Skype has become one of the most effective and comprehensive communication solutions we have today and although it has a much more business approach, for traditional users we have certain advantages when talking with our family or friends in the world..
By default, Skype only allows us to run an account on our computer and on certain occasions it may be useful to have two accounts there as one can be used for work and another for personal use.
TechnoWikis, through this tutorial, will explain how to manage two Skype accounts simultaneously on Windows..
To keep up, remember to subscribe to our YouTube channel! SUBSCRIBE
Set up Skype to open two accounts at the same time in Windows 10, 8, 7
Step 1
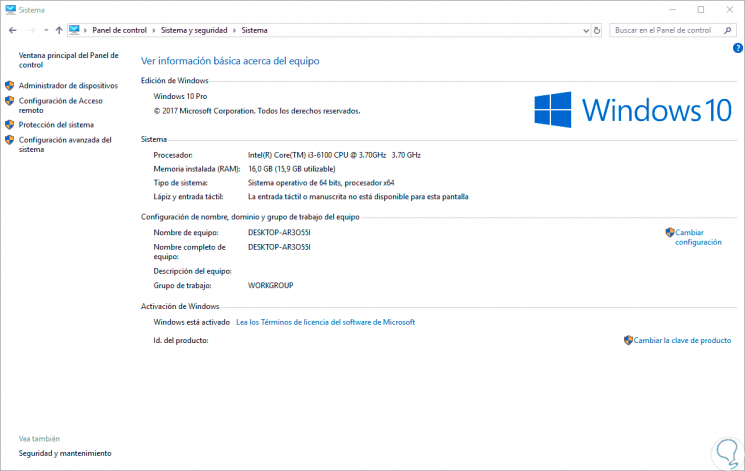
The first step to take is to verify what type of Windows architecture we handle, for this we can go to the next route. There we check if the equipment is 32 or 64 bits.
Step 2
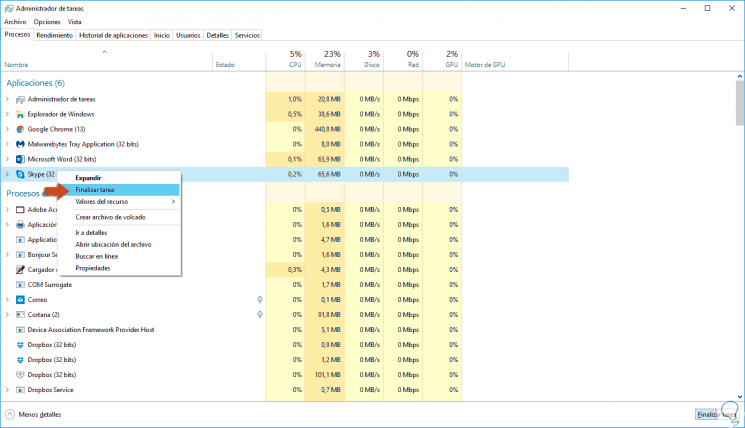
Now, it is time to set up Skype and the first point to make is to close Skype if we are currently running it, for this we can close the session directly or use the Task Manager by right clicking on the Skype process and selecting the option “End task ":
Step 3
Now, we will use the following key combination and execute any of the following lines:
+ R
For 32-bit systems
% programfiles% / skype / phone /
For 64-bit systems
% programfiles (x86)% / skype / phone /
Step 4
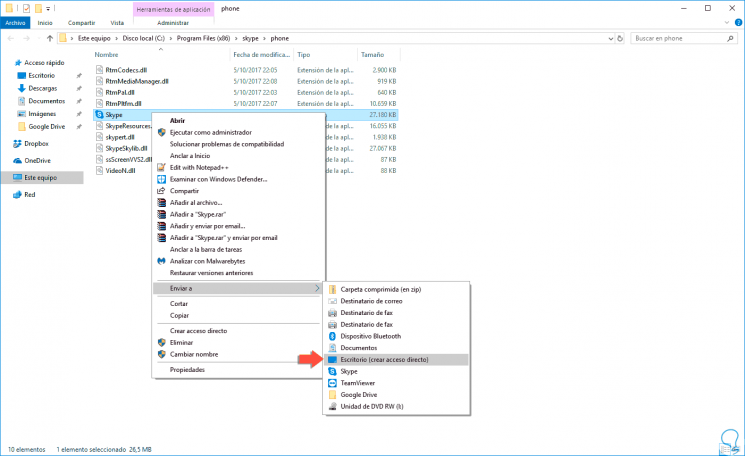
In the window displayed, we will right click on Skype and select the option “Send to / Desktop (create shortcut)â€:
Step 5
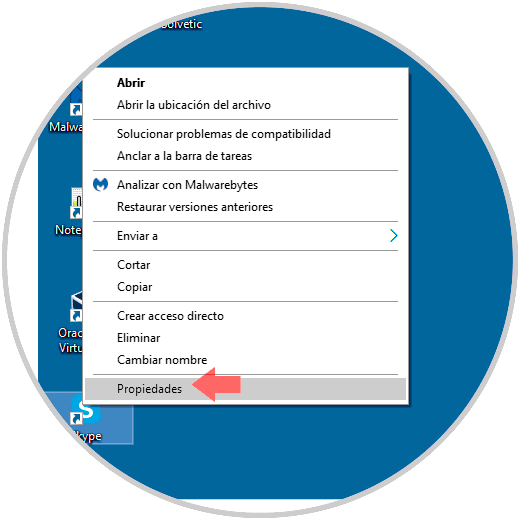
We go to the desktop, we will right click on the shortcut that has been created and select the "Properties" option:
Step 6
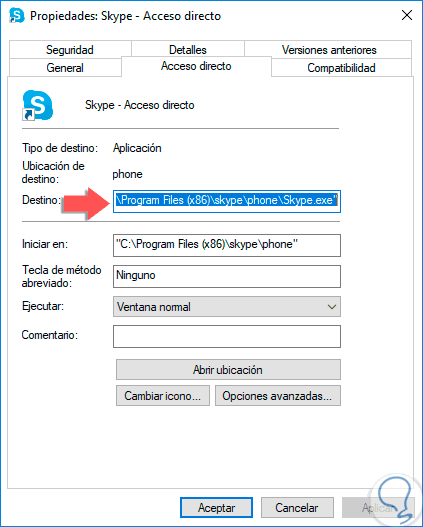
The following window will be displayed:
Step 7
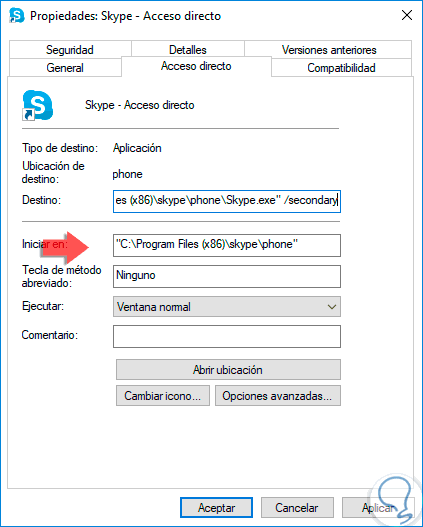
There we go to the “Destination†field and add the “/ secondary†line at the end of the path which should be as follows:
For 32-bit systems
"C: \ Program Files \ Skype \ Phone \ Skype.exe" / secondary
For 64-bit systems
"C: \ Program Files (x86) \ Skype \ Phone \ Skype.exe" / secondary
Step 8
Click on Apply and Accept and in this way when we double click on said shortcut, a new Skype session will be opened to use as appropriate:
