The daily use of Microsoft Word 2019 is one of the actions that many of us perform to create professional documents thanks to the various functions and features integrated in this application and it is natural that many times we want to establish page numbers or number styles and formats within of the outline of the document as in its table of contents, subtitles, etc.
Thanks to text editing and programs intended for it as Word, we can create text documents with different formats and styles creating original and complex documents. The work of the text allows us to change the font to the origin of characters and thus intermingle languages. An example of this is to transform numbers into other formats known as Roman numerals or Arabic style. With this we would be creating different and differentiating formats that we can use at some time. To achieve this, one of the best alternatives available is the use of Arabic and Roman numerals for this design and today TechnoWikis will explain how to insert this type of numbers in Word 2019.
We also leave you below the video tutorial with the steps and forms you have to be able to put numbers in Roman or Arabic easily in Word 2019.
To keep up, remember to subscribe to our YouTube channel! SUBSCRIBE
1. Insert Roman numerals in Microsoft Word 2019
Step 1
For this process, we will go to the Insert menu and in the Header and footer group we click on the Page Number option and in the displayed list we select Page Number Format: 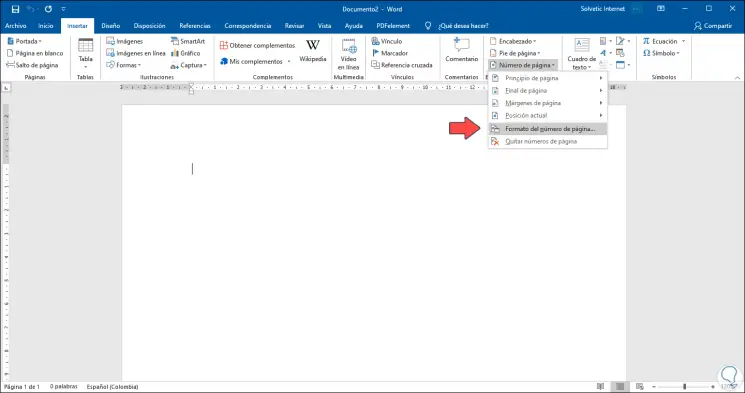
Step 2
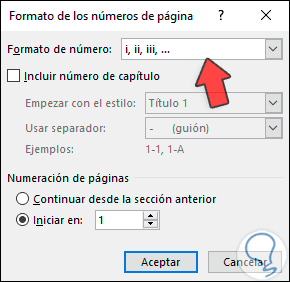
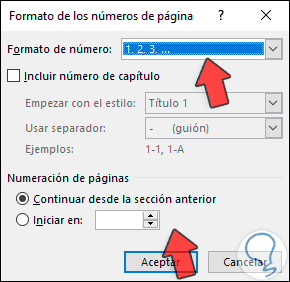
After this, in the "Number format" field, we select the integrated Roman numeral scheme:
Step 3
In addition, in the Page Numbering section, in the Start in field, we define from which number the page numbering should be initialized. We click on Accept and after that we go to the "Page number" option and there we define the location of the Roman numeral: 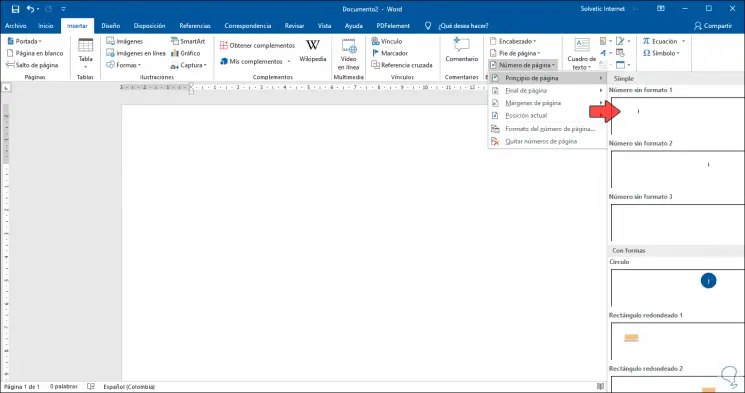
Step 4
Once the position is selected we will see the number there: 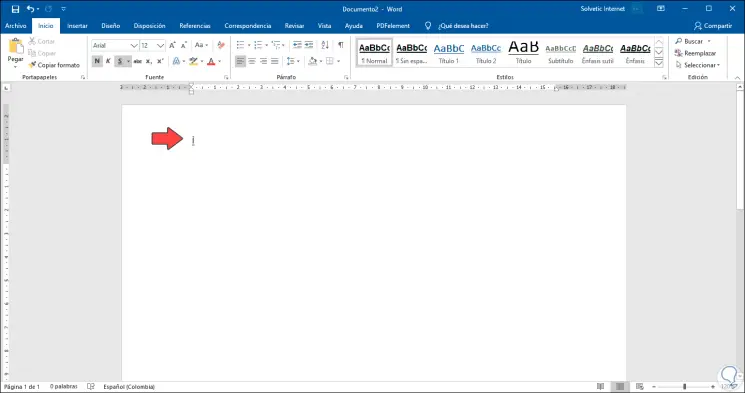
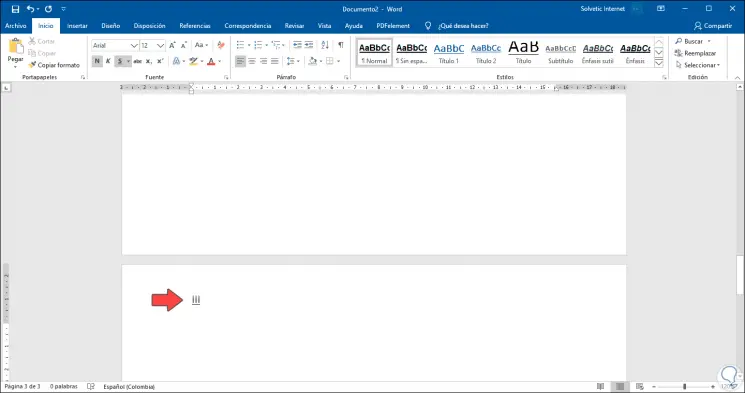
Step 5
To verify that the numbering continues, we can use the Ctrl + Enter keys and we will see that the Roman numeration continues. It's that simple we can implement Roman numerals in Word 2019.
+ E Ctrl + E
2. Insert Arabic numerals in Microsoft Word 2019
Step 1
Arabic numerals are the traditional numbers we use (1, 2, 3, 4. Etc) and by default it is the value in Microsoft Word 2019, so if you want to insert this type of numbers just go to the Insert menu, Header group and footer and there go to the option Page number / Top of page and choose the location of the number: 
Step 2
When choosing the location we will see the established Arabic number: 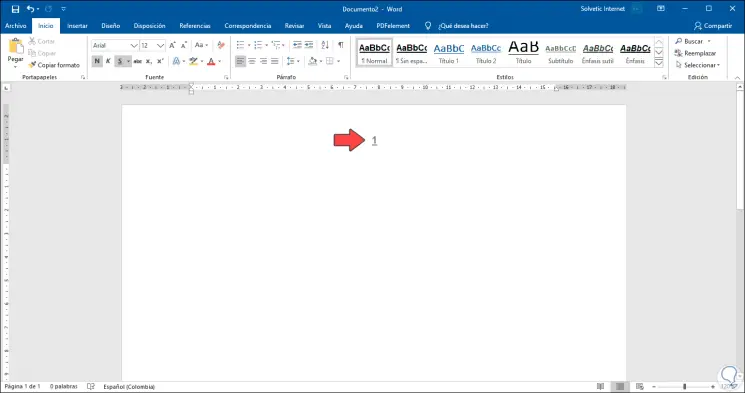
Step 3
As we insert new pages, we will see that the number rises: 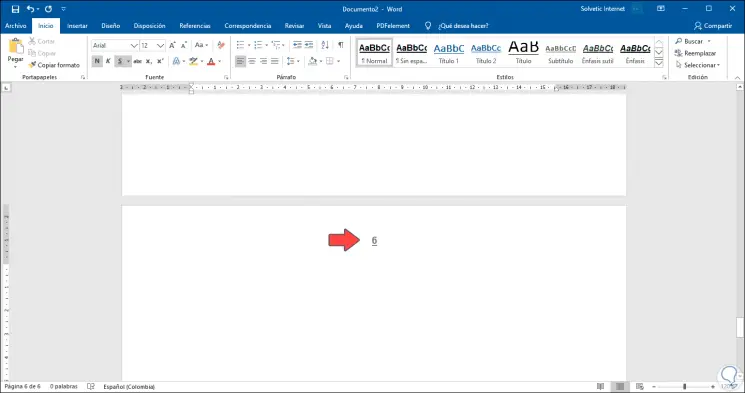
Step 4
Now, another option to define the Arabic number in Word 2019, is from the Header and footer group and then select "Page number format" located in the "Page number" option. In the pop-up window we select the Arabic numbers in the "Number format" field: 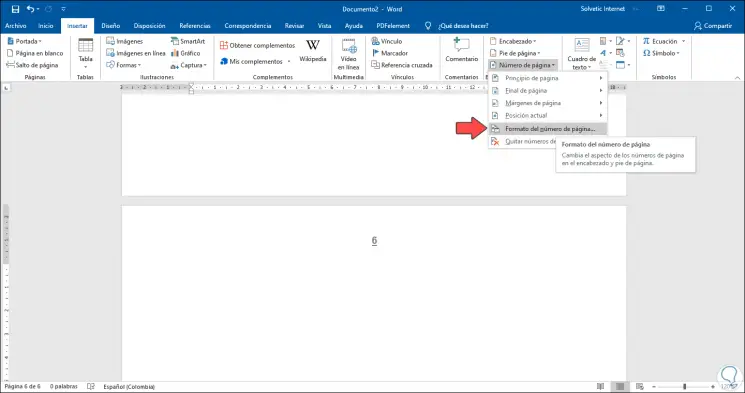
Step 5
At the bottom we can define from which number to start or if we want it to start from the previous section and after this we click on OK to save the changes.
3. Combine Roman and Arabic numerals in Word 2019
Another option we have for a comprehensive document is to combine both options (Roman and Arabic), for this we will make the following structure:
- First page without numbering (table of contents, index, etc.).
- Pages 2 to 4 in Roman numerals.
- From page 5 onwards in Arabic numerals.
Step 1
To access a better understanding of the process, we will go to the View menu and there we select the option Multiple pages: 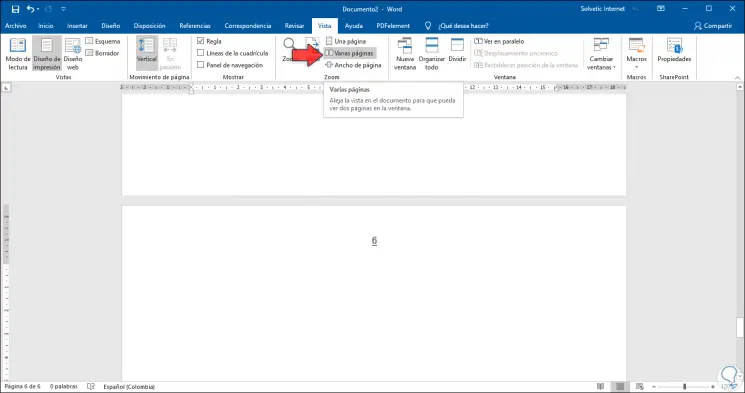
Step 2
This allows us to view different pages simultaneously: 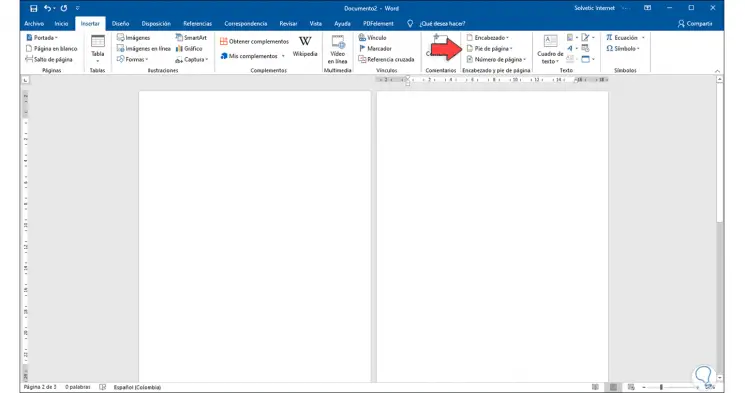
Step 3
In this case we will insert the numbering in Word 2019 from the footer but not in the header. To do this we will go to the Insert menu and in the Header and footer group we click on "Footer" to select the desired design: 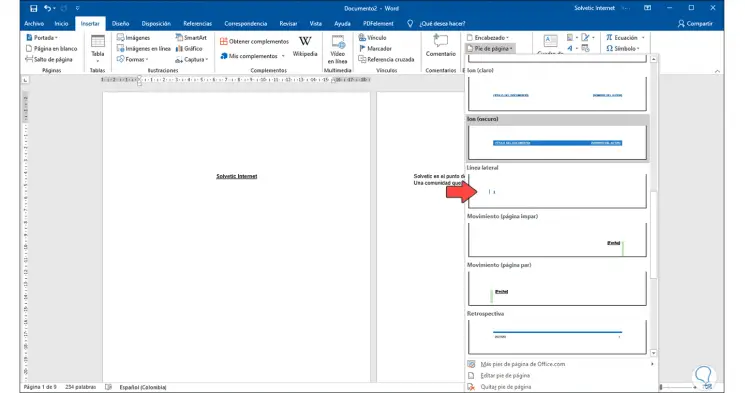
Step 4
When doing this by default, Arabic numerals will be applied to the entire document: 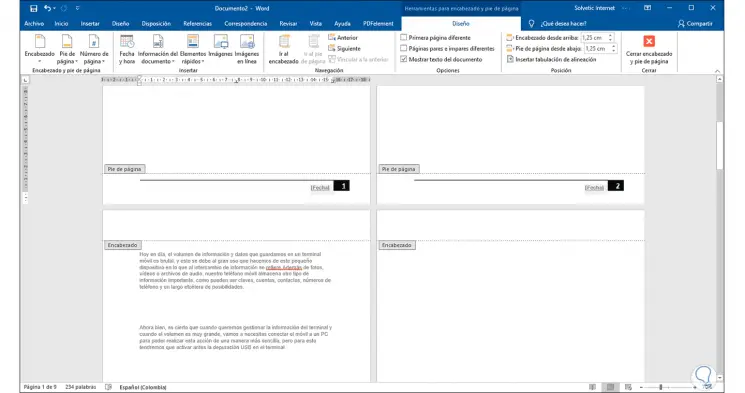
Step 5
Now the time has come to edit these values, for this we place the cursor on the last word of the first sheet and go to the "Layout" menu and in the "Page Setup" group we click on the "Jumps" option and select " Next page": 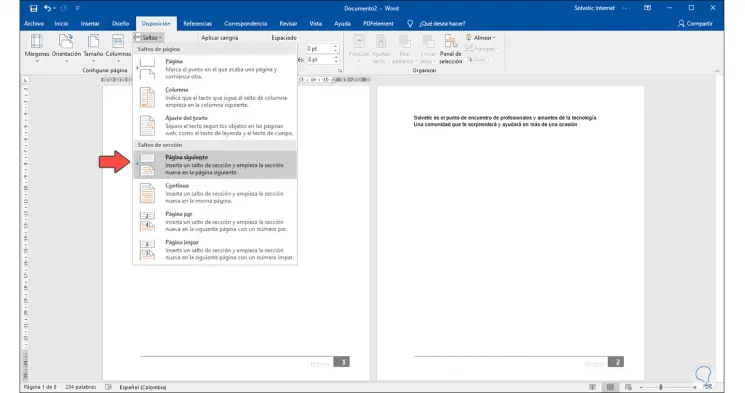
Step 6
When doing this it is normal for the content of page 2 to move to the third page: 
Step 7
In this case we place the cursor on the second page and use the Delete key so that the text is in its original position again: 
Step 8
We check that the section has been applied correctly by double clicking on the footer and there we will see the legend Footer section 1, 2 etc. It should be noted that only page one has the legend Section one, the other pages will say Section 2. 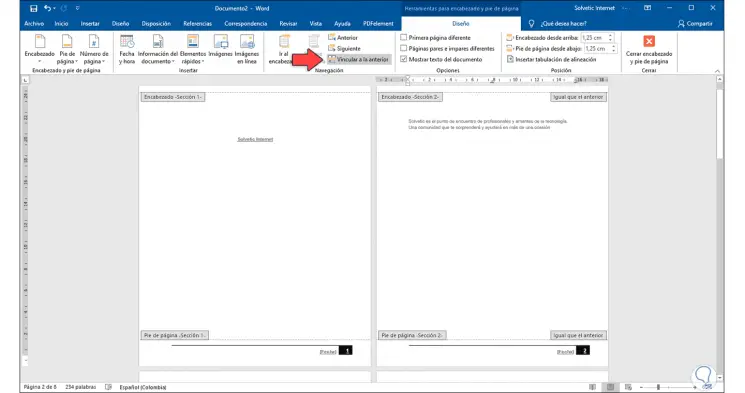
Step 9
Next, we will place the cursor in the footer of page 2 and in the "Design" menu we must click on the "