One of the main actions we carry out when we use a computer is to connect it to the network . In this way we can surf the internet and make for example downloads or access our email, which without this connection would not be possible. There are several network elements that are essential for connectivity to be as ideal and correct as possible and these are:
IP
It is the Internet Protocol address which makes the computer or server can connect to the network and be recognized by the other elements of the system.
DNS
Domain Name System which is a domain name system that allows you to translate IP addresses into web domain names
DHCP
Dynamic Host Configuration Protocol which is a protocol in charge of providing IP addresses to the network equipment
In addition to this, the IP addresses of the device can be fixed or dynamic (DHCP). When the device has a dynamic address it will change frequently, but there are certain devices in which the address cannot be modified, in this case the objective is to assign a fixed IP..
TechnoWikis will explain the process of configuring IP, DNS and DHCP in CentOS 8 to manage network parameters much more centrally.
1. How to identify the CentOS 8 network adapter
Step 1
To know the ID of the network adapter, we must access the directory etc / sysconfig / network-scripts / and there list the elements:
cd etc / sysconfig / network-scripts / ls -lah
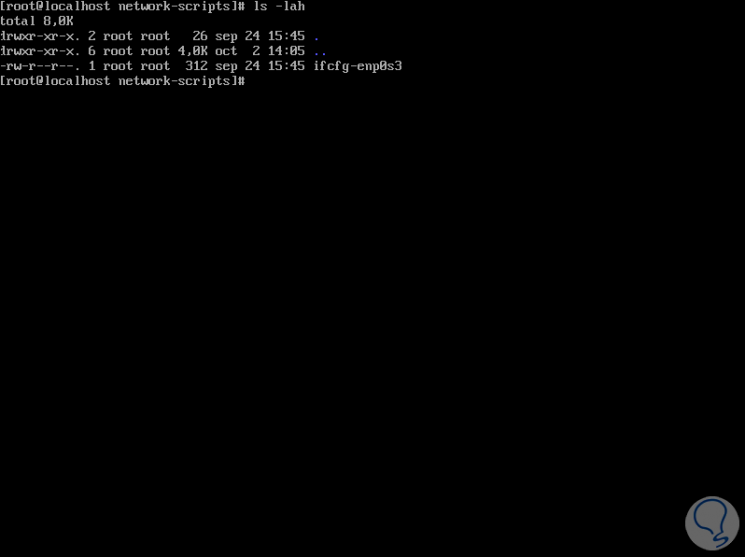
In this case we can see that our adapter is identified as "ifcfg-enp0s3". If there are more network adapters, they will be identified with the ifcfg-ensxxx syntax..
This is the file to edit to process the network configuration and define it as necessary.
Step 2
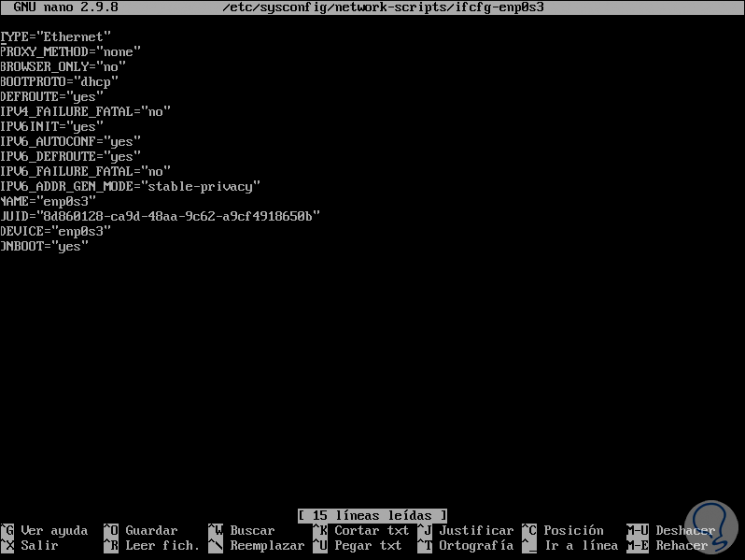
To edit the necessary network settings, we will use some text editor and take the adapter ID, in this case it will be the following:
nano / etc / sysconfig / network-scripts / ifcfg-enp0s3
When accessing this file we find all the network details such as:
Step 3
There we must add the line at the beginning of the file referencing the MAC address of the device, to know it we must execute the following:
ip to
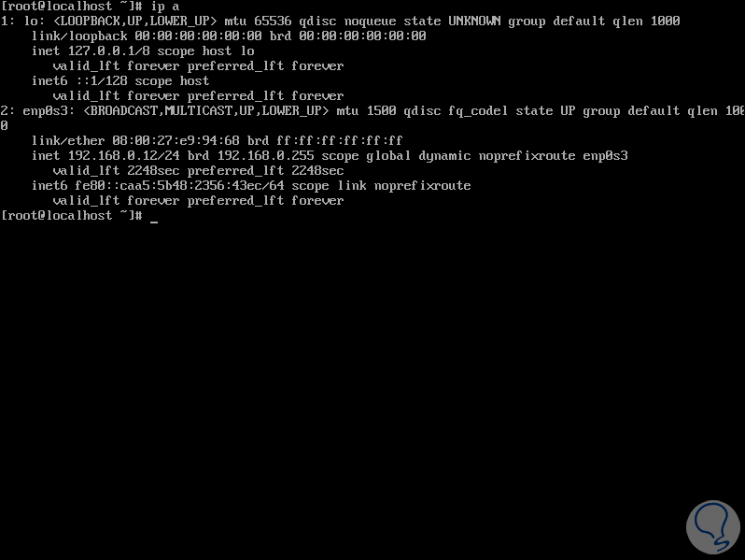
Step 4
As we see, in our adapter is the MAC address in the link / ether line, those 6 pairs of alphanumeric characters are entered in the previous file with the following syntax:
HWADDR = â€00: 00: 00: 00: 00: 00 ″
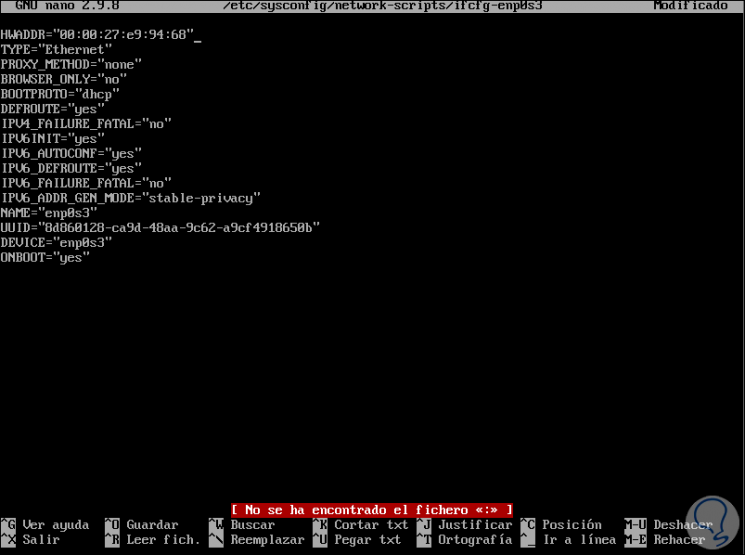
This process allows us to use an IP address in DHCP mode, that is, dynamically.
We save the changes using the Ctrl + O keys and exit the editor using the Ctrl + X keys..
Step 5
For the changes to take effect we can turn off the system by running:
shutdown -r now
Or, if we don't want to restart the computer, just restart the network service with the following command:
systemctl restart network.service
Step 5
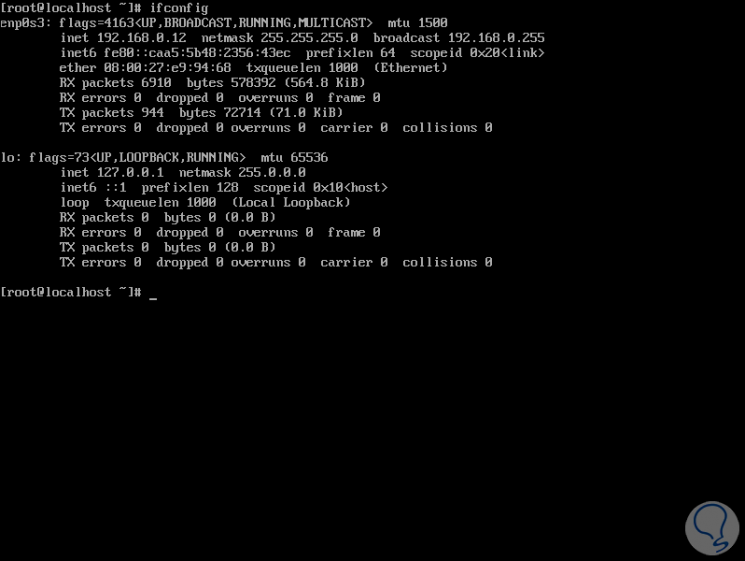
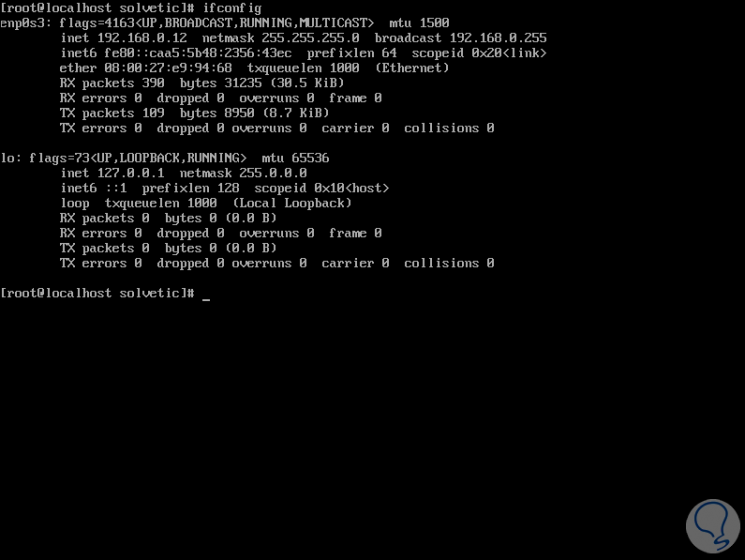
Now, after this, we can check the IP address, DNS and other parameters by executing "ifconfig":
2. How to set IP address, DNS and static gateway in CentOS 8
As we have mentioned, in some cases it is required that the device has a static IP address due to process or task issues, so in TechnoWikis you will learn how to assign a static IP address to your CentOS 8 server.
Step 1
For this case we must access again the configuration file of the network adapter:
nano / etc / sysconfig / network-scripts / ifcfg-enp0s3
There we will add the following lines:
It is edited from dhcp to static
It is the desired IP address for the server
This value is set to Yes so that it is enabled when the device is started up.
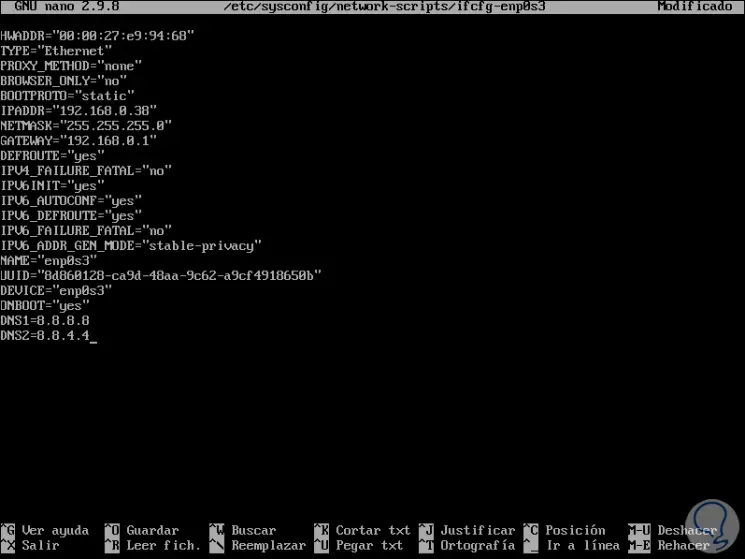
Note
In this case we have used Google’s public DNS, but you can use whatever you want.
We save the changes with the Ctrl + O keys and exit the editor with the Ctrl + X keys.
Step 2
We proceed to restart the computer to apply the changes:
systemctl restart network
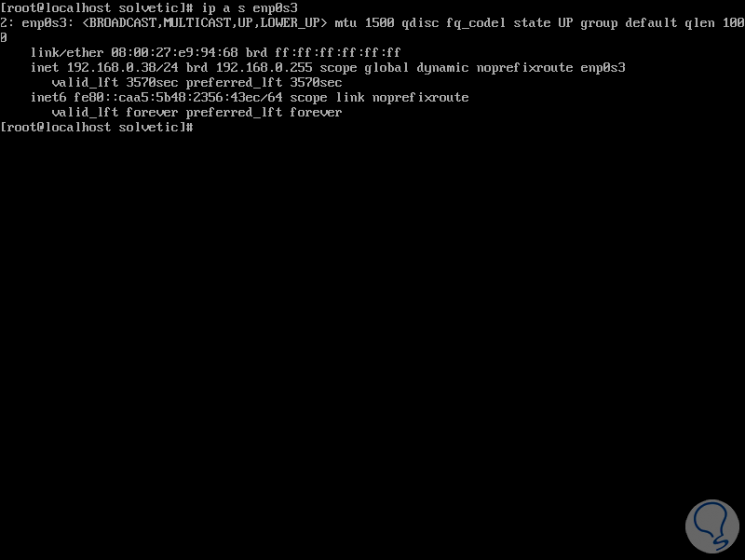
To verify that the changes have been implemented by running the following:
ip as enp0s3
Step 3
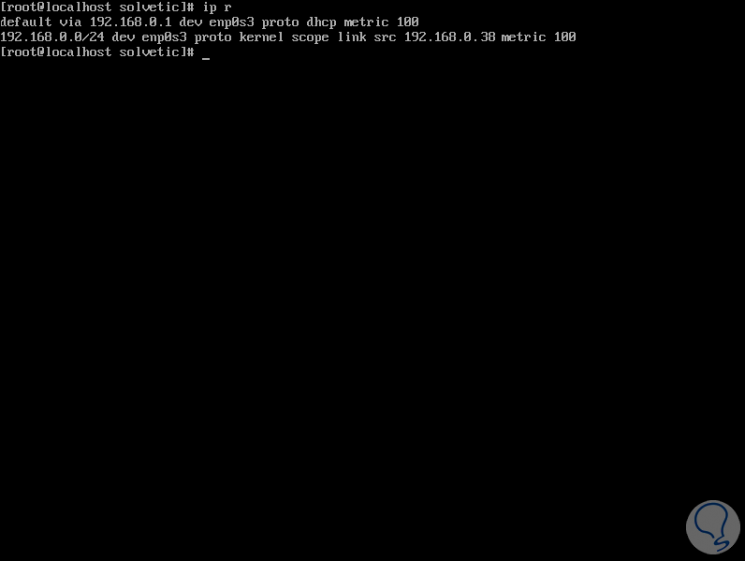
We check the routing:
ip r
Step 4
We can run a ping to validate connection to the external network:

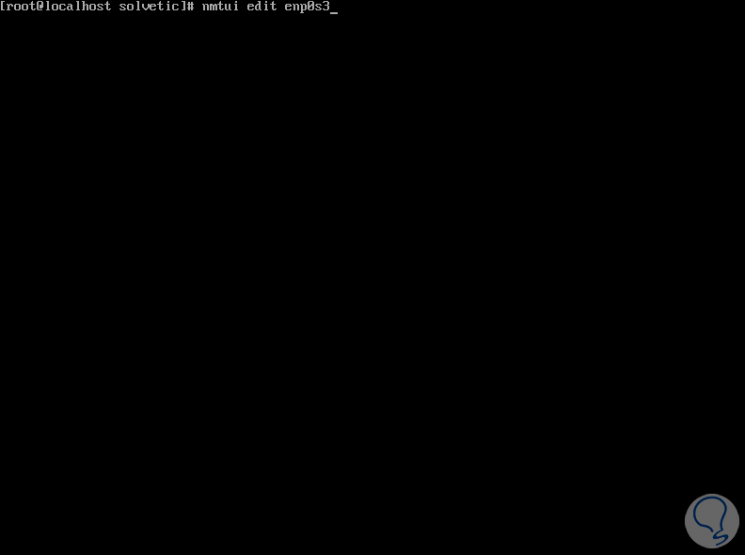
3. How to configure the network from CentOS Network Manager 8
This is a method that makes use of the nmtui command which is a TUI application to interact with NetworkManager and with which it will be possible to edit various aspects of the network.
Step 1
For its use we execute the following:
nmtui edit enp0s3
Step 2
Pressing Enter we will see the following:
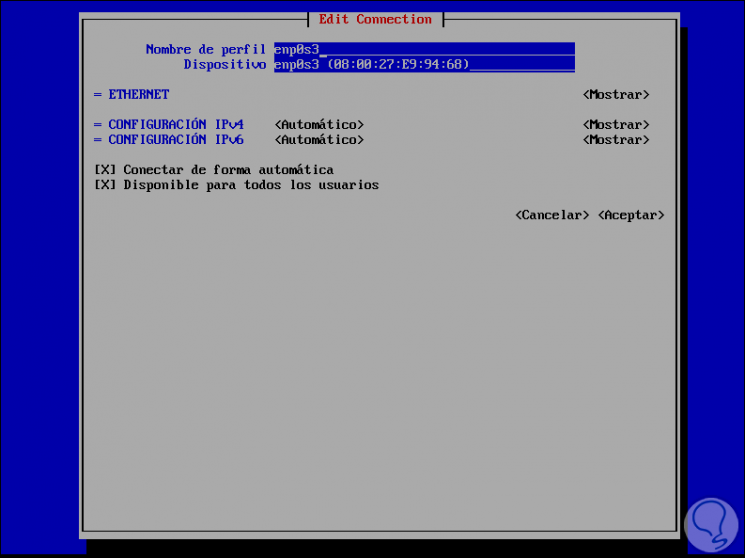
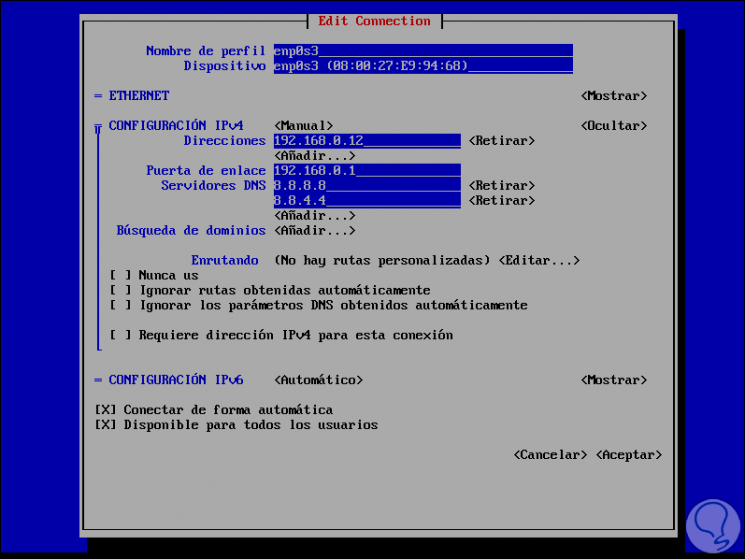
There by default we can see the ID of the network adapter which is configured by DHCP (Automatic), if we wanted to set the IP manually we must use the Tab key to select the line “IPv4 Configuration and there press Enter to select the option“ Manual":
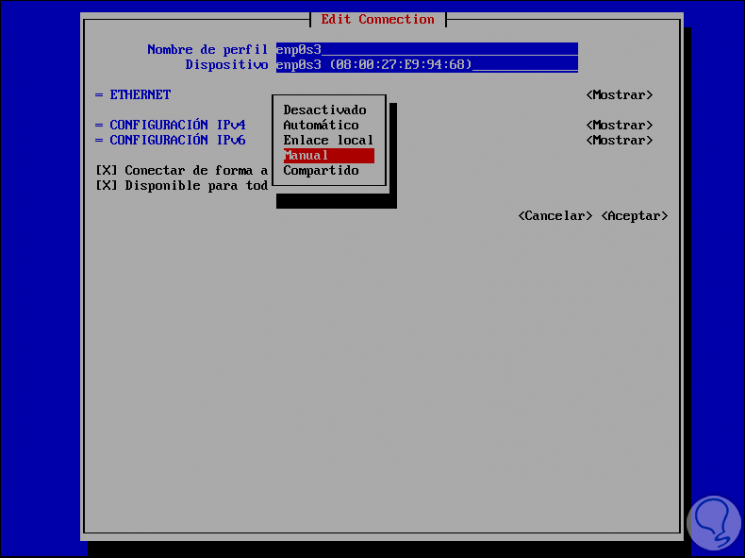
Step 3
We enter and now select the Show field:
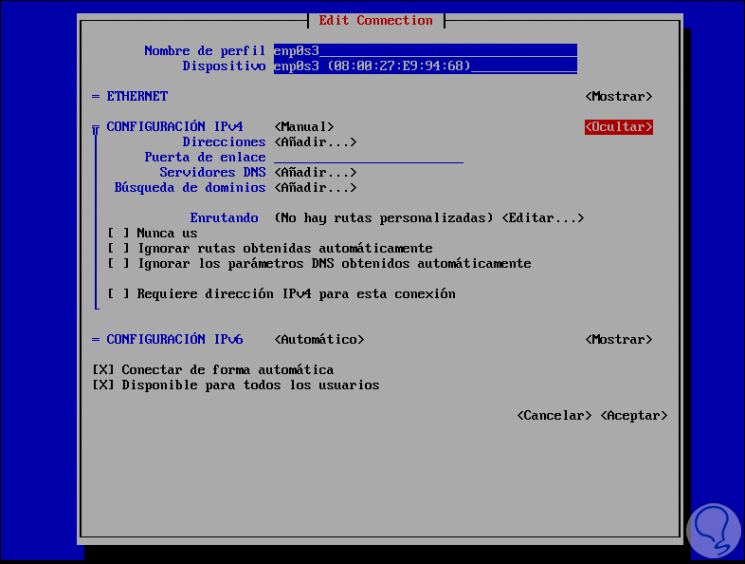
Step 4
There we select each field and press Enter to enter the necessary IP values:
Step 5
We use the Tab key to go to Accept and apply the changes to verify that the desired IP has been set:
With any of these methods we will be able to assign the type of IP, as well as the DNS or Gateway in CentOS 8.