The recent rise of social networks requires us to have elements that are vital for the communications in these networks to be as complete as possible, this includes two essential multimedia aspects that are the audio and the image since without them it will be impossible to realize many of the actions that this digital world demands. We know that when communicating through social networks or applications such as Skype, we want to see and hear what we have on the other side of the screen and thus maintain a somewhat closer virtual relationship..
The microphone and speakers are two of the natural components in a team, especially in a laptop in which it is integrated, so that communications are as accurate as possible. When we use Skype, developed by Microsoft, and in which we find various features , such as group calls, message encryption and more, it is more than necessary to learn how to configure both the microphone and the speakers so that the talks and video calls are the most possible as possible.
In case of not having Skype this can be downloaded at the following link:
Skype
Now TechnoWikis will explain in detail how to configure these two elements of Skype in Windows 10 to get the most out of it..
To stay up to date, remember to subscribe to our YouTube channel! SUBSCRIBE
1. How to configure Skype audio in Windows 10
Step 1
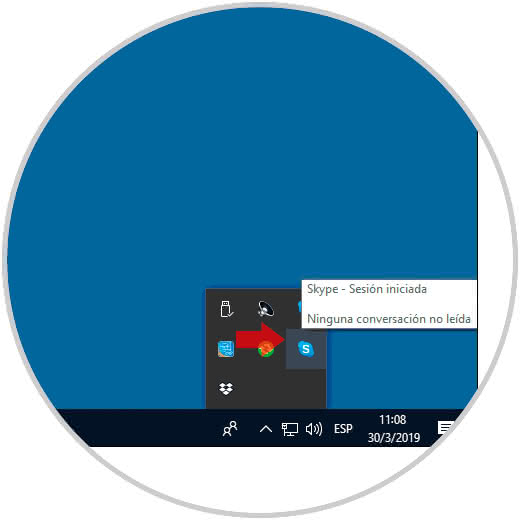
The first step we must take will be to access the Skype configuration to execute is to access the application, for this we can click on the icon in the taskbar or click on the arrow located just before the center of actions and in the options displayed click on Skype :
Step 2
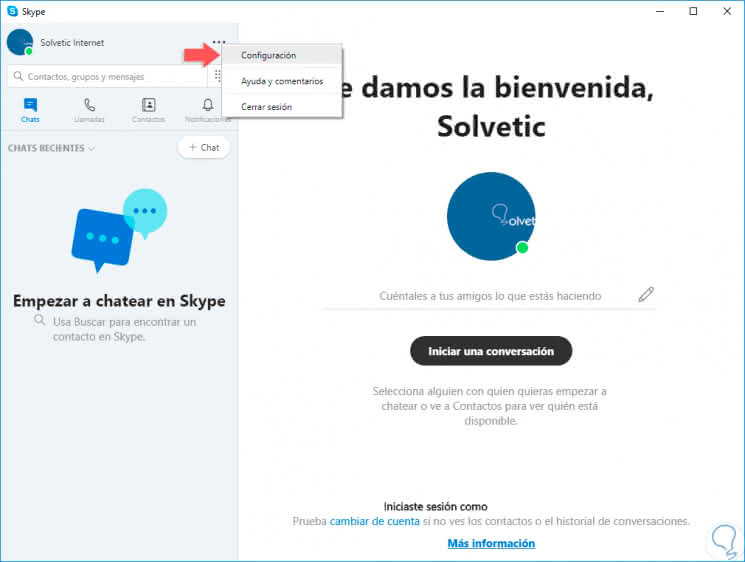
The Skype application will be displayed and there we should click on the More line (three horizontal points) and in the options displayed select "Configuration":
Step 3
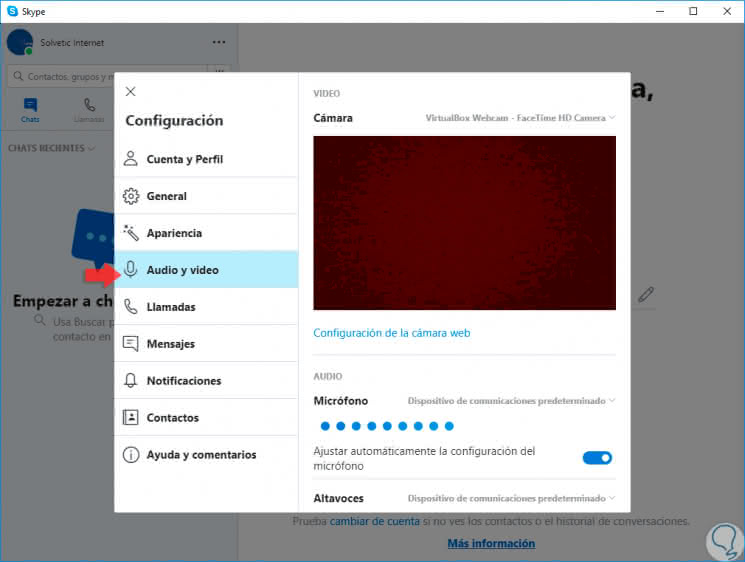
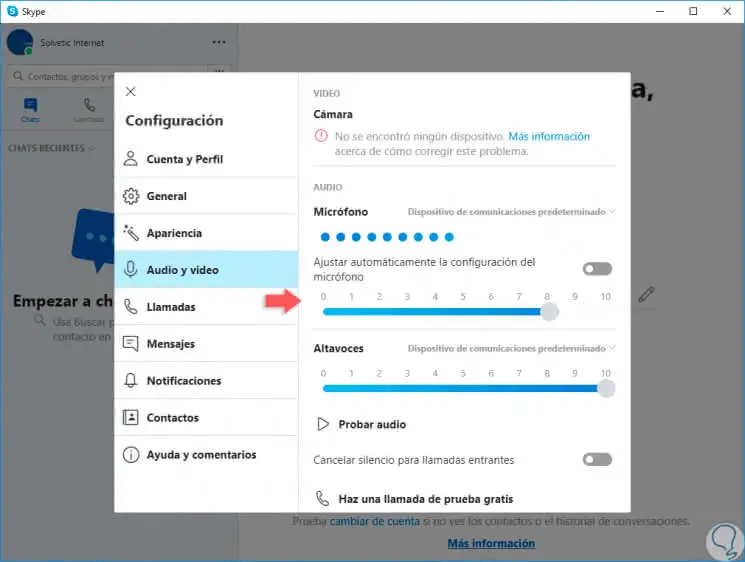
In the next window we will go to the section "Audio and video" where we will see the following:
2. How to set up the microphone in Skype in Windows 10
Step 1
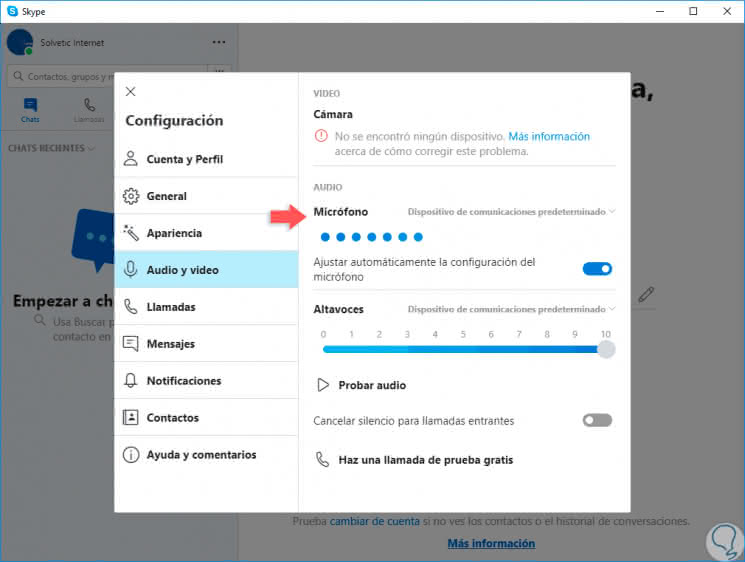
The first step we will take will be the microphone configuration, for this we go to the Microphone section where we find the following:
- Default device as a microphone.
- Options to adjust the microphone automatically.
Step 2
By default Skype will select the default microphone device in Windows 10 as the microphone to use, in case of having more options we can click on the name of the microphone and in the displayed list select the desired device:

Step 3
If we switch to the correct microphone, the microphone input bar will begin coloring the points as we speak, this refers to the input level used. In the lower part we will see the line Automatically adjust the microphone configuration, this is an action that Skype performs logically but sometimes can use a very high audio level, so if we want to perform this process manually just press on that switch and on the bottom bar choose the desired level:
3. How to configure the speakers in Skype in Windows 10
Step 1
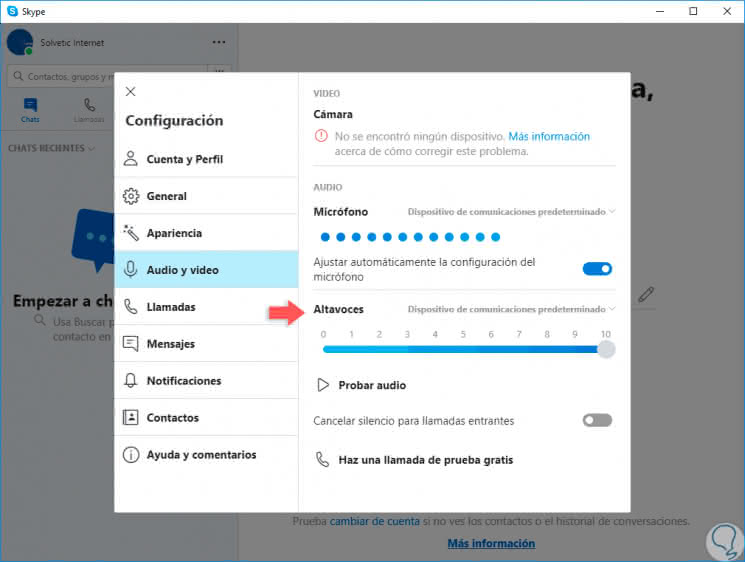
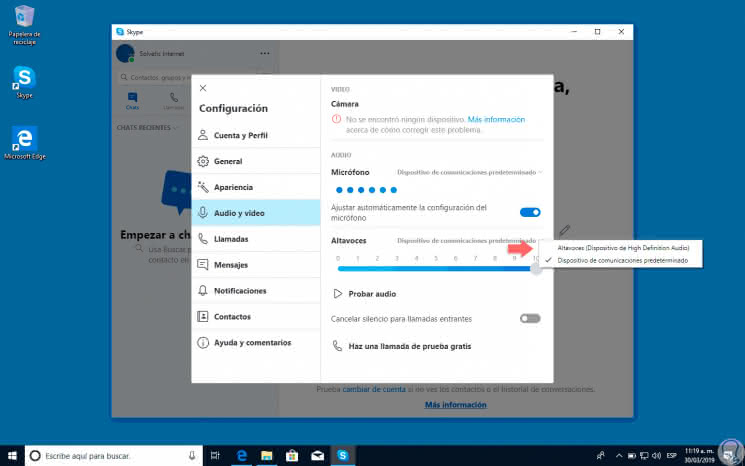
Now it's time for us to configure the speakers which we find in the "Speakers" section with parameters like:
Step 2
Like the microphone, we may use other speakers, to select them you simply need to click on the name of the speakers and in the list displayed select the appropriate one. To configure the volume of these we can use the slide bar to the desired level.
4. How to test the microphone and audio in Skype in Windows 10
Step 1
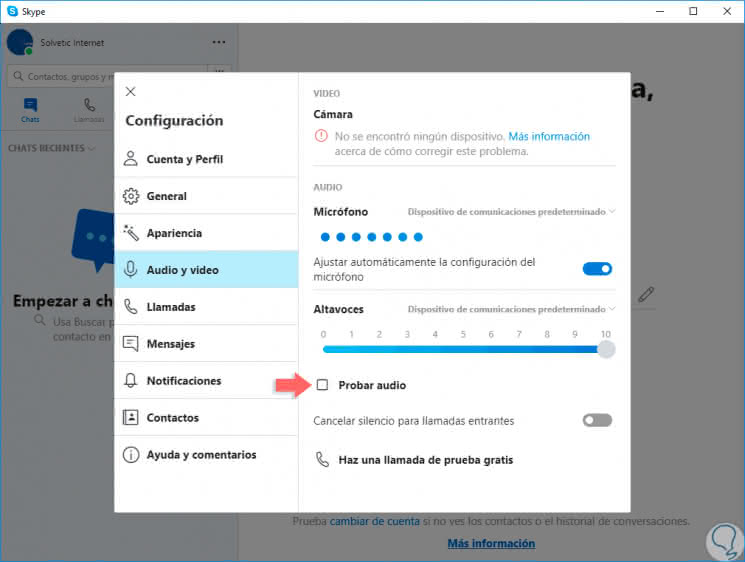
When these changes have been processed, Skype allows us to check their current status, first we can click on the "Test audio" button to validate the current levels and that the appropriate one has been selected. When we confirm that it is correct, we click again on Test audio to stop the test.
Step 2
In the same way, to validate the Skype audio we can click on the line "Make a free test call" located at the bottom, this will establish a call with the Skype robot so we can check if the audio conforms to the needs, when this is validated we click on the line "End test call":

As we can see, it does not require us to be sound engineers to adjust the Skype microphone and audio at our discretion.