Windows 10 has several tools to manage all the sensitive information and data in a much more centralized way and one of them is the file history which was basically designed to create a backup copy of the most relevant data housed in the Documents libraries , Images, Music, Videos or Desktop..
With this functionality, it will be possible to indicate the unit where these data will be stored and thus be sure to always have their availability at any time. To make effective use of the file history in Windows 10, it is required to use the NTFS file system, this file history is based on the NTFS journal function in order to detect changes in the stored items and thus proceed to its update At the slightest change.
The file history automatically creates backup versions of the data in a programming in the unit, internal or external, that we have selected for this purpose..
Today in TechnoWikis we will see how to create and configure this type of copy in Windows 10.
1. Activate file history in Windows 10
Step 1
To start with the configuration process we will go to the following route:
Step 2
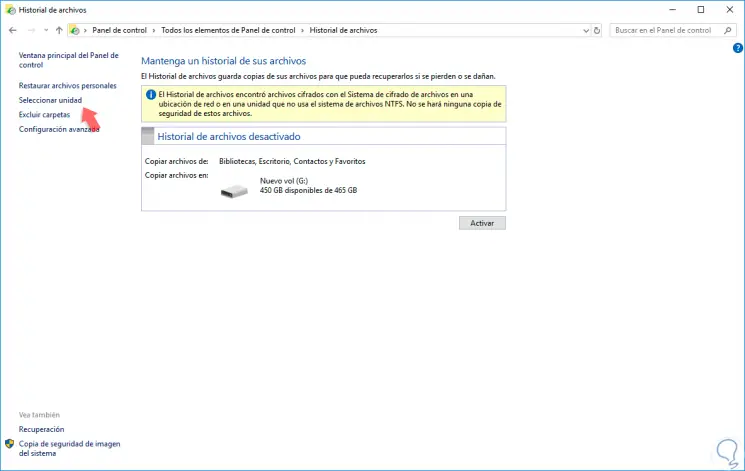
By default, Windows 10 will detect the connected units automatically, but we can select a new one if we wish by clicking on the “Select unit†line on the left side.
Step 3
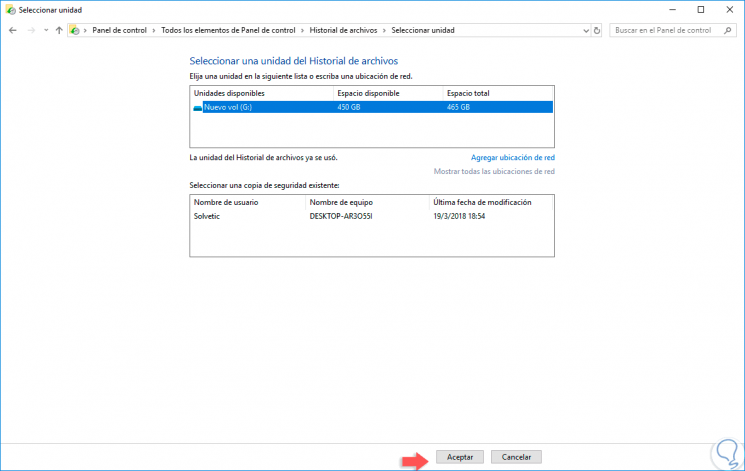
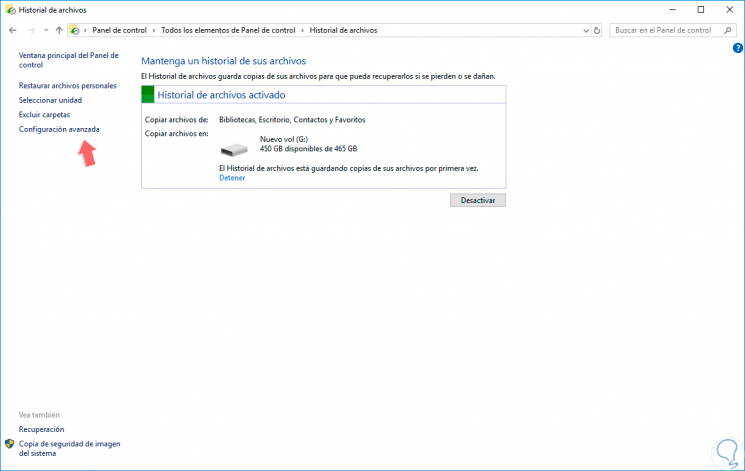
As we see, there is also the possibility of using a network drive. Once the unit is defined, click on the "Activate" button to enable file history in Windows 10 and we will see the following. As we can see, the functionality is storing the files of the indicated libraries in the selected unit.
2. Configure file history in Windows 10
Step 1
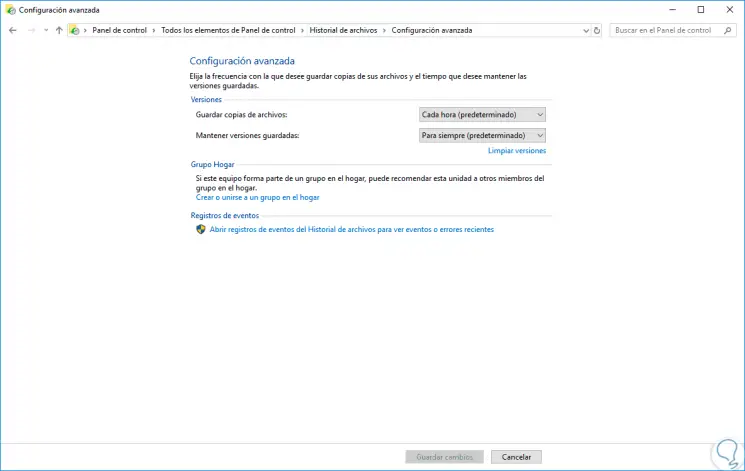
There are a number of advanced options that we can manage when administering this function. To do this, click on the “Advanced configuration†line located on the left side and the following will be displayed:
Step 2
As we see, we will be able to:
- Define the frequency of time each backup will be stored (every hour, every 10 minutes, every 15 minutes, etc.)
- Define whether or not the stored versions of the files are preserved
- Create or join a Home Group
3. Restore files stored in Windows 10
Step 1
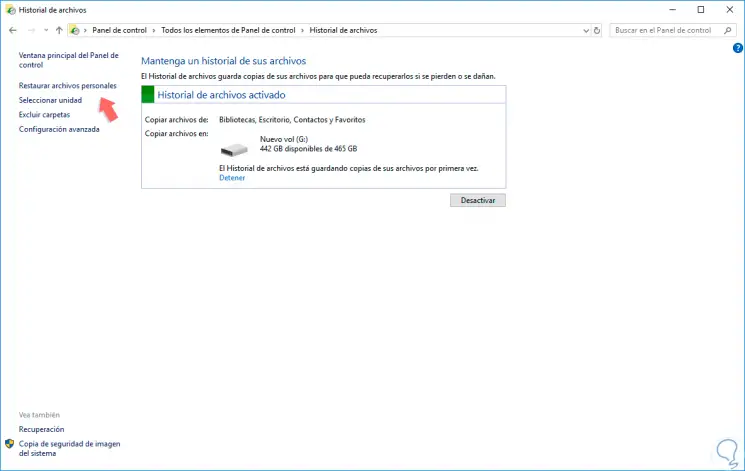
Once we have created backup copies of the most important files and it is necessary to restore them, we go to the main menu and select the option “Restore personal files†located on the left side:
Step 2
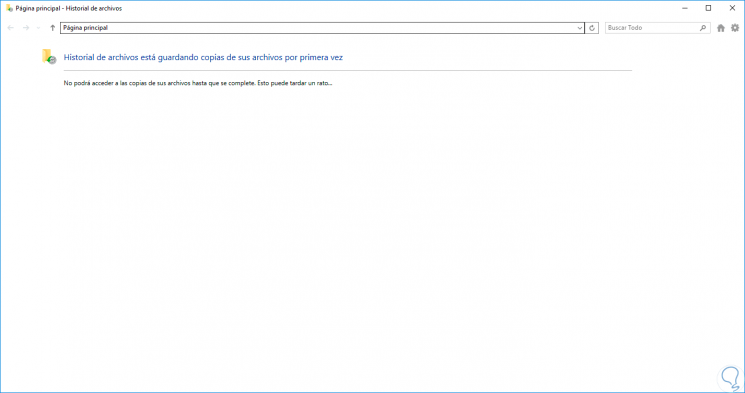
In the case that is the first time we run the history we will see the following. If you have stored folders, simply select them and click on "Restore".
Step 3
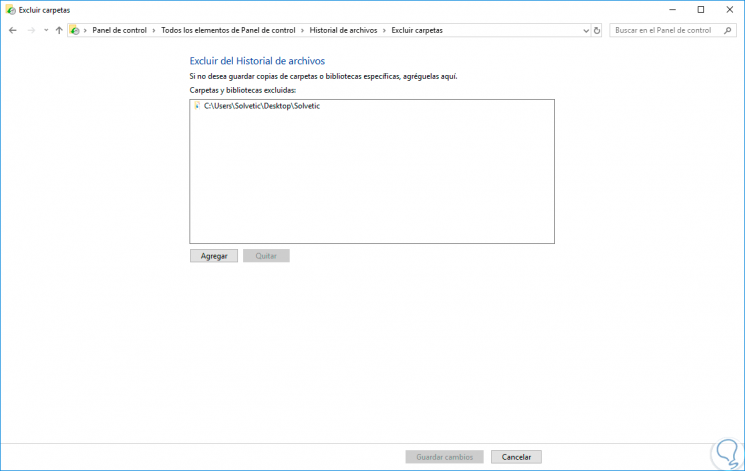
Another option available is to add or delete folders to be backed up with the Windows 10 file history. To do this, click on the "Exclude folders" option located on the right side and see the following. There we can click on the “Add†button to add more folders or click on the “Remove†button, after selecting the folder, for deletion.
4. Use file history from Settings in Windows 10
Step 1
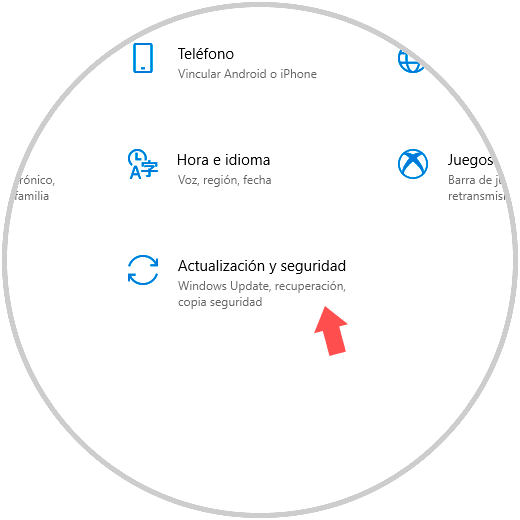
In Windows 10 we have the opportunity to manage these copies from the Configuration utility, for this, we go to the Start / Configuration menu:
Step 2
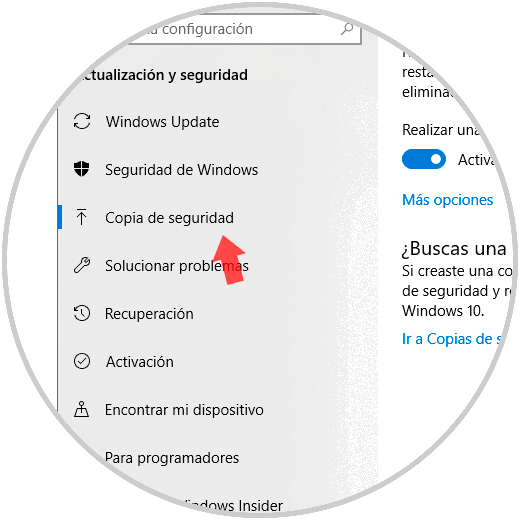
There we select the "Update and security" option and in the window we will go to the "Backup" section:
Step 3
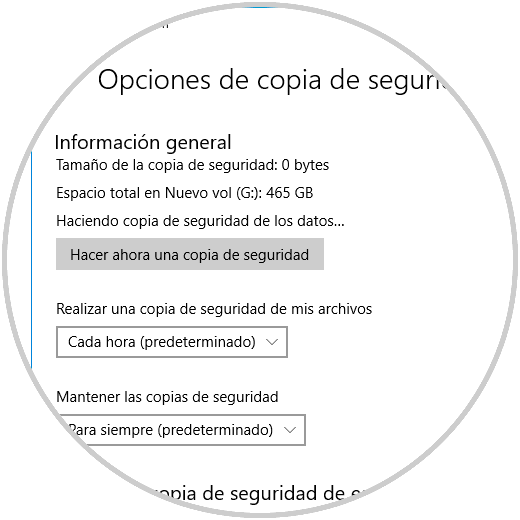
Click on the “More options†line where the following will be displayed:
Step 4
There we have the following options:
- Create a backup immediately
- Define how often the backup will be created (every hour, every 3 hours, etc.)
- Configure whether backup copies are stored or overwritten
- Add or remove folders for backup
We can see the options that Windows 10 offers us to keep our data safe and always available..