Many times we wonder where are the screenshots that we made in Windows 10 or better yet, a more direct question is, what are screenshots for? Well, the screen capture is a mechanism through which it is possible to take a snapshot of the action that we are doing on the computer either in the entire desktop or in a particular window . These screenshots are especially useful for some tasks such as:
Use of screenshots
We can use screenshots for tasks such as:
- Add a more professional touch to the files we make.
- Keep them as evidence of some kind of task or action.
- Use them to explain step by step multiple tasks and more.
Through this tutorial TechnoWikis will explain the simplest way to save these captures automatically in Windows 10 defining a special library, or using the one that is set by default..
To stay up to date, remember to subscribe to our YouTube channel! SUBSCRIBE
1. How to save screenshots using OneDrive in Windows 10
Step 1
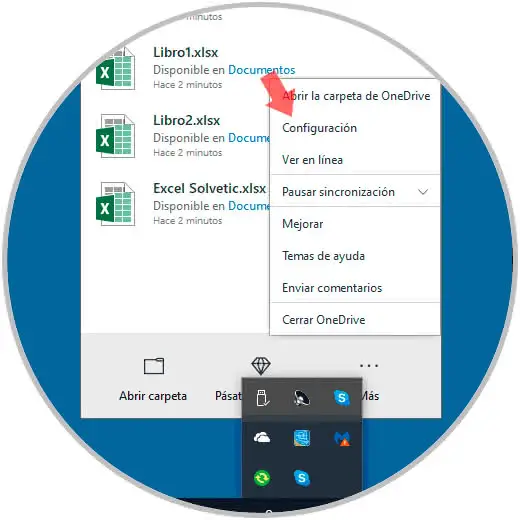
To begin this process, we will right click on the icon of OneDrive located in the taskbar (this can be hidden so we must click on the button "Show hidden icons" and in the options that are displayed select the line "Configuration ":
Step 2
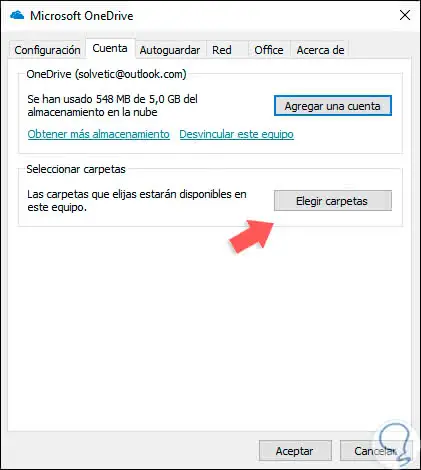
The following window will be displayed where we should go to the "Account" tab and we will see the following options:
Step 3
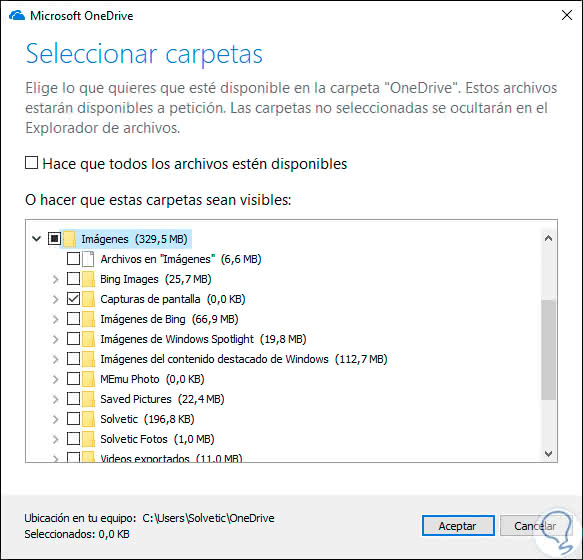
We click on the "Choose folders" button located in the "Select folders" section and then select the "Screenshots" folder:
Step 4
This will make the captures automatically saved in that folder synchronized in the cloud with OneDrive.
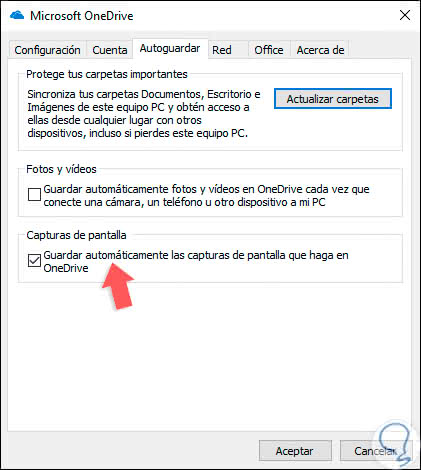
Click on accept and now go to the "Save" tab and there activate the box "Automatically save the captures you make in OneDrive":
Step 5
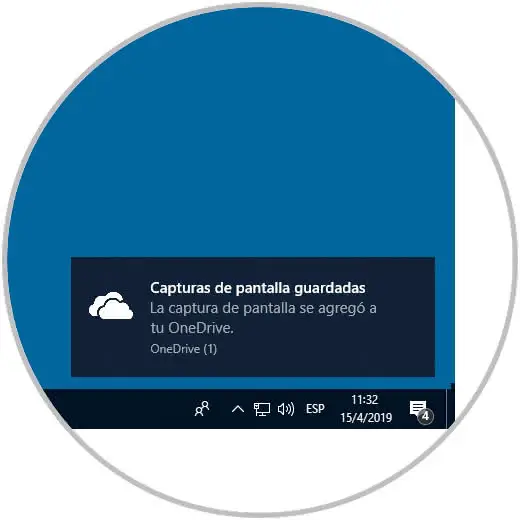
Click on "OK" to save the changes. At the moment we capture the screen in Windows 10 using the "Print Screen" key we will be notified that a new capture has been saved in our OneDrive:
Step 6
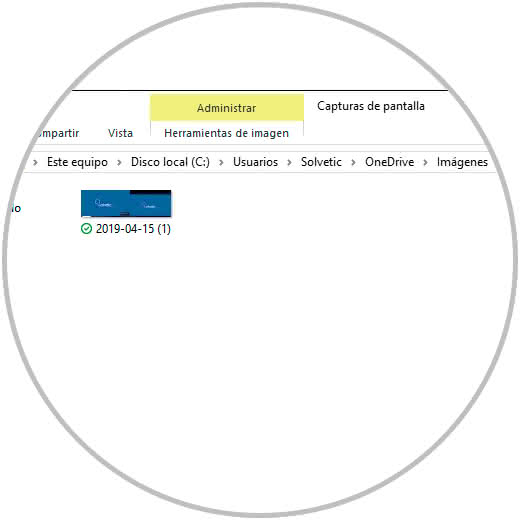
By default OneDrive will create a link to this folder using the following syntax:
C: \ Users \ User \ OneDrive \ Images \ Screenshots
Step 7
There will be hosted screenshots we make in Windows 10:
2. How to save screenshots automatically in Dropbox in Windows 10
Dropbox is another of the storage applications in the cloud which gives us the opportunity to host it, facilitating its availability, screenshots made in Windows 10.
Step 1
In case of not having Dropbox this can be downloaded at the following link:
Dropbox
Step 2
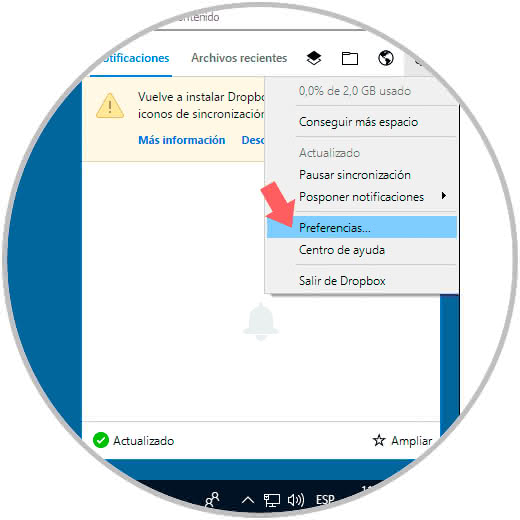
At the time of installation, a shortcut will be created in the taskbar, there we will right click on it and go to the configuration of this (gear icon at the top) and then click on "Preferences":
Step 3
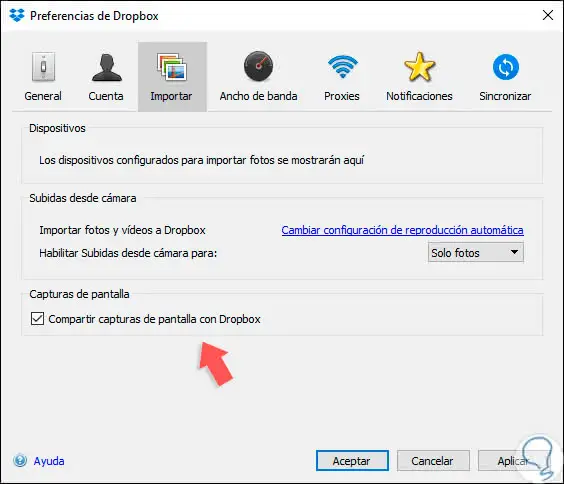
The following window will be displayed where we will go to the "Import" tab and in the "Screenshot" section we activate the "Share screenshots with Dropbox" box:
Step 4
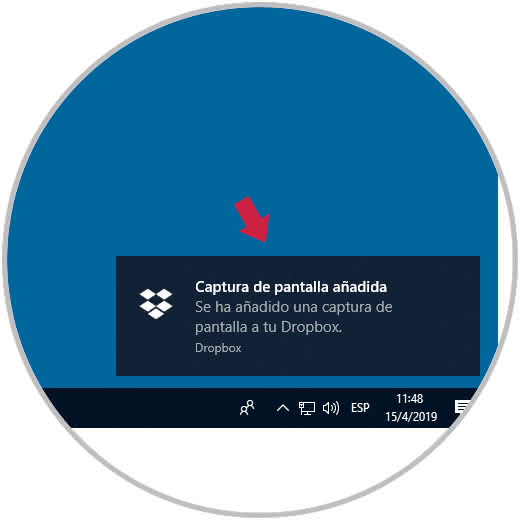
Click on Apply and then OK to complete the configuration process. After this, when an image is captured, we will be notified of this:
Step 5
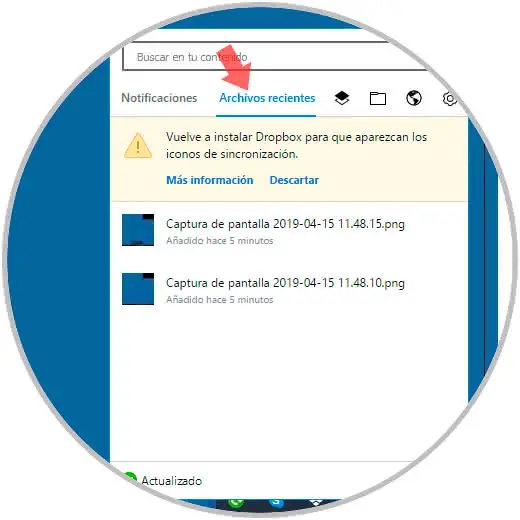
To view the screenshots, we must click again on the Dropbox icon in the taskbar and on the tab "Recent files" we will see these screenshots:
Thanks to these two applications in the cloud it will be possible to automatically save screenshots in Windows 10 and to host them in the cloud.
3. How to save screenshots locally in Windows 10
We may not want the catches to be in the cloud, either because of a security issue or because we do not want to log in and so on, for this we can logically save the catches locally in our team.
Step 1
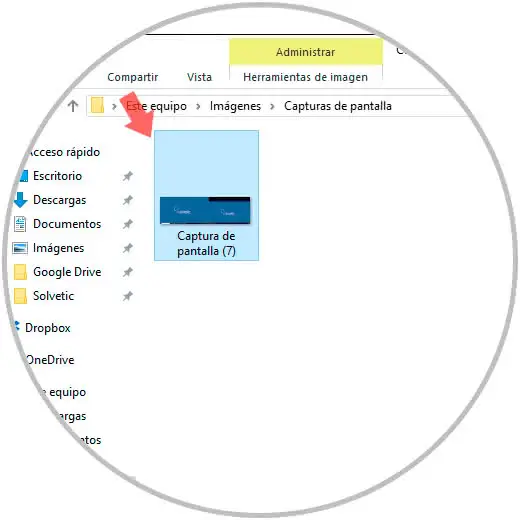
For this it is enough to use the following key combination and automatically the image will be saved in the route:
+ Print Screen
C: \ Users \ User \ Pictures \ Screenshots
With some of the methods described by TechnoWikis, it will be possible to take full advantage of the screenshots that we must carry out and they are simple and functional methods..